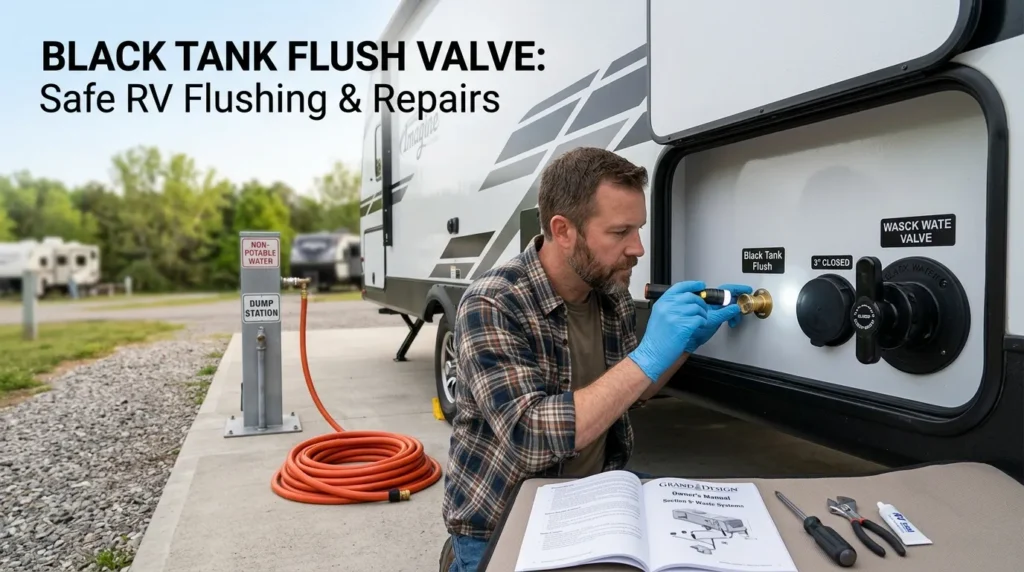
Black Tank Flush Valve: My Guide to RV Flushing, Leaks, and Repairs
I approach RV waste-system maintenance with a simple rule: identify the component before trying to fix it. A black tank flush valve can be confused with the waste-discharge gate, the hose inlet, or the backflow device in the rinse-water line. These parts perform different jobs, and replacing the wrong one can leave the original problem unresolved.
In this guide, I explain how the system works, how I recommend carrying out a safe rinse, and what I check when water leaks or flushing performance drops. I’m covering common built-in RV flushing systems—not one specific manufacturer’s plumbing layout. Your RV’s owner’s manual and the component manufacturer’s instructions determine the correct pressure limits, replacement parts, and winterization procedure.
What Is a Black Tank Flush Valve?
The name is not a universal part designation. Depending on the RV, parts listing, or conversation, it may describe a valve associated with the black tank’s rinse-water circuit.
I distinguish that circuit from the black tank dump valve, which opens to release sewage through the RV’s waste outlet.
A typical built-in flushing system sends water through a dedicated inlet to a spray head inside the black holding tank. The water helps loosen residue and move remaining waste toward the outlet while the tank drains.
However, there may be no separate on/off valve labeled “flush.” On some systems, the water-source faucet controls the rinse flow.
The Components I Identify First
| Component | Main function | What I do not confuse it with |
|---|---|---|
| Tank-flush inlet | Connects a dedicated rinse hose to the flushing circuit | The city-water connection or freshwater tank fill |
| Check valve | Resists reverse water flow | A universal substitute for every backflow-protection device |
| Vacuum breaker or anti-siphon assembly | Interrupts siphoning according to its design | The black tank’s waste-discharge valve |
| Internal tank sprayer | Distributes rinse water inside the holding tank | A valve that controls sewage discharge |
| Black tank dump valve | Holds or releases black-water waste | The valve or backflow assembly in the rinse-water plumbing |
My first diagnostic question is always: Is the problem on the incoming rinse-water side or the outgoing waste side?
That distinction determines what I inspect, which replacement part I consider, and whether it is safe to continue flushing.
How an RV Tank Flush Valve System Works
When I assess an RV tank flush valve system, I follow the water path rather than assuming every RV uses the same arrangement.
A simplified layout looks like this:
Approved water source → dedicated rinse hose → labeled flush inlet → required backflow protection → internal sprayer → black tank → open dump valve → sewer hose → approved sewer connection
The placement and design of the backflow components vary by manufacturer.
Red Rekated article on RV tank flush valve
Why Backflow Protection Matters
The rinse hose connects a water source to equipment associated with a sewage holding tank. Required backflow protection helps prevent contaminated water from traveling in the wrong direction.
I keep two functions separate:
- A check valve resists reverse flow.
- A vacuum breaker admits air under specified conditions to interrupt a siphon.
Some assemblies combine these functions. That does not mean an ordinary check valve is an acceptable replacement for every vacuum breaker or backflow assembly.
I never recommend bypassing required backflow protection to stop a leak or improve water flow. A leaking device needs correct diagnosis and an approved replacement—not a straight coupling installed in its place.
What the Flush System Can—and Cannot—Do
A tank sprayer can help remove loose residue and improve rinsing after dumping. It does not guarantee that every surface is clean.
I also do not treat it as:
- A substitute for using enough water during normal toilet operation.
- A guaranteed solution for a blocked tank outlet.
- A method for sanitizing the holding tank.
- A way to repair a leaking dump-valve seal.
- Proof that the tank is empty simply because the discharge looks clearer.
The black tank is a vented holding tank, not a pressure vessel. I do not try to force a blockage out by pressurizing it.
My Safety Checklist Before Flushing
Before connecting the rinse hose, I check the following:
- Correct inlet: I identify the connection labeled for black-tank rinsing. I do not guess based on its location.
- Approved disposal point: I connect the sewer hose to an authorized dump station or campsite sewer connection.
- Secure fittings: I check the sewer-hose connections before opening a waste valve.
- Dedicated rinse hose: I keep this hose separate from drinking-water and freshwater-filling equipment.
- Required backflow protection: I confirm that the specified protection is present, including source-side protection where required.
- Correct water pressure: I follow the flush-system manufacturer’s pressure requirements rather than assuming the RV’s city-water rating applies.
- Personal protection: I wear gloves, avoid splashes, and wash my hands after handling waste equipment.
For the open-drain procedure below, my most important rule is:
I keep the black tank dump valve open whenever flush water is running, and I never leave the process unattended.
If discharge slows unexpectedly, a leak appears, or I cannot monitor the system, I turn the water off.
How I Recommend Flushing an RV Black Tank
This procedure describes a common built-in rinse system used with an open black-tank dump valve. I confirm the exact instructions for the RV before starting.
1. Connect the Sewer Hose With the Dump Valves Closed
I begin with the waste valves closed, then attach the sewer hose securely to the RV outlet and the approved sewer connection.
I check for damage, loose fittings, and hose positioning that could restrict drainage.
2. Empty the Black Tank First
I open the black tank dump valve and allow the tank to drain. During this stage, I keep the gray tank valve closed.
If the black tank does not discharge normally, I stop and investigate. Adding more water to a tank with a restricted outlet can create a much larger problem.
3. Connect the Dedicated Flush Hose
With the water source turned off, I connect the dedicated rinse hose to the labeled tank-flush inlet.
I inspect the hose washer and connection, confirm the required backflow protection, and use pressure-control equipment when the manufacturer specifies it.
I do not borrow the drinking-water hose for this job.
4. Start the Rinse With the Black Dump Valve Open
I turn the rinse water on in a controlled manner while keeping the black tank dump valve open.
During flushing, I watch for:
- Continued discharge through the sewer hose.
- Leaks around the exterior flush connection.
- Water appearing beneath cabinets or near the backflow assembly.
- Unexpected pooling beneath the RV.
- A sudden reduction in discharge.
If I need to walk away, I shut the water off first.
5. Monitor the Discharge Without Relying Only on Sensors
A clear sewer adapter can help me observe the discharge, but clearer water does not prove that every part of the tank is clean.
I also avoid relying exclusively on the tank monitor. Sensor readings can be affected by residue, sensor design, or an actual remaining waste load.
I follow the manufacturer’s flushing guidance rather than using an arbitrary timer for every RV.
6. Turn the Flush Water Off Before Closing the Dump Valve
When rinsing is complete, I shut off the water source and let the remaining rinse water drain.
Only then do I close the black tank dump valve.
I relieve hose pressure as directed by the equipment instructions before disconnecting the rinse hose.
7. Dump the Gray Tank, If Appropriate
Where the RV’s plumbing arrangement and instructions support this sequence, I dump the gray tank after closing the black tank valve.
Gray water can help move residual waste through the sewer hose, but I do not consider it a disinfectant.
I then close the valves and disconnect, cap, and store the equipment appropriately.
8. Add Starting Water Back to the Black Tank
After dumping, I add the starting amount of water recommended for the RV through the toilet.
That water helps prevent the next load of solids from landing in a dry tank. I avoid prescribing one fixed number of gallons because tank dimensions and manufacturer recommendations vary.
How I Troubleshoot an RV Black Tank Flush Valve
When an RV black tank flush valve appears to malfunction, I start with the symptom—not a replacement part.
The following checks help separate a supply problem, a leaking backflow assembly, a blocked sprayer, and a waste-valve issue.
| Symptom | Possible causes | My first response |
|---|---|---|
| Little or no apparent rinse flow | Closed supply, kinked hose, restricted inlet, faulty check valve, blocked sprayer | Turn the water off and check the accessible supply path |
| Weak flushing performance | Insufficient supply flow, regulator issue, hose restriction, partial blockage | Verify the equipment’s pressure and flow requirements; do not increase pressure blindly |
| Leak at the exterior hose connection | Damaged hose washer, loose connection, cracked inlet fitting | Shut off the supply and inspect the washer and fitting |
| Water leaking inside a cabinet during flushing | Loose fitting, cracked line, damaged vacuum breaker, incorrect installation | Stop flushing immediately and inspect the actual leak source |
| Flush water is running but discharge stops | Restricted sewer hose, obstructed outlet, valve problem | Shut off the rinse water immediately |
| Dump handle sticks or the outlet seeps with the valve closed | Gate-valve obstruction, seal damage, cable or linkage problem | Diagnose the waste-discharge valve separately |
| Tank monitor still reads full after dumping | Sensor contamination, sensor fault, or remaining contents | Verify tank condition before assuming the reading is false |
| Odor remains after rinsing | Residue, toilet seal issue, venting problem, or another plumbing source | Check the broader waste system rather than automatically replacing a rinse valve |
Water Leaking Near the Vacuum Breaker
A leak that appears under a sink or behind a cabinet only while flushing can point to the rinse-water plumbing.
I look for:
- Loose connections.
- Cracked plastic fittings.
- Freeze damage.
- A failed vacuum breaker or combined backflow assembly.
- Incorrect component orientation.
- Installation that does not meet the component’s mounting requirements.
I do not assume the device itself is defective until I identify where the water originates. A nearby fitting can leak onto the assembly and make the wrong component look responsible.
Persistent leakage into cabinetry during operation requires attention. I stop using the flush system until the problem is resolved.
A Sticking Dump Valve Is a Different Repair
If the large black-tank discharge handle is difficult to move, replacing a component in the rinse-water circuit will not normally solve it.
I inspect the gate-valve mechanism, seals, cable, or linkage according to the valve manufacturer’s instructions.
I avoid forcing the handle or applying an unspecified lubricant. Excessive force can damage the mechanism, and unsuitable products may affect seals.
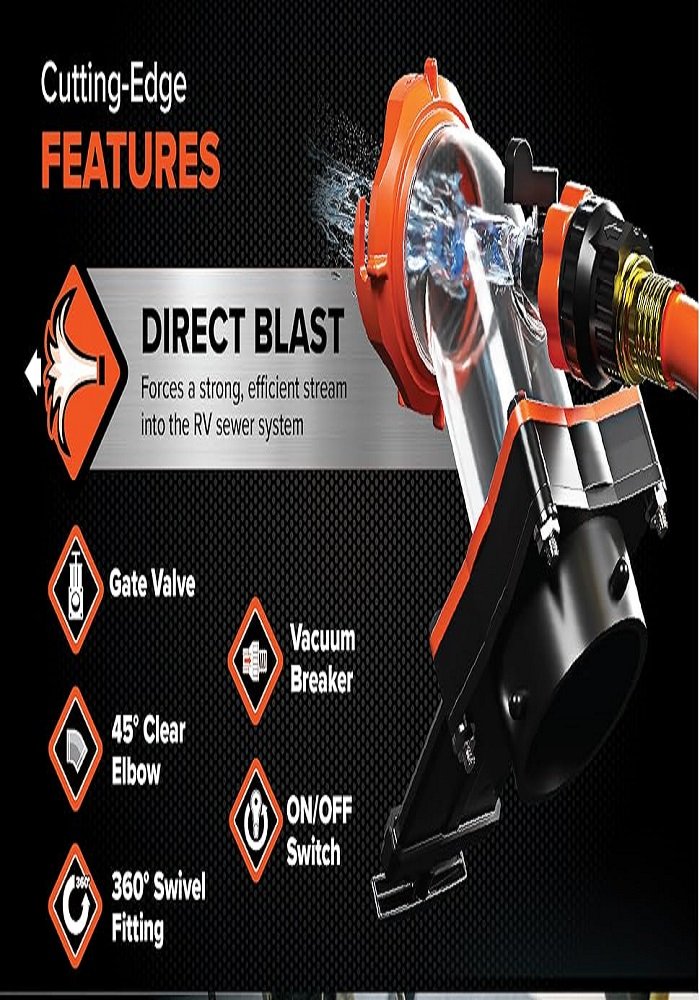
How I Choose a Replacement Black Water Flush Valve
When a product listing uses the phrase black water flush valve, I look beyond the name. Similar-looking parts can have different functions and installation requirements.
Before ordering, I confirm:
- The actual component type: inlet fitting, check valve, vacuum breaker, combined assembly, or waste gate.
- The original manufacturer and part number: where available.
- Connection size and thread type: including the distinction between hose threads and pipe threads.
- Flow direction: shown by markings or the installation diagram.
- Required orientation and mounting height: especially for backflow components.
- Pressure and temperature ratings: appropriate for the specified application.
- Material and seal compatibility: suitable for the RV’s plumbing and approved maintenance products.
- Manufacturer-approved substitution: particularly if the original part is discontinued.
I do not assume a metal replacement is automatically better than a plastic one. Correct function, compatibility, and installation matter more than appearance.
My Replacement Approach
For an accessible, correctly identified component, I follow the manufacturer’s replacement instructions and generally work through these stages:
- Shut off the water source.
- Relieve pressure and prepare for residual water.
- Photograph the original routing, flow direction, and mounting position.
- Remove the component without twisting or stressing nearby plumbing.
- Install the approved replacement with the specified seals or sealant.
- Restore the required orientation and mounting arrangement.
- Test the system with the sewer connection secured and the black dump valve open.
- Inspect for leaks during operation and after shutoff.
If the repair opens the waste-discharge side, the tank must first be emptied and prepared appropriately.
I also distinguish sealing methods. A connection designed to seal with a flat hose washer is not repaired by automatically adding thread tape. Tapered pipe-thread connections may require an approved sealant, depending on the component instructions.
If I cannot identify the assembly, preserve its required installation geometry, or access it safely, I would have an RV service technician handle the repair.
My Maintenance Routine for the Flush System
I focus on simple inspections and correct use rather than unnecessary disassembly.
| When | What I recommend checking |
|---|---|
| Before flushing | Hose condition, washers, inlet damage, secure sewer connections, and unobstructed drainage |
| During flushing | Discharge flow, leaks, and unexpected water inside or beneath the RV |
| After flushing | Complete water shutoff, hose drainage, inlet cap condition, and separate storage of rinse equipment |
| Periodically | Accessible backflow components, mounting security, cracked fittings, and dump-valve operation |
| Before freezing weather | The separate winterization requirements for the tank-flush circuit |
Keep the Black Dump Valve Closed Between Dumps
During normal use, I recommend keeping the black tank dump valve closed until it is time to dump.
Leaving it open at a full-hookup campsite can allow liquid to drain away while solids remain behind. A functioning rinse system does not eliminate that risk.
Use Suitable Cleaning Products
I follow the RV and component manufacturers’ recommendations for tank treatments and cleaners.
I do not pour household drain cleaner into the system or mix treatment chemicals. A product that is effective in household plumbing is not automatically suitable for RV tanks, seals, and valves.
Treat Winterization as a Separate Task
The tank-flush circuit is often separate from the RV’s normal freshwater distribution system.
That means pumping RV antifreeze through the freshwater plumbing may not protect the flush inlet, backflow assembly, or rinse line.
I follow the specific winterization procedure for that circuit. I do not improvise with compressed air unless the manufacturer provides an approved method and pressure limit.
I also never use automotive antifreeze in an RV water or waste-maintenance procedure.
Frequently Asked Questions
Where Is the Black Tank Flush Valve Located?
It depends on which component the term describes.
The flush inlet is commonly on an exterior utility panel or near the service area. A vacuum breaker or backflow assembly may be inside a cabinet or another protected location. The waste-discharge valve is on the tank’s outlet plumbing.
I use the RV’s plumbing diagram or trace the accessible rinse line rather than assuming all models place these parts in the same location.
Can I Flush the Black Tank With the Dump Valve Closed?
For the open-drain procedure in this guide, no. I keep the black dump valve open while rinse water is running.
Closing it can allow water to accumulate faster than expected, especially if the tank monitor is inaccurate. I do not recommend improvised “fill and blast” techniques with a pressurized hose.
Can I Use My Drinking-Water Hose for Tank Flushing?
I do not recommend it.
I use a dedicated, clearly identified rinse hose and store it separately from potable-water equipment. I do not later use that hose to fill the freshwater tank.
How Long Should I Flush the Tank?
There is no single duration that fits every tank, sprayer, water supply, and waste load.
I follow the manufacturer’s guidance and monitor the discharge continuously. If drainage becomes restricted or a leak appears, I stop immediately rather than waiting for a timer to finish.
Will the Flush System Clear a Black Tank Clog?
It may help loosen some residue, but I do not treat it as a guaranteed clog-removal tool.
If the tank is not draining normally, adding more water can make the situation worse. I stop flushing and investigate the obstruction or arrange professional service.
Is the Tank-Flush Valve the Same as the Toilet Water Valve?
No.
The toilet water valve supplies water to the toilet during use. The built-in tank-flush circuit sends rinse water to the holding tank through a separate connection.
A toilet that will not admit water and a tank sprayer that will not rinse require different troubleshooting.
My Bottom Line
I get the clearest diagnosis by separating the rinse-water circuit, its backflow protection, and the waste-discharge valve.
My priorities are straightforward:
- Identify the correct component before buying parts.
- Use a dedicated rinse hose.
- Preserve all required backflow protection.
- Keep the dump valve open during the open-drain flushing procedure.
- Stay present and monitor discharge.
- Shut the water off immediately if drainage stops or a leak appears.
- Follow the exact component instructions for replacement and winterization.
Correct identification and controlled flushing matter more than aggressive rinsing or replacing parts based on a product title.
Manufacturer Resources for Model-Specific Verification
For pressure limits, plumbing layouts, replacement requirements, and winterization instructions, I recommend starting with the RV’s year-specific owner’s manual and the original component documentation.
Useful manufacturer starting points include:
- Jayco owner resources
- Keystone RV owner resources
- Valterra — when Valterra is the manufacturer of the installed component
These are starting points for locating documentation, not confirmation that every model uses the same system.
Internal-Linking Plan for the Pillar and Supporting Articles
The four supplied keywords overlap substantially. I would not create four near-identical articles simply to target wording variations. I would keep the main keyword on this pillar and create supporting pages only where each page serves a genuinely different search intent.
The URLs below are proposed destinations, not existing pages.
| Target keyword | Recommended page purpose | Suggested URL | Best linking location in this pillar |
|---|---|---|---|
| black tank flush valve | Main pillar covering identification, safe use, troubleshooting, and maintenance | /black-tank-flush-valve/ | Supporting articles should link back to this page |
| rv tank flush valve | Detailed component-identification, location, and compatibility guide | /rv-tank-flush-valve-types/ | “How an RV Tank Flush Valve System Works” |
| rv black tank flush valve | Focused replacement guide with verified part examples and installation requirements | /rv-black-tank-flush-valve-replacement/ | Replacement section |
| black water flush valve | Focused leak-diagnosis guide covering inlet fittings and backflow assemblies | /black-water-flush-valve-leaking/ | Troubleshooting section |
Additional Supporting Topics Worth Developing
These offer more distinct article opportunities than synonyms alone:
- RV black tank flush not working
- RV black tank vacuum breaker leaking
- Black tank flush check valve replacement
- Black tank dump valve leaking
- Winterizing an RV black tank flush system
- Black tank sensors reading full after dumping
- Dedicated RV black tank flush hose
- Black tank flush vs. backflush attachment
Each supporting article should answer its narrower question thoroughly, then link back to the relevant section of this pillar. Where search intent is effectively identical, I would expand the existing page instead of publishing a duplicate.
E-E-A-T Publishing Checklist
Before publishing, I would strengthen the draft with:
- A verified Mertin Kevinton author biography.
- Original photos identifying the inlet, backflow assembly, sprayer access, and dump valve.
- The year, make, and model of any RV used as an example.
- Links to the exact manuals supporting model-specific instructions.
- A technical reviewer’s name only if that person actually reviewed the article.
- A genuine reviewed or updated date.
- Firsthand observations only when they reflect real experience.
These additions provide stronger evidence of experience and trustworthiness than adding unsupported claims such as “expert-tested” or “years of hands-on experience.”