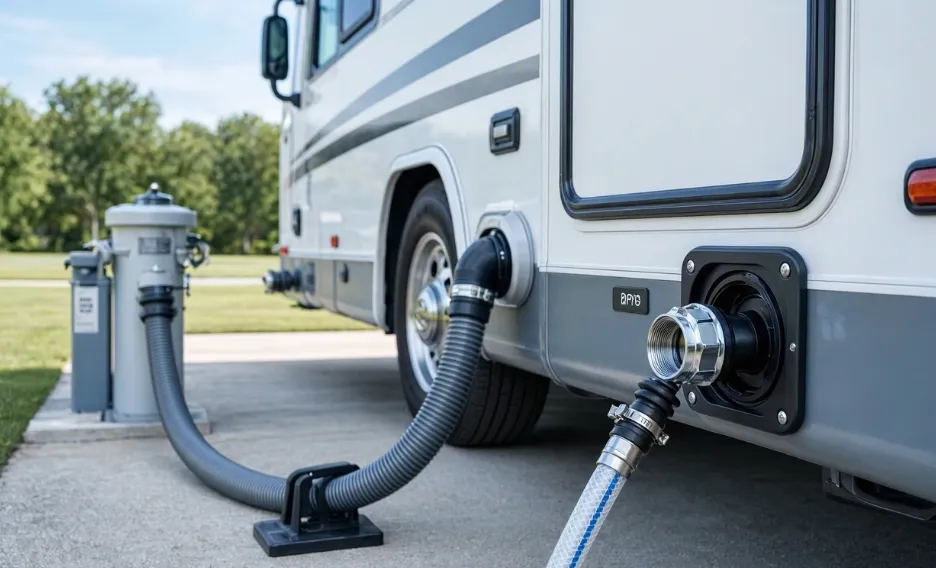
A Black Tank Flush System helps rinse the RV holding tank that collects toilet waste. After you empty the tank at a U.S. RV dump station or campground sewer connection, a dedicated water inlet and internal sprayer let you rinse away leftover residue.
Used correctly, flushing can help reduce buildup and odors and may improve tank-level readings. It does not replace regular dumping, secure sewer connections, or proper sanitation. Use a dedicated rinse hose—not your drinking-water hose—and follow your RV manual for valve positions, water pressure, and flushing time. Always check the dump station’s posted rules, and never leave the flush running unattended.
What Is a Black Tank Flush System?
A black tank flush system is a built-in or aftermarket rinse system for an RV’s black water holding tank. Most systems connect to a pressurized water supply through a fitting on the RV’s exterior wall.
Inside the tank, one or more spray nozzles direct water across the tank walls and bottom. The rinse water then leaves through the RV sewer outlet when the black tank valve is open.
The system is separate from the RV toilet. It does not flush waste from the toilet bowl. Instead, it cleans the holding tank after the waste has been dumped.
Main parts of the system
A typical system may include:
- A fresh-water inlet fitting
- A check valve or backflow protection device
- An internal spray nozzle
- A flush-water hose
- A sewer hose and outlet connection
- A black tank gate valve
- A clear sewer-hose elbow or adapter
Some RVs have a factory-installed flush system. Others use an aftermarket system, such as a rotating spray head or tank-rinse wand.
Types of RV black tank flush systems
| Type | How it works | Main benefit | Main limit |
|---|---|---|---|
| Built-in spray nozzle | Sprays water inside the tank through an outside connection | Easy to use and does not require entering the tank | The nozzle can clog or lose pressure |
| Rotating tank rinser | Attaches between the sewer outlet and sewer hose | Adds a visible rinse and may help break up residue | Requires access to the sewer outlet |
| Toilet wand | A wand enters through the toilet and sprays inside the tank | Useful for some tanks without a built-in flush | Requires more handling and care |
| Tank-cleaning bladder | Expands inside the sewer pipe and directs water backward | Can provide strong cleaning in some setups | Must be used exactly as directed |
A flush system is not a substitute for a functioning black tank valve. The tank must be able to drain before the rinse can work well.
How Does a Black Tank Flush Work?
A black tank flush sends clean water through an independent inlet and sprays it inside the waste tank. The spray loosens waste residue and toilet paper. Gravity and the open black tank valve carry the dirty rinse water into the sewer hose.
The system works best when the tank has first been emptied. A flush cannot remove a large amount of waste if the outlet is closed or blocked.
Most systems rely on water pressure from a campground spigot or dump-station faucet. The manufacturer’s manual controls the safe pressure and run time. Do not assume that every RV flush inlet can handle the same pressure.
What the flush can and cannot do
A black tank flush can help:
- Rinse residue from the tank walls
- Reduce some odors caused by waste buildup
- Improve the accuracy of tank sensors when residue causes false readings
- Clean the sewer outlet and valve area during a normal dump
It may not remove:
- A fully dried waste mass
- A severe “poop pyramid”
- A blocked sewer hose
- A failed or closed gate valve
- A clogged internal spray nozzle
- Damage caused by harsh chemicals or freezing water
A tank that has been neglected for a long time may need several cleaning cycles. In severe cases, a professional RV service center may be safer than aggressive home methods.
How to Use an RV Black Tank Flush Safely
Use the black tank flush only when the sewer hose is connected and the waste outlet is ready to drain. Never send flush water into a closed tank for an unknown period.
What you need
Before starting, gather:
- A dedicated drinking-water-safe hose for the flush connection
- A sewer hose rated for RV waste service
- A clear elbow or clear sewer adapter, if available
- Sewer-hose supports when needed
- Disposable gloves
- A second hose for the flush system if your setup requires one
- The RV owner’s manual
Do not use the same hose for the black tank flush and drinking water. A hose can look clean and still carry harmful contamination.
Step-by-step procedure
Park and secure the RV.
Make sure the RV is stable and the dump outlet is close enough for the sewer hose to reach without sharp bends.Put on gloves.
Treat every sewer connection as contaminated, even when it appears clean.Connect the sewer hose first.
Attach it to the RV waste outlet and secure the other end to the campground sewer inlet. Use a threaded adapter or approved connection when required.Add a clear adapter if available.
A clear section lets you see when the discharge becomes lighter and when flow stops.Open the black tank valve.
Let the tank drain fully. Keep the gray-water valve closed at this stage.Close the black tank valve.
Once the main discharge stops, close the valve before starting the rinse unless the RV manual gives different instructions.Connect the flush hose.
Attach the dedicated clean hose to the black tank flush inlet. Connect the other end to a suitable water supply.Turn on the flush water slowly.
Check every connection for leaks. Keep the black tank valve open if the manufacturer directs continuous drainage during flushing.Watch the discharge.
Continue only while water flows freely and the tank can drain. Do not leave the system unattended.Stop the water before disconnecting.
Shut off the supply. Allow the remaining water to drain through the sewer hose.Repeat only if needed.
A second short rinse may help when the discharge remains dark or contains visible material.Close and rinse the system.
Close the black tank valve. If appropriate, dump the gray tank afterward to rinse some residue from the sewer hose. Do not treat gray water as sterile.Disconnect in a controlled order.
Follow the campground and RV manufacturer instructions. Keep the sewer hose end low and capped while carrying it.Store the hoses separately.
Keep the flush hose away from drinking-water equipment and store both hoses so they cannot touch one another.
How long should you run the flush?
There is no single safe time for every RV. Tank size, spray-nozzle design, water pressure, and the condition of the tank all change the answer.
Use the RV or flush-system manual first. If the manual gives no time, use short monitored cycles rather than leaving the water running. Watch the tank level, sewer discharge, hose connections, and ground around the RV.
Stop immediately if:
- The tank begins to fill
- Water backs up at the sewer connection
- The sewer hose swells or leaks
- The flush inlet leaks
- The discharge stops while water continues entering
- The RV begins to smell strongly of sewer gas
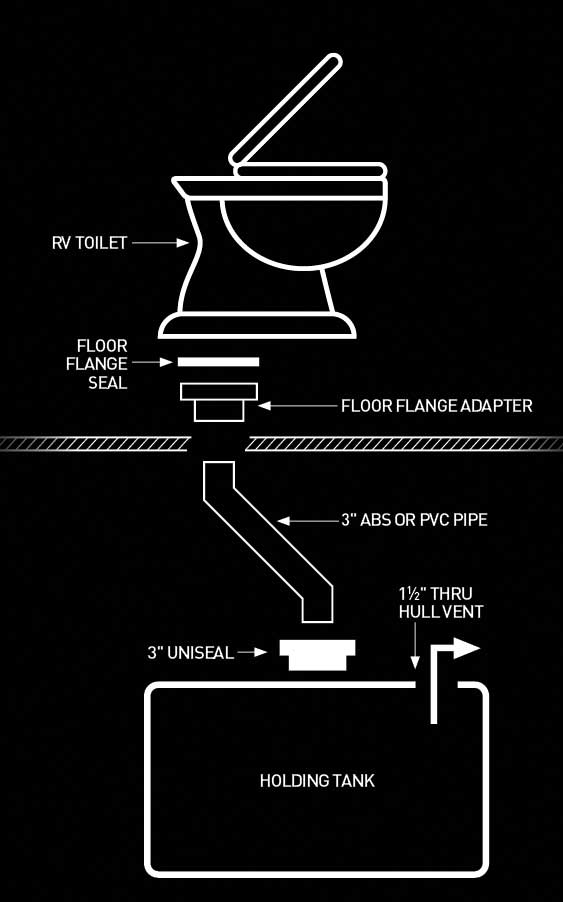
Black Tank Flush Safety Rules
The greatest risk is cross-contamination between waste equipment and drinking-water equipment. The U.S. Environmental Protection Agency describes backflow and cross-connections as pathways that can allow contaminated water to enter a clean-water supply. Review the EPA guidance on cross-connection control and backflow prevention for the general safety principle.
Follow these rules:
- Use a separate hose for the flush inlet.
- Use a hose labeled for drinking-water service or potable-water use.
- Never connect a sewage hose to a fresh-water inlet.
- Do not use a drinking-water hose to rinse a sewer hose.
- Keep hose ends capped when stored.
- Do not bypass a built-in check valve.
- Do not use high pressure unless the manual permits it.
- Never leave a tank flush running while you leave the RV.
- Do not stand over an open sewer connection.
- Wash your hands after handling sewer equipment.
- Keep children and pets away from the dump area.
A campground spigot may have its own backflow protection, but that does not remove the need for safe hose separation and proper equipment.
How to Maintain a Black Tank Flush System
Routine care is simple: use enough water in the black tank, dump at suitable intervals, rinse when needed, and inspect the system for leaks.
Use enough water in the tank
A dry black tank allows waste and paper to harden on the tank floor. After dumping, add water according to the RV manual. Many owners add several gallons, but the correct amount depends on the tank and toilet design.
Do not fill the tank to the top unless the manufacturer provides a safe method and you can monitor it. The goal is to keep waste from drying, not to create an uncontrolled overflow.
Use RV-safe chemicals only
Use treatment products made for RV holding tanks. Avoid household bleach, strong drain cleaners, solvents, and products that can damage seals or interfere with treatment systems.
Tank chemicals cannot fix a blocked outlet or a failed valve. They also cannot replace water conservation and regular dumping.
Inspect the flush inlet
Check the exterior connection for:
- Cracks
- Loose fittings
- Leaks under pressure
- Missing caps
- Damaged threads
- Signs of freezing
If water appears inside the RV or around the wall behind the inlet, stop using the system until the fitting and plumbing are inspected.
Protect the system before freezing weather
Water trapped in the flush line can freeze and split fittings. Before winter storage, follow the RV manufacturer’s winterization instructions.
Do not assume that draining the fresh-water tank also drains the black tank flush line. Some systems require a separate step. If the RV will be stored below freezing, use the documented method for that model.
You might also loke: How To Flush Black Water Tank
Black Tank Flush Troubleshooting
Start with the simplest and safest checks. Do not increase water pressure to force a suspected blockage.
| Symptom | Likely causes | Safe checks |
|---|---|---|
| No water enters the tank | Closed spigot, kinked hose, clogged inlet screen, blocked check valve | Check the supply, hose, inlet screen, and manual |
| Water enters but does not drain | Closed valve, blocked sewer hose, full tank, poor slope | Stop water and inspect the sewer path |
| Flush inlet leaks | Loose connection, damaged washer, cracked fitting | Shut off water and replace the damaged part |
| Tank sensors still read full | Residue on sensors, failed sensor, wiring fault | Repeat a controlled rinse; test sensors if the problem remains |
| Bad odor continues | Dry tank, residue, vent problem, toilet seal issue | Add water, inspect the vent and toilet seal, and clean the tank |
| Water backs up into the RV | Blocked outlet or closed valve | Stop flushing at once and do not add more water |
| Spray seems weak | Low supply pressure, clogged nozzle, restricted check valve | Check the hose and inlet; consult the manual before repairs |
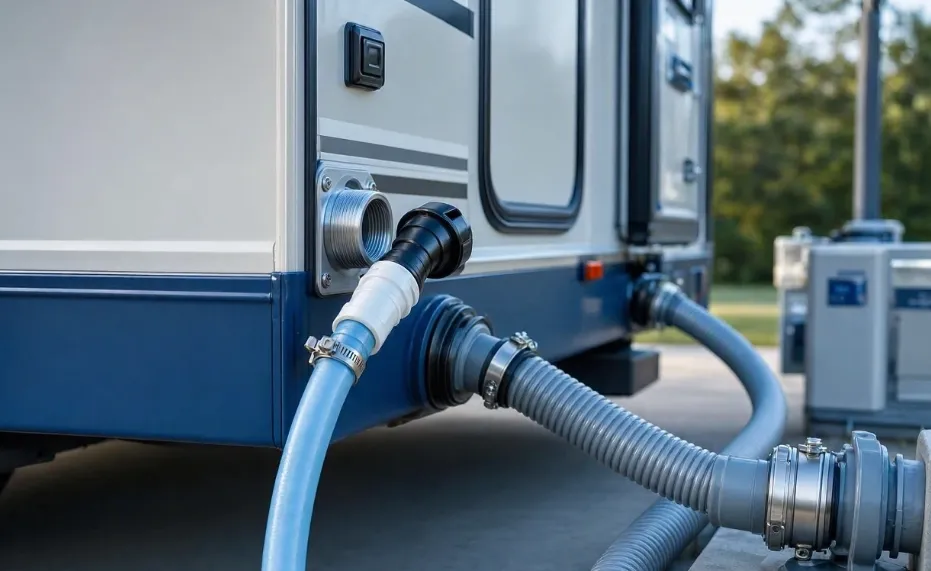
When the flush has no water flow
First confirm that the water supply is on and that the hose is not kinked. Remove the hose only after shutting off the water.
Inspect the flush inlet for a small screen or check valve. Mineral deposits can restrict flow. Do not remove safety parts unless the manual explains how to service them.
If the inlet has pressure but no water reaches the tank, the internal nozzle or plumbing may be blocked. An RV technician may need to inspect it.
When the tank will not drain
Stop the flush water. Check that the black tank gate valve is fully open and that the sewer hose is not bent, crushed, or blocked.
If the valve handle moves but no discharge appears, the valve may have failed internally. Do not push a metal rod through the toilet unless the manufacturer specifically approves the method. A rod can damage the tank, valve, or toilet seal.
When tank sensors read incorrectly
Tank sensors can give false readings when residue covers their contact points. A thorough rinse may help, but repeated false readings can also indicate a failed sensor, loose wiring, or a damaged control panel.
If the tank drains normally but the display remains inaccurate, have the sensor system tested. Do not keep filling the tank based only on a faulty gauge.
When a sewer smell remains
A black tank flush may not be the cause of the smell. Check the tank water level, toilet bowl seal, roof vent, vent cap, and sewer-hose connections.
A dry toilet seal can allow odor into the RV. A blocked roof vent can also push odor through the toilet or plumbing. If the smell is strong or persistent, stop using the system and arrange a professional inspection.
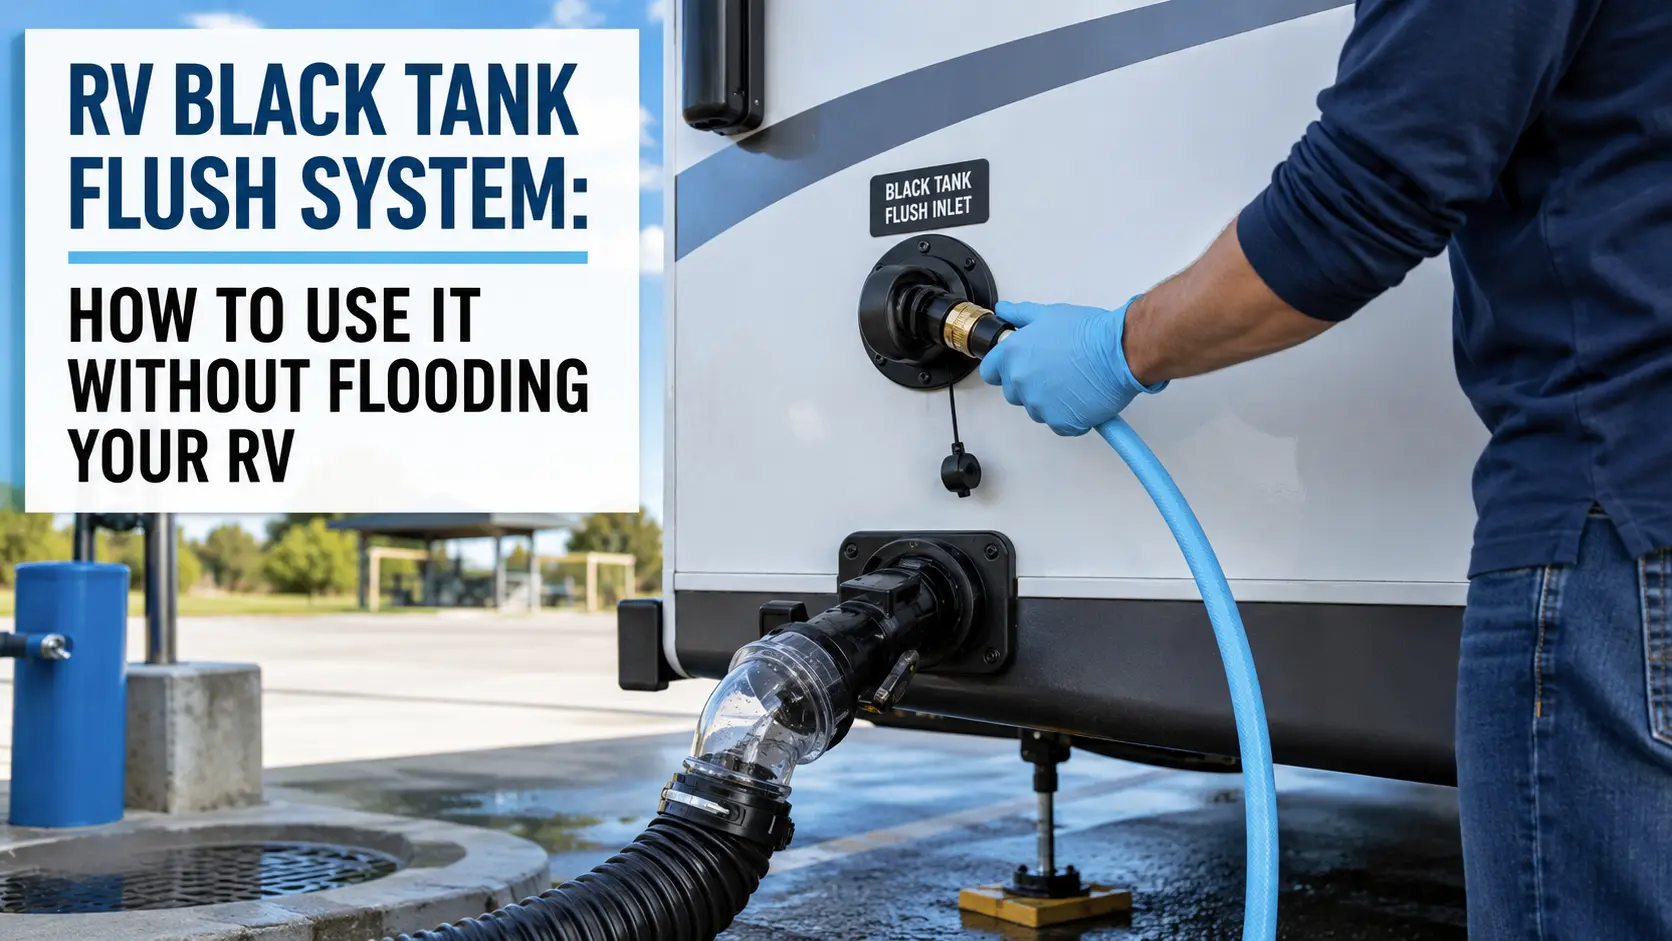
Built-In Flush vs. Aftermarket Tank Rinser
A built-in flush system is usually the most convenient option when the RV includes a working inlet and spray nozzle. It can be used without opening the toilet or placing equipment inside the tank.
An aftermarket rinser can help when the RV has no built-in system. However, compatibility matters. Check the sewer outlet size, valve arrangement, clearance, water-pressure limits, and whether the adapter allows the tank to drain while rinsing.
A toilet wand may help with a localized buildup, but it requires careful handling. It also creates more opportunities for splashing and cross-contamination.
Choose based on the actual problem:
- Working built-in system: Use it and maintain it.
- No flush system: Consider an external rinser or properly designed wand.
- Recurring blockage: Diagnose the waste system instead of buying more rinse equipment.
- Frozen or leaking plumbing: Repair the system before flushing.
- Incorrect sensor readings: Clean and test the sensors before replacing parts.
A product is not automatically better because it uses higher pressure. Excess pressure can damage fittings, valves, or tank plumbing.
Common Black Tank Flush Mistakes
Flushing with the black valve closed
A closed valve can allow the tank to fill. This may cause a backup through the toilet or a leak at a weak connection.
Using the fresh-water hose
This is one of the most serious mistakes. Keep a separate, clearly marked flush hose for waste-system tasks.
Leaving the flush unattended
A failed valve, blocked hose, or loose connection can cause wastewater or fresh flush water to spill. Stay beside the RV and watch the system.
Dumping the gray tank first
The black tank should normally be emptied first. Dumping gray water afterward may rinse some material from the sewer hose, but it does not disinfect it.
Using too little water during normal RV use
A small amount of water may save space, but it can leave solids behind. Follow the toilet and tank instructions, and use enough water to keep waste moving.
Relying on chemicals alone
Chemicals do not correct poor tank habits, clogged vents, failed valves, or inaccurate sensors. Water use and proper dumping matter more.
Ignoring the manufacturer’s limits
Flush systems differ. The RV manual may specify a pressure limit, connection method, winterization procedure, or maximum rinse time. Those instructions take priority over general advice.

Frequently Asked Questions
Does a black tank flush clean the whole tank?
It can rinse much of the tank, but coverage depends on the nozzle location and tank shape. A built-in nozzle may not reach every corner. Heavy buildup may need repeated rinsing or professional service.
Can I use a garden hose for a black tank flush?
Use a hose intended for potable-water or drinking-water service, and keep it separate from all drinking-water equipment. A general-purpose garden hose may contain materials or residues that are not suitable for potable-water contact.
Should the black tank valve be open during flushing?
Follow the system manual. Many RV procedures use an open valve so rinse water and loosened waste can drain. Some cleaning methods use a short fill-and-drain cycle. Never keep the valve closed unless you can safely monitor the tank level and the procedure allows it.
Why does my black tank still smell after flushing?
Possible causes include a dry tank, residue, a blocked roof vent, a worn toilet seal, or a loose sewer connection. A flush addresses tank residue, but it does not repair ventilation or plumbing problems.
Can I install a black tank flush system myself?
Some external rinsers require no permanent modification. A built-in spray nozzle may require drilling the tank, sealing a fitting, and confirming internal clearance. Because a mistake can cause leaks or tank damage, permanent installation is best handled by a qualified RV technician unless the manufacturer provides clear instructions for your model.
Is a black tank flush required?
No. An RV can operate without one if the tank is used and maintained correctly. The system is a cleaning aid, not a required part of the waste system.
Key Takeaways
- A black tank flush rinses an RV’s toilet-waste holding tank.
- Dump the black tank before starting the rinse.
- Use a separate potable-water hose for the flush connection.
- Keep the sewer hose connected and watch the system at all times.
- Follow the RV manual for pressure, timing, and winterization.
- Stop if water backs up, leaks, or stops draining.
- Persistent odors, blockages, and sensor faults may require RV service.
Conclusion
A black tank flush system works by spraying water inside the RV waste tank while the tank drains through the sewer hose. The best results come from regular water use, safe dumping, controlled rinsing, and careful maintenance.
Before your next dump, read the RV manual, label a dedicated flush hose, inspect the sewer connection, and confirm that the tank can drain freely. If the system leaks, backs up, or fails to drain, stop adding water and repair the problem before using the flush again.