Clean the tank often, flush well, use safe treatments, and never leave the valve open.
The first time I dealt with a black tank problem on the road it was not pretty. Wrong chemicals, skipped flushes, and a sensor that had not read correctly in weeks. I was parked at a campsite with no easy fix and a very unpleasant situation on my hands. That experience taught me everything I needed to know about why proper RV black tank cleaning and maintenance is not something you can put off or guess your way through.
After years of owning and servicing rigs, clearing real clogs in the field, and testing every product and method I could find, I built a system that actually works. This complete guide to RV black tank cleaning and maintenance covers everything — the right chemicals, the correct flushing steps, sensor care, odor prevention, and a simple schedule you can follow every trip. If you want a stink free rig and stress free travel, this is the guide that gets you there.
What Is the RV Black Tank?
Simple Explanation:
Your RV black tank is the holding tank that collects everything that goes down your RV toilet — human waste and toilet paper. That is it. Simple but important. Without it working properly your whole trip can fall apart fast.
Black Tank vs Gray Tank
A lot of new RV owners confuse these two. Your black tank holds toilet waste only. Your gray tank is separate and holds the water from your sinks and shower. They drain differently, smell differently, and need different care. Never mix them up.
What Happens Inside the Tank
When everything works right, waste stays wet, breaks down slowly, and drains cleanly when you open the valve at a dump station. The vent stack on your roof lets air flow through and keeps pressure from building up. Tank sensors on the side tell you how full it is getting.
The key parts inside and around your black tank are:
- The tank body and outlet fitting
- The black gate valve and cap
- The vent stack running to the roof
- Tank level sensors
- A flush inlet or rinse system on some models
Why Waste and Buildup Become Problems
This is where most RV owners run into trouble. When waste dries out, it hardens into what RV owners call a pyramid plug — a solid mass that blocks the outlet and is very hard to clear. Sensors get coated in residue and stop reading correctly. Odors build up when the vent stack gets blocked or chemicals are not used properly.
The good news is all of these problems are completely preventable with the right routine. That is exactly what the rest of this guide covers.
The Biggest RV Black Tank Problems I See
After years on the road I have seen the same problems come up again and again. Most of them are easy to fix once you know what you are looking for. Here are the ones that cause RV owners the most headaches:
| Problem | Common Sign |
|---|---|
| Bad odors | Smell inside or around the RV |
| False sensor readings | Tank shows full when it is not |
| Waste buildup | Tank does not empty properly |
| Slow draining | Dumping takes too long |
| Stuck valve | Valve becomes difficult to operate |
The good news is every single one of these problems is preventable. The rest of this guide shows you exactly how.
Why RV Black Tank Cleaning and Maintenance Matter
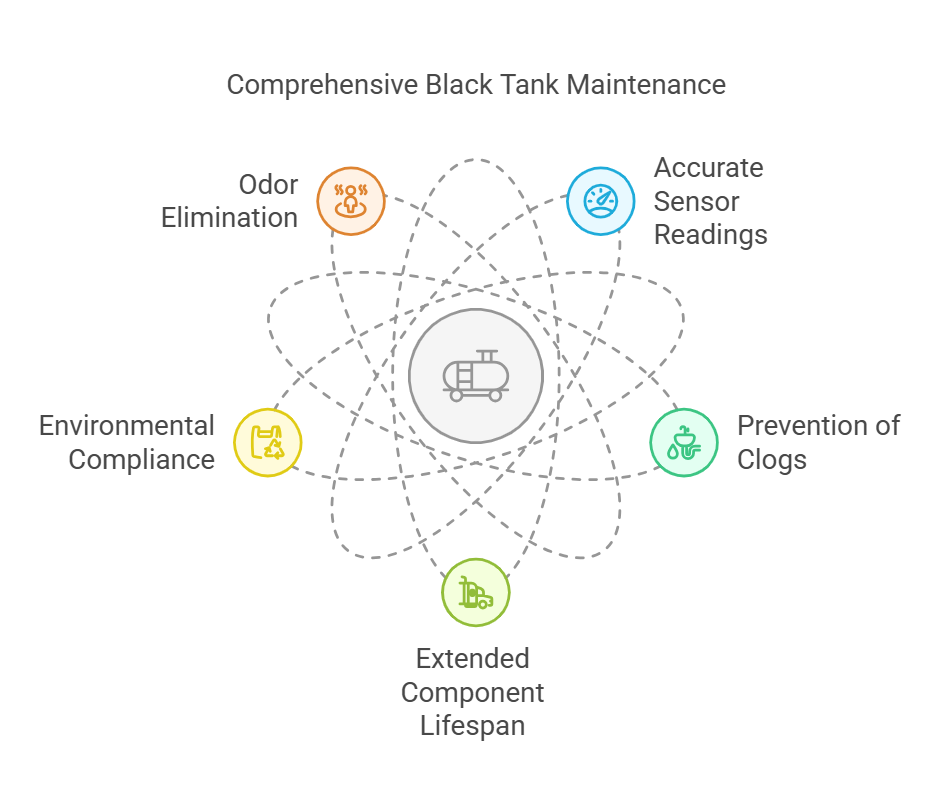
A clean black tank prevents smells, clogs, and premature wear. It keeps valves and seals healthy. It also keeps sensors accurate so you know when to dump.
Poor care leads to:
- Pyramid plugs when solids pile under the toilet.
- Odors from anaerobic bacteria and vent issues.
- Stuck valves and leaky seals.
- Expensive service visits and bad trips.
RV black tank cleaning and maintenance also protects campgrounds. Many parks require proper dump methods and safe chemicals. Do it right and you help everyone.
How Often Should You Clean an RV Black Tank?
This is one of the most common questions I get from new RV owners. The honest answer is — it depends on how often you use your rig. But here are the clear guidelines I follow and recommend:
Normal Cleaning
For regular use, clean your black tank every time you dump it. That means flushing it with water after every dump until the water runs clear. This takes about five to ten minutes and prevents buildup from hardening between trips. It is the single most important habit you can build as an RV owner.
Deep Cleaning
Do a proper deep clean at least once every three to four months or at the start and end of every camping season. A deep clean means using a dedicated black tank cleaner, filling the tank with water, letting it soak for several hours or overnight, and then dumping and flushing completely. This breaks down any stubborn residue, clears coated sensors, and removes odor causing buildup that regular flushing misses.
When the Tank Needs Extra Attention
Sometimes your tank needs more than a routine clean. Give it extra attention when:
- You have been parked in hot weather for several days
- The tank has been sitting unused for a long time
- You are getting persistent odors even after dumping
- Sensors are reading incorrectly
- The tank is draining slower than usual
- You are preparing to store the RV for winter
Signs You Should Clean It Now
Do not wait for the scheduled clean if you notice any of these:
- A strong smell inside the RV near the toilet
- Sensors showing full when the tank was recently dumped
- Slow or incomplete draining at the dump station
- Gurgling sounds from the toilet or vent
- Visible residue around the toilet base
If you see any of these signs, clean the tank as soon as possible. Waiting makes the problem harder and more expensive to fix.
How I Clean an RV Black Tank: Step-by-Step
I have done this hundreds of times across different rigs and different campgrounds. This is the exact process I follow every single time. Stick to these steps and your tank will stay clean, odor free, and working properly for years.
Step 1: Empty the Tank
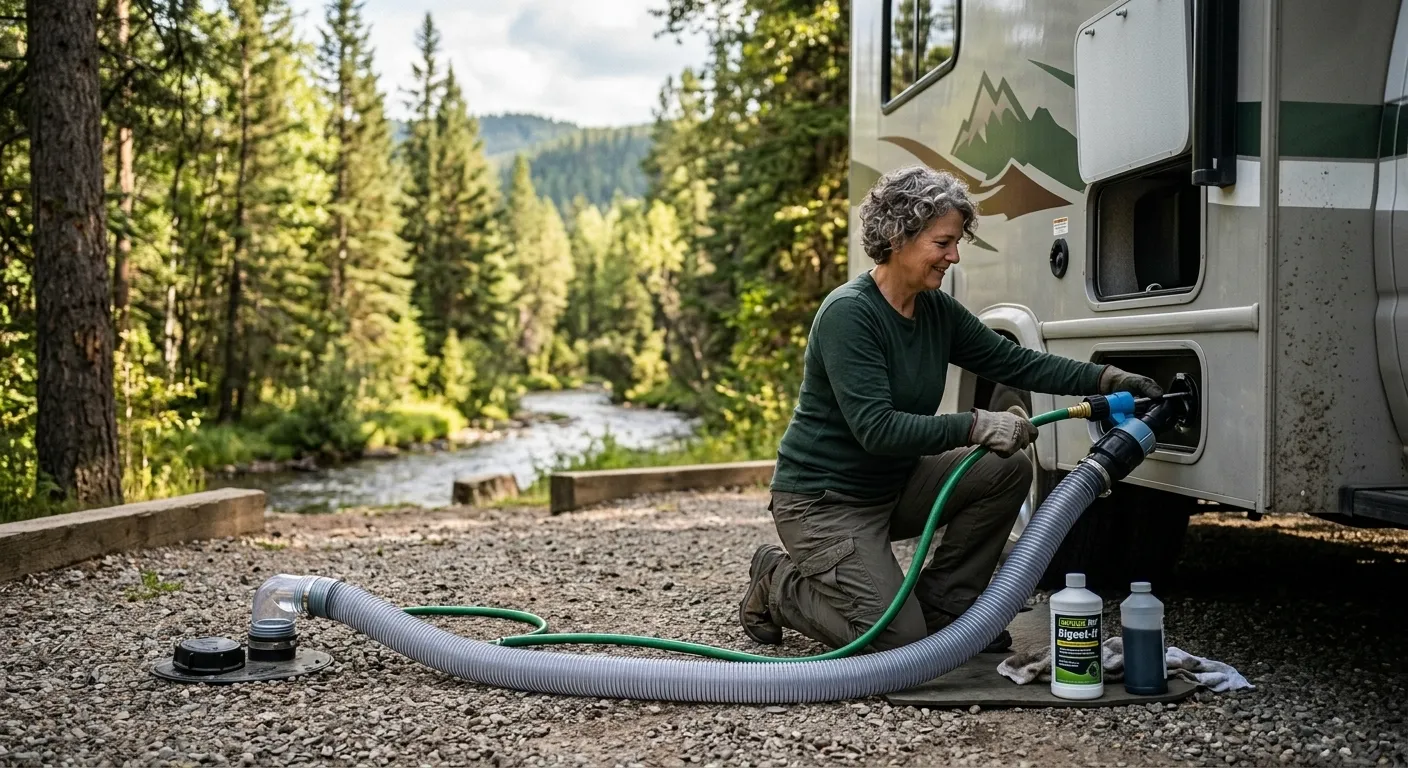
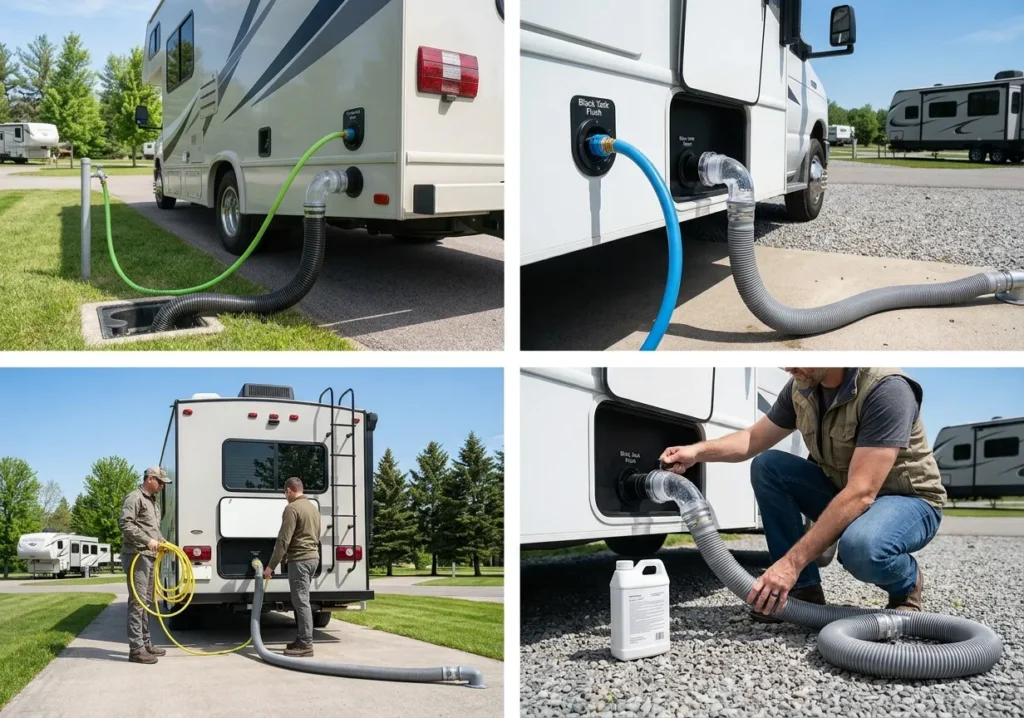
Never start cleaning a tank that is not fully dumped first. Connect your sewer hose to a proper dump station, open the black tank gate valve fully, and let it drain completely. Do not rush this step. Wait until the flow stops before moving on.
💡 Always dump the black tank before the gray tank. The gray water helps rinse your sewer hose at the end.
Step 2: Flush It
Once the tank is empty close the valve and flush the tank with fresh water. If your RV has a built in flush system or rinse inlet use it now. If not use a dedicated tank flushing wand through the toilet. Let the water fill, open the valve, and dump again. Repeat this two or three times until the water runs clear.
Step 3: Add Water
Close the valve and add at least two to three gallons of fresh water to the tank. This is important. Never leave the tank completely dry after dumping. Water keeps the bottom of the tank wet and prevents waste from drying and hardening between uses.
Step 4: Use the Right Cleaner or Treatment
Add your chosen black tank treatment or cleaner to the water sitting in the tank. I always use a enzyme or bacteria based treatment for regular use — it breaks down waste naturally and controls odor without harsh chemicals. For a deep clean I use a dedicated tank cleaner and let it soak overnight before dumping again.
💡 Avoid cleaners with formaldehyde. They kill the good bacteria that break down waste and can damage seals over time.
Step 5: Flush Again
After soaking dump the tank one more time and flush with fresh water until it runs completely clear. This is the step most people skip and it is the most important one for keeping sensors clean and odor under control.
Step 6: Check the Sensors
After a full clean your sensors should read empty or close to it. If they are still reading incorrectly after a proper clean and flush it means there is residue coating the sensor probes. Use a dedicated sensor cleaner or repeat the deep clean process with a stronger solution and a longer soak time.
Step 7: Leave the Tank Properly Prepared
Before your next trip add two to three gallons of fresh water and a dose of your regular treatment to the clean empty tank. This gives the bacteria a head start and keeps the tank bottom wet so waste does not stick on your first use. Your tank is now clean, treated, and ready to go.
Pro tip from the road: I once cleared a stubborn sensor issue by adding warm water with a small, approved dose of water softener and a teaspoon of mild dish soap, then towing 15 miles. The gentle slosh and soft water freed paper films. Use modest amounts and confirm your manufacturer’s guidance first.
Read My Complete Guide on How To Clean An RV Black Tank: Quick, Odor-Free Tips

Tools and Supplies You Need
You do not need a shop full of gear. Stock these basics and you are set for RV black tank cleaning and maintenance.
| Tool | Best Use |
|---|---|
| Black tank cleaner | Breaking down buildup |
| Flush system | Regular tank flushing |
| Flush wand | Direct cleaning |
| Flush hose | Connecting to a water source |
| Sensor cleaner | Sensor maintenance |
| Deodorizer | Odor control |
RV Black Tank Flush Systems: Are They Worth It?
Yes. A good flush system saves time, reduces odors, and keeps your tank cleaner between deep cleans. Here is a quick breakdown of your options:
Built-In Flush Systems
The easiest option. A dedicated water inlet on the outside of your RV sprays directly inside the tank while it drains. If your RV has one use it every single time you dump. Takes five minutes and makes a big difference.
Flush Hoses
A long hose with a spinning spray head that goes through the toilet into the tank. Works well if your RV does not have a built in system. More thorough than a wand and worth the extra cost for frequent users.
Flush Wands
A simple rigid wand you insert through the toilet and move around manually. The most affordable option. Not as thorough as a flush hose but gets the job done for occasional use.
Which one makes sense:
| Option | Best When |
| Built-in flush system | Your RV has one — always use it |
| Flush hose | No built-in system, frequent use |
| Flush wand | Occasional use, tight budget |
My honest take: If your RV does not have a built in flush system a good flush hose is worth every dollar. The difference in tank cleanliness between regular flushing and no flushing is significant — cleaner sensors, fewer odors, and far less buildup over time. It is one of the best small investments you can make for long term black tank health.
How to Stop RV Black Tank Odors
Bad smells coming from your black tank are not just unpleasant — they are a sign something is wrong. In my experience the cause is almost always one of five things. Here is exactly what to look for and how to fix each one:
Waste Buildup
Dried waste stuck to the bottom and walls of your tank is the number one cause of persistent odors. It happens when the tank is not flushed properly after dumping or when the valve is left open at a campsite hookup — which dries everything out fast.
Fix: Deep clean the tank, soak overnight with a good enzyme cleaner, and flush thoroughly. Always keep the valve closed until you are ready to dump.
Too Little Water
This is the most common mistake I see. People dump and leave the tank almost dry. Without enough water waste dries out, hardens, and smells.
Fix: Always add two to three gallons of fresh water to the tank after every dump. Keep water in there at all times during use.
Ventilation Problems
Your black tank vents through a pipe that runs up to your RV roof. If that vent gets blocked by debris, a bird nest, or ice in winter, gases build up inside and push back through the toilet into your living space.
Fix: Check and clear the roof vent regularly. A vent cap cover can help keep debris out year round.
Toilet Seal Problems
The rubber seal at the base of your RV toilet keeps tank gases from entering the RV. When it dries out or cracks it lets odors through even when the tank is clean.
Fix: Keep the seal lubricated with a dedicated RV toilet seal conditioner. Replace it if you see cracks or if it no longer holds water in the bowl properly.
Poor Cleaning
Skipping regular flushes, using the wrong chemicals, or not deep cleaning often enough lets odor causing bacteria and residue build up over time.
Fix: Follow a consistent cleaning schedule. Use enzyme or bacteria based treatments after every dump and deep clean every three to four months.
RV Black Tank Sensors: Why They Stop Workin
If your sensors show full after a fresh dump you are not alone. This is one of the most common black tank problems and it is almost always fixable.
Why Sensors Get Dirty Your sensors are small probes inside the tank wall. Waste, toilet paper, and mineral deposits coat them over time. Once coated they read full even when the tank is completely empty.
Why Readings Become Inaccurate Three main causes:
- Dried waste stuck to the probe
- Toilet paper wrapped around the sensor
- Hard water mineral deposits built up over time
All three give the same result — wrong readings every trip.
How to Clean Them
- Dump and flush the tank completely
- Add fresh water and a dedicated sensor cleaner
- Let it soak overnight
- Dump and flush until water runs clear
- Check the reading — it should now show empty
💡 Adding a bag of ice before a drive helps agitate the tank and scrub the walls during the soak.
When Cleaning Does Not Work If sensors still read wrong after a proper deep clean the probe may be physically damaged, the wiring loose, or the monitor panel faulty. In that case inspect the probes directly or have a technician check the connections. Replacement sensors are affordable but installation varies by model.
RV Black Tank Valve Problems
The gate valve is one of the most important parts of your black tank system. When it works properly you never think about it. When it fails it becomes your biggest problem on the road. Here is everything you need to know:
How the Valve Works Your black tank gate valve is a flat sliding blade that sits between the tank outlet and your sewer hose connection. When you pull the handle it slides open and waste drains out. Push it back and it seals the tank shut. Simple in theory — but it takes a lot of abuse over time.
Signs of a Stuck Valve
- Handle is hard to pull or push
- Valve only opens partway
- Tank drains slowly even when valve is fully open
- Valve handle moves but tank does not drain
- Visible leaking around the valve body
Common Causes
- Dried waste buildup around the valve blade prevents it from sliding freely
- Lack of lubrication causes the blade to stick and corrode over time
- Physical damage from forcing a stuck valve or accidental impact
- Warped blade from heat exposure or age
- Debris caught in the valve opening blocking the slide
Basic Maintenance This is the step most RV owners skip and then regret. Keep your valve working properly with these simple habits:
- Lubricate the valve blade with a dedicated RV valve lubricant at least twice a year
- Always flush the tank thoroughly before closing the valve after dumping
- Never leave the valve open at a campsite hookup — it dries waste around the blade fast
- Inspect the valve body for cracks or leaks at the start of every season
When Replacement Is Necessary Sometimes maintenance is not enough. Replace your valve when:
- It leaks even when fully closed
- The blade is visibly cracked or warped
- Lubrication no longer frees a stuck valve
- The handle breaks or disconnects from the blade
- You see sewage seeping around the valve body
Replacing a black tank valve is a straightforward job for most RV owners with basic tools. New valves are affordable and widely available. If you are not comfortable doing it yourself any RV service center can handle it quickly.
Quick Reference:
| Problem | Solution |
|---|---|
| Stuck valve | Lubricate and work it back and forth |
| Slow draining | Check for waste buildup around blade |
| Leaking valve | Replace the valve |
| Broken handle | Replace valve or handle assembly |
| Visible cracks | Replace immediately |
RV Black Tank Maintenance Mistakes to Avoid
I have made most of these mistakes myself. Some cost me time. Some cost me money. A couple made for very unpleasant afternoons at the dump station. Learn from my experience so you do not have to learn the hard way:
Dumping Too Early This is the most common mistake new RV owners make. Dumping when the tank is less than two thirds full means there is not enough liquid to carry solid waste out cleanly. The result is waste left behind that dries out, hardens, and causes blockages and odors.
✅ Fix: Wait until the tank is at least two thirds full before dumping. The volume of liquid helps everything flush out completely.
Too Little Water A dry black tank is a smelly black tank. Without enough water waste dries on the bottom and walls fast. This leads to pyramid plugs, coated sensors, and persistent odors that no amount of treatment will fix.
✅ Fix: Always add two to three gallons of fresh water after every dump. Keep the tank wet at all times during use.
Ignoring Sensors Inaccurate sensors are easy to dismiss — until you overflow the tank because you thought it was empty. Ignoring sensor readings means you lose track of your tank level completely.
✅ Fix: Clean your sensors regularly and investigate any reading that seems wrong. Do not guess with a black tank.
Skipping Regular Flushing Dumping without flushing is like emptying a bucket without rinsing it. Residue builds up every single trip and compounds over time into serious buildup that is very hard to remove.
✅ Fix: Flush the tank with fresh water after every single dump. No exceptions.
Using the Wrong Cleaning Products Harsh chemicals, formaldehyde based treatments, and household cleaners kill the good bacteria that break down waste naturally. They also damage seals, valves, and tank walls over time.
✅ Fix: Use enzyme or bacteria based treatments designed specifically for RV black tanks. They work better and are safe for your system long term.
Leaving Waste Sitting in the Tank Leaving a full or partially full tank sitting for weeks between trips is one of the fastest ways to create serious buildup and odor problems. Waste dries, hardens, and becomes extremely difficult to remove.
✅ Fix: Always dump, flush, and treat the tank before storing your RV. Never leave waste sitting in a tank you are not actively using.
Ignoring a Leaking or Stuck Valve A leaking valve is not just inconvenient — it is a health hazard. A stuck valve left untreated gets worse over time and can fail completely at the worst possible moment.
✅ Fix: Address valve problems as soon as you notice them. Lubricate regularly, inspect every season, and replace the valve at the first sign of a leak or serious sticking.
Quick Reference:
| Mistake | Fix |
|---|---|
| Dumping too early | Wait until two thirds full |
| Too little water | Add 2-3 gallons after every dump |
| Ignoring sensors | Clean regularly and investigate readings |
| Skipping flushing | Flush after every single dump |
| Wrong cleaning products | Use enzyme or bacteria based treatments |
| Leaving waste sitting | Always dump before storing |
| Ignoring valve problems | Lubricate, inspect, and replace when needed |
Quick RV Black Tank Troubleshooting Guide
Even with strong RV black tank cleaning and maintenance, things happen. Here is how I fix the most common issues in the field.
| If You Have This Problem | Start Here |
|---|---|
| Tank smells | Clean, flush, and check ventilation |
| Sensor says full | Clean the sensors |
| Tank drains slowly | Flush and check for buildup |
| Valve is stuck | Inspect and clean the valve |
| Tank does not empty | Check the valve and possible blockage |
Chemicals and Treatments: What Works, What to Avoid
A smart chemical plan makes RV black tank cleaning and maintenance easier.
Good options:
- Enzyme or bacterial treatments. They digest waste and reduce odor.
- Water softeners in small amounts. They help reduce scale on tank walls.
- Mild, septic-safe dish soap in tiny doses can help lubricate and reduce surface tension.
Use with caution:
- Bleach. It can damage seals and kill helpful bacteria. Only use a very dilute mix if your manufacturer allows it, then flush well.
- Strong caustics. They can harm tanks and valves.
Skip:
- Formaldehyde-based products. Many parks ban them and they are hard on septic systems.
I see the best long-term results with consistent water use plus an enzyme product. Big doses of heavy chemicals are a short fix with long costs.
Eco and Campground Etiquette
Great RV black tank cleaning and maintenance includes good manners.
Do:
- Use RV-safe, septic-safe chemicals.
- Rinse any spills at the dump station.
- Keep a clean hose and cap. Store it in a dedicated bin.
Do not:
- Dump on the ground or in storm drains.
- Leave the black valve open at hookups.
- Use formaldehyde products that stress septic systems.
These small steps protect parks and keep rules simple for everyone.
Safety Tips and Hygiene
Stay safe while you handle black water. It is a key part of RV black tank cleaning and maintenance.
Best practices:
- Wear gloves and wash hands after.
- Keep fresh water hoses away from sewer gear.
- Disinfect fittings and the clear elbow after each trip.
- Ventilate the area. Do not breathe aerosols from pressure wands.
- Secure children and pets away from the dump zone.
If you feel unsure, stop and reset. Slow is smooth, and smooth is safe.
Frequently Asked Questions of RV Black Tank Cleaning & Maintenance: Complete Guide
How often should I dump my RV black tank?
Dump when the tank is at least half to two-thirds full. This gives enough water weight to move solids and clean the outlet.
Can I leave my black tank valve open at a full-hookup site?
No. Liquids drain away and solids stay, causing pyramid plugs. Keep it closed until the tank is ready to dump.
What causes false readings on tank sensors?
Paper and residue on the sensor probes cause false full readings. Backflush and enzyme treatments help clean films so sensors work.
Is bleach safe for RV black tanks?
Use only if your manufacturer allows it and only in a very dilute mix. Bleach can harm seals and kill helpful bacteria, so enzymes are safer.
What toilet paper should I use in an RV?
Use septic-safe, fast-dissolving paper. More important than the brand is plenty of water with each flush.
How much water should I add after dumping?
Add 3–5 gallons to cover the tank floor before use. This prevents dry piles and helps break down waste.
My tank smells even after dumping. What now?
Check the toilet bowl seal for water, the roof vent for blockages, and use an enzyme treatment. Ensure the tank has some water, not air only.
Conclusion
You now have a clear plan for RV black tank cleaning and maintenance: use plenty of water, dump at the right time, backflush often, and choose safe treatments. With a simple routine, you avoid clogs, odors, and sensor lies, and you protect your valves and seals for years.
Make this week the one you set your schedule, stock your kit, and do a clean reset. If you found this RV Black Tank Cleaning & Maintenance: Complete Guide helpful, subscribe for more road-ready tips, share it with a camping friend, or leave a question so I can help you dial in your setup.