
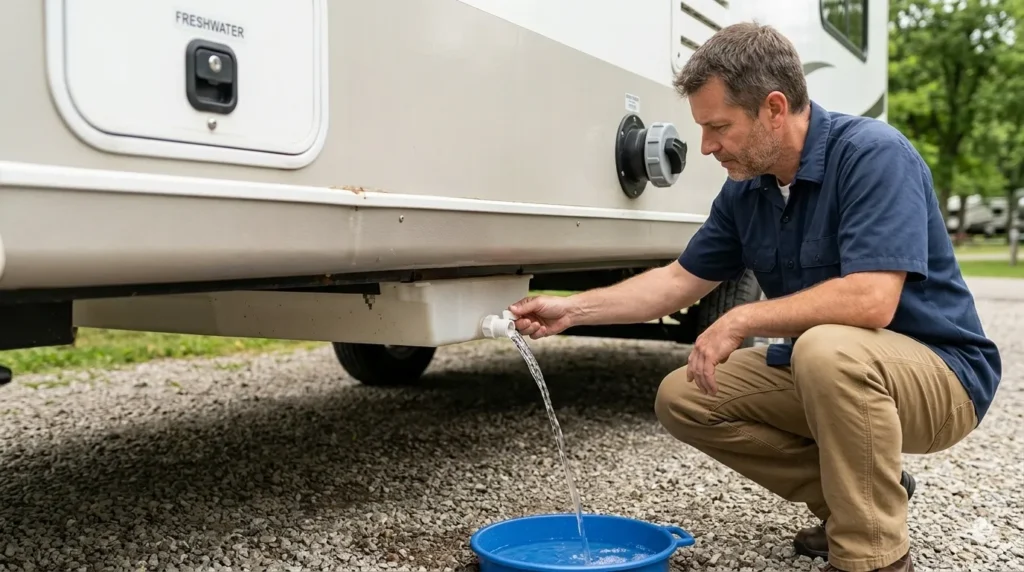
A Camper Tank Flush helps rinse leftover waste from your RV’s black-water holding tank after dumping—but doing it safely matters more than running extra water through the tank. Whether you’re at a U.S. campground or an RV dump station, start with a securely connected sewer hose, empty the black tank, and follow your manufacturer’s instructions for the approved flushing system. Use a dedicated rinse hose, never your drinking-water hose, and keep the black-tank drain valve open during flushing unless your manual explicitly directs otherwise. Never leave the water running unattended.
After flushing, drain the gray tank to help rinse the sewer hose. Remember, flushing can remove residual waste, but it does not sanitize the tank, clear every blockage, or guarantee accurate tank-level readings. This guide covers the recommended sequence, essential equipment, and warning signs that mean you should stop adding water and investigate before continuing.

What Does a Camper Tank Flush Clean?
A camper tank flush cleans the waste-holding tank, most often the black tank. It is not the same as cleaning or sanitizing the fresh-water system.
Most travel trailers, fifth wheels, and motorhomes have these separate systems:
| System | What it holds | What cleaning involves |
|---|---|---|
| Black-water tank | Toilet waste and flush water | Dumping, rinsing, and adding the specified amount of water before use |
| Gray-water tank | Water from sinks and showers | Dumping and, when needed, cleaning under the RV maker’s instructions |
| Fresh-water tank | Water supplied to onboard faucets and fixtures | A separate potable-water cleaning and sanitizing process |
A built-in black-tank flush uses a separate water inlet to feed a spray nozzle inside the waste tank. Some campers lack this feature. Others have more than one waste tank, so one flush inlet may not clean every tank.
Check the labels before connecting a hose. A city-water inlet supplies the camper’s fresh-water plumbing. A black-tank flush inlet serves the waste system. They are not interchangeable.
What You Need Before Flushing a Camper Tank
Use an approved dump station or a campsite sewer connection, along with equipment kept separate from your drinking-water gear.
Have these items ready:
- A sound RV sewer hose with secure fittings.
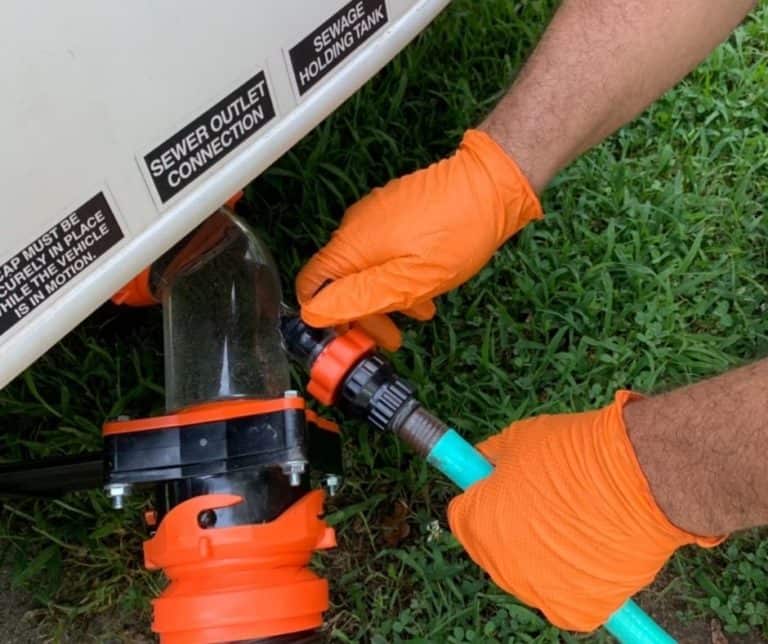
- An approved sewer-inlet adapter.
- A dedicated, clearly marked non-potable rinse hose.
- Disposable gloves.
- Eye protection where splashing is possible.
- The owner’s manual for your camper and any separate flush-system instructions.
- A clear sewer elbow, if desired, to help you observe drainage.
A clear elbow can show whether waste is still flowing. It cannot prove that the tank is clean or germ-free.
Confirm That the Site Allows Rinsing
Check the posted rules before you start. Some U.S. dump stations limit rinse time, prohibit certain hose connections, or provide a rinse faucet that is not suitable for your planned use.
Use only an authorized water connection. Do not connect waste-service equipment to a drinking-water fill point unless the facility expressly allows that use and provides the required protection.
Keep Drinking-Water Equipment Separate
Never use your fresh-water hose for a black-tank flush. Mark the rinse hose and store it apart from drinking-water hoses, filters, and fittings.
A built-in flush system may include a vacuum breaker or another backflow-protection device. Do not remove, bypass, or assume that device makes a contaminated hose safe for potable-water use.
Do not flush a tank when you cannot confirm that it can drain. If the black tank appears full but nothing exits when its valve opens, adding more water may cause an overflow.

How to Flush a Camper Black Tank Step by Step
The following sequence applies to a typical gravity-drain RV with a built-in black-tank flush. Macerator systems, cassette toilets, portable waste tanks, and some multi-tank layouts require different steps.
1. Park and Prepare the Dump Connection
Park securely within reach of the sewer inlet. Set the parking brake and use wheel chocks as needed.
Put on gloves. With the waste valves closed, attach the sewer hose firmly to the RV outlet and the approved sewer connection. Support the hose so waste can drain without deep low spots.
2. Empty the Black Tank First
Open the correct black-tank valve and let the tank drain. Keep the gray-tank valve closed for now.
If the tank should contain waste but little or nothing comes out, stop and check the valve identification and hose path. Do not start the flush to force a suspected blockage through.
3. Connect the Dedicated Flush Hose
With the water supply off, connect the non-potable rinse hose to the inlet labeled for the black-tank flush. Follow any pressure limit, connection rule, or backflow requirement in the manual.
Do not assume a pressure limit for the city-water inlet also applies to the flush inlet.
4. Run the Flush With a Drain Path Open
For the standard open-valve method, leave the black-tank drain valve open and turn on the flush water. Stay at the controls and watch the discharge.
Never close the black-tank valve while the flush is running unless the exact system instructions expressly permit a controlled procedure. A closed valve turns the rinse into a tank fill. If the tank overfills, sewage can back up through the toilet or other connected plumbing.
Do not rely on a tank gauge or timer to prevent an overflow.
5. Stop the Water and Let the Tank Drain
Turn off the flush-water supply first. Let the remaining water drain, then close the black-tank valve.
There is no universal flush time. Tank shape, nozzle design, residue, water flow, and station rules all affect the process. Follow the manual rather than treating a fixed number of minutes as a safety rule.
6. Drain the Gray Tank Last
Open the gray-tank valve after the black tank is closed. Gray water helps carry remaining waste through the shared sewer hose.
Gray water still contains contaminants. It does not disinfect the hose or make the fittings safe to handle without care.
7. Disconnect and Store the Equipment
Close all waste valves before removing the sewer hose. Disconnect the hose from the RV while keeping its far end at the sewer inlet, then drain it fully.
Rinse equipment only where permitted. Cap the RV outlet, store waste-service gear apart from potable-water gear, remove your gloves, and wash your hands with soap and water.
8. Add Water Before the Next Use
If you will keep using the camper, add the amount of water specified by the RV or toilet manufacturer through the toilet. Add a compatible holding-tank treatment only if desired or required by the instructions.
The goal is to avoid starting the next use with a dry tank bottom. Storage and winterization may require a different final step.

What If Your Camper Has No Built-In Tank Flush?
Use only a cleaning method compatible with your toilet, tank, and drain layout. Two common options are a toilet cleaning wand and a drain-mounted rinse adapter, but neither works in every camper.
| Method | When it may help | Main limit |
|---|---|---|
| Toilet cleaning wand | The toilet provides suitable access to the black tank | Toilet valves, bends, and tank layout may restrict access |
| Drain-mounted rinse adapter | The outlet and tank plumbing allow useful rinse flow | Elbows and long pipe runs may prevent water from reaching tank deposits |
| Water added through the toilet | A manual-approved rinse or water recharge | It does not provide the same spray coverage as a built-in nozzle |
Do not force a wand through a toilet mechanism. Keep a supply hose out of standing waste, protect against backflow, and follow the tool’s instructions.
A drain-mounted adapter is not proof that water reaches the whole tank. If waste remains despite normal rinsing, more pressure or more water is not automatically the answer.

How Often Should You Flush, and How Much Water Should You Use?
Flush frequency depends on use, drainage, and the manufacturer’s guidance—not a universal schedule. A rinse after dumping can help remove residue, but a lengthy rinse at every stop may waste water and hold up a busy dump-station line.
Consider a rinse when:
- Waste remains visible after the main discharge.
- The camper has had heavy use.
- The tank is being cleaned before an approved storage procedure.
- Tank readings remain inaccurate after dumping, while recognizing that rinsing may not fix the sensor fault.
Why There Is No Safe Universal Fill Time
Water added during a closed-valve rinse depends on flow rate and the tank’s actual remaining capacity.
For a hypothetical calculation, a hose flowing at 3 gallons per minute adds 15 gallons in 5 minutes. A tank that seems nearly empty may still hold waste or have less usable capacity than expected.
That calculation explains the risk; it is not a recommended filling procedure. Tank gauges can be wrong, and water pressure can change. The safer default is to preserve an open drain path during flushing and follow the exact manual.
At a full-hookup campsite, keep the black-tank valve closed between dumps unless the manufacturer directs otherwise. Leaving it open can let liquid escape while solids collect.
Troubleshooting: When a Camper Tank Flush Does Not Work
Start with the safest checks: confirm the right valve, a clear hose path, and the correct inlet. Do not use extra pressure or prolonged filling to diagnose an unknown problem.
| Symptom | Possible cause | First action |
|---|---|---|
| No discharge from a tank believed to be full | Wrong valve, obstructed hose, blocked outlet, or valve fault | Shut off rinse water and check labels and the external hose |
| Water enters the flush inlet, but little exits | Restricted drain, closed valve, or wrong tank selected | Stop the water immediately and verify the drain path |
| No water appears to enter the flush system | Supply fault, kinked hose, failed device, or clogged nozzle | Turn off the supply and check accessible connections |
| Water leaks inside the camper during flushing | Failed fitting, hose, vacuum breaker, or other plumbing fault | Stop flushing and arrange inspection |
| Gauge still reads full after draining | Residue on some sensor types, wiring fault, or sensor failure | Check the sensor-specific troubleshooting instructions |
| Odor persists after rinsing | Low water, residue, vent trouble, toilet-seal issue, or a leak | Check accessible seals, water levels, and visible plumbing |
When to Stop and Get Help
Stop if sewage backs up, a hidden space becomes wet, the tank will not drain, or a valve cannot be operated normally. A qualified RV technician should assess inaccessible plumbing faults, damaged tanks, and persistent blockages.
Do not crawl under an unsecured camper, loosen fittings that may hold sewage, or pressurize the holding tank to clear a clog.
A holding tank is not a pressure vessel. Compressed air and improvised pressure-cleaning methods can damage the system and expose people to waste.
Common Mistakes That Cause Trouble
The most serious errors involve overfilling, cross-contamination, and using products that do not suit the system.
Avoid these practices:
- Leaving a running flush unattended. An open drain can still become restricted.
- Using the drinking-water hose. Dedicated gear reduces the chance of contaminating fresh-water equipment.
- Assuming a rinse sanitizes the tank. The waste system remains contaminated.
- Mixing tank chemicals. Never mix bleach with ammonia, acids, or other cleaners.
- Using household drain openers. They may be incompatible with RV plumbing, seals, and existing tank chemicals.
- Treating the gauge as a safety control. A false reading can hide the risk of overfilling.
- Dumping outside an approved location. Use authorized disposal facilities and follow local rules.
A tank treatment may help manage waste or odor under its labeled conditions. It does not replace water, proper dumping, or repair of a blocked system.

Frequently Asked Questions
Can I flush the tank at a dump station with no rinse faucet?
You can dump without performing a full tank rinse. Use the station as directed, then rinse later at a location with an authorized connection. Do not improvise by using a potable-water fill faucet for waste equipment.
Does the black-tank flush need to be winterized?
It may. The flush line, fittings, and backflow device can retain water even after the tank drains. Follow the camper’s winterization instructions; draining the holding tank alone may not protect the flush plumbing.
Can I use the built-in black-tank flush to clean the gray tank?
Usually not. A flush inlet serves the tank to which it is plumbed. Use it for a gray tank only if the manufacturer identifies that function.
Does clear rinse water mean the tank is completely clean?
No. Clear discharge shows that fewer visible solids are leaving at that moment. Residue can remain on surfaces or outside the nozzle’s spray pattern, and the tank is not disinfected.
Should I add water after flushing before long-term storage?
Use the storage procedure for your camper and climate. The water charge used during active camping may not suit freezing weather or an extended layup. Complete any required winterization before temperatures fall below freezing.
Evidence, Sources, and Coverage Limits
This guide provides general operating guidance, not a model-specific service procedure. Live webpages and competing articles were not available for inspection during preparation, and no hands-on testing was performed. Current manual wording, individual system layouts, and site rules must be checked before use.
Use these primary-source starting points to find the instructions that control your setup:
- Winnebago manuals and diagrams: locate the manual for the correct model and year.
- Forest River owner resources: find owner information and applicable component documentation.
- Jayco owner resources: locate model-specific operating and maintenance information.
Next-Question Gap Map
These are inferred reader needs, not verified search-demand findings. Competitor coverage was not checked, so no claim is made that these topics are missing from other guides.
| Question | Reader stage and basis | Competitor coverage | Benefit and evidence needed | Priority and placement |
|---|---|---|---|---|
| What if the tank will not drain? | During use; inferred from overflow risk | Not checked | Prevent unsafe filling; exact drain and valve instructions | High; troubleshooting |
| Can rinse gear share a drinking-water connection? | Before setup; inferred from contamination risk | Not checked | Protect potable-water equipment; facility rules and backflow instructions | High; prerequisites |
| Must the flush line be winterized? | After use; inferred from retained-water risk | Not checked | Prevent freeze damage; model-specific winterization procedure | High in freezing climates; FAQ |
Conclusion
A safe camper tank flush starts with the right inlet, dedicated rinse gear, and a secure drain path. Dump the black tank first, flush as the manual directs, shut off the rinse water before closing the drain, and empty the gray tank last.
Before your next trip, find the waste-system section in your camper’s manual and mark the flush inlet and rinse hose. If the tank will not drain or water appears where it should not, stop adding water and diagnose the fault before continuing.