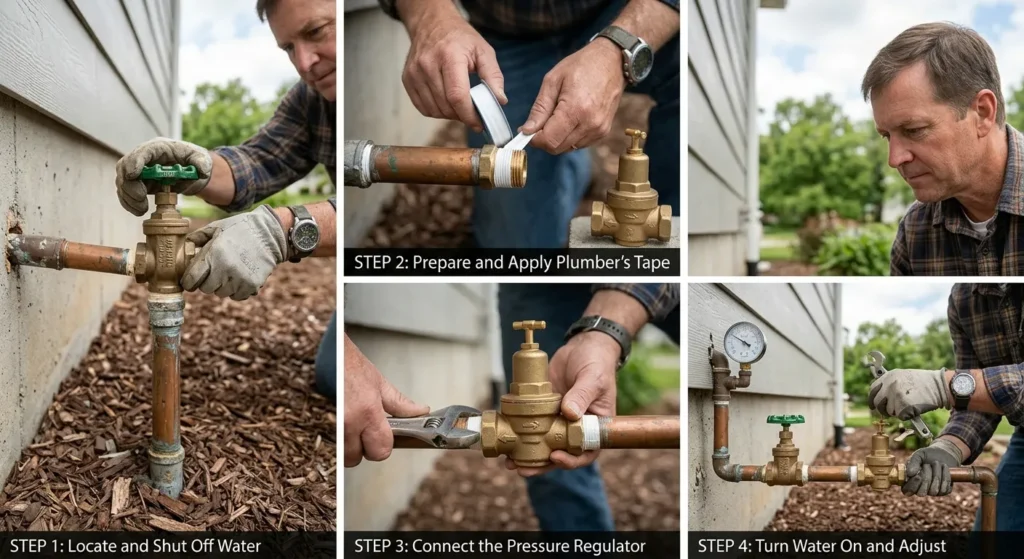
To install a water pressure regulator in a U.S. home, confirm the incoming pressure, check local permit rules, shut off and drain the water supply, and fit the regulator into the main supply line with its arrow pointing toward the house. Then restore water slowly, check for leaks, and set the downstream pressure within the valve manufacturer’s range and local code limits.
In the United States, widely used model plumbing codes call for pressure reduction when a building’s static water pressure exceeds 80 pounds per square inch (psi). Your city or county may adopt a different code edition or make local changes. Check with the local building department before cutting the main water line.
This guide covers a whole-house pressure-reducing valve, often called a water pressure regulator or PRV. Replacing an accessible regulator with matching union connections can be a manageable plumbing job. A first-time installation, corroded piping, or work near a meter, electrical bonding connection, or fire sprinkler supply calls for a licensed plumber.
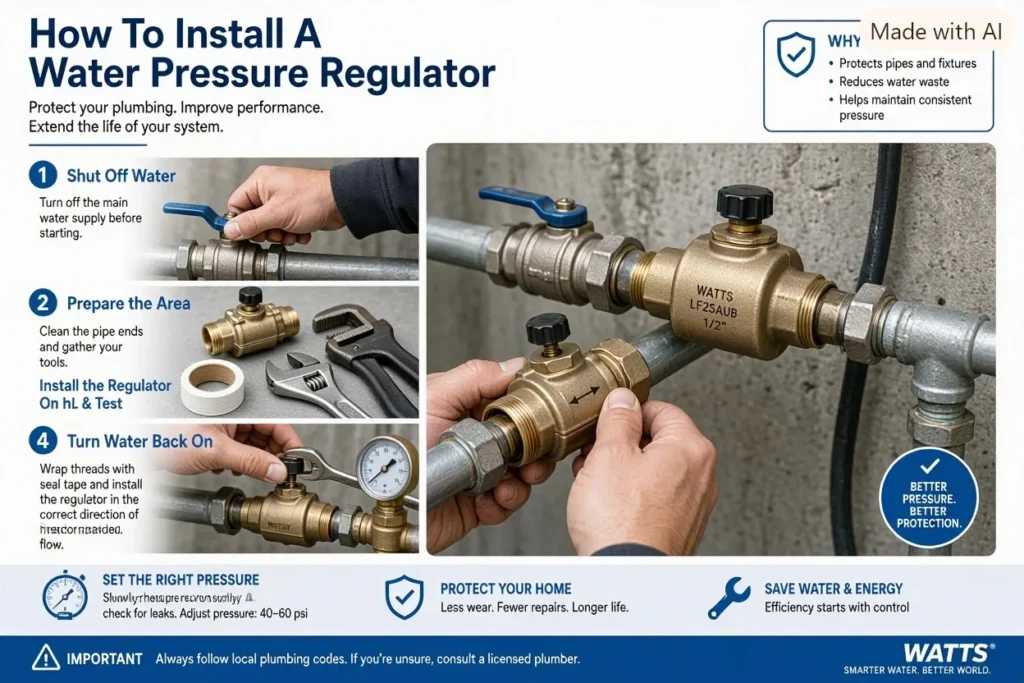
What Does a Water Pressure Regulator Do?
A water pressure regulator reduces higher supply pressure to a controlled pressure for household plumbing. It works like an automatic gate: an internal spring and diaphragm adjust the opening as water demand changes.
A regulator does not create pressure. If the supply pressure is too low, installing or adjusting a PRV will not solve the underlying problem.
Also, pressure and flow are not the same:
- Pressure, measured in psi, is the force available to move water.
- Flow, often measured in gallons per minute (gpm), is the volume moving through the pipe.
- Static pressure is measured when no water is running.
- Flowing pressure is measured while a fixture is open.
A home can have high static pressure yet poor shower flow because of a clogged filter, small pipe, partly closed valve, or failing regulator. Raising the pressure setting may hide the symptom without fixing the cause.
Before You Start: Confirm the Pressure and Installation Requirements
Measure pressure first, then confirm that the proposed valve and location suit your plumbing. Do not assume that pipe noise or a weak shower proves you need a new regulator.
Measure the home’s water pressure
Use a water pressure gauge made for a hose-thread connection. A gauge with a maximum-reading pointer can help reveal pressure increases that occur while you are not watching.
- Attach the gauge to a cold-water hose bibb or other suitable test connection.
- Confirm that the connection is downstream of the existing regulator, if there is one.
- Turn off faucets and water-using appliances. Wait for toilets and other automatic loads to finish filling.
- Open the test connection and record the static pressure.
- Repeat at different times, especially if the problem is intermittent.
A hose bibb may branch off before the regulator. A reading from that outlet does not show the pressure delivered to regulated indoor fixtures.
Use these readings as a starting point, not a complete diagnosis:
| Reading or symptom | What it may mean | Next check |
|---|---|---|
| Static pressure above 80 psi | Excess supply pressure, a failed PRV, or thermal expansion | Confirm gauge location and whether pressure rises during water heating |
| Stable pressure around 50–60 psi | A common residential operating range | Check fixture performance and local requirements |
| Adequate static pressure but a large drop during use | A restriction, undersized valve, or limited supply | Check shutoffs, filters, pipe condition, and valve sizing |
| Pressure rises after the water heater runs | Thermal expansion in a closed system | Have the expansion-control arrangement checked |
| Pressure slowly approaches upstream pressure with no water use | Possible PRV seat leakage, though thermal expansion can look similar | Compare readings under controlled conditions |
The 2024 International Plumbing Code, Section 604.8, uses 80 psi as the threshold for pressure reduction. This is a model-code requirement, not proof of the rule adopted at your address.
Check permits, ownership, and access
Ask the local building department whether a permit or inspection is required and whether homeowners may perform the work. Ask the water utility which shutoff you may operate.
Do not force a stuck valve or operate utility-owned equipment without permission. If the home’s shutoff does not stop the water, arrange a proper shutdown before removing anything.
Choose a suitable regulator
Use a regulator listed for potable-water service and accepted by the local authority. Check its published:
- Maximum inlet pressure and temperature.
- Adjustable outlet-pressure range.
- Permitted installation orientation.
- Flow capacity and pressure-loss data.
- Connection type and service-clearance needs.
- Applicable lead-free and drinking-water certifications.
Matching pipe diameter alone does not confirm the right valve size. A regulator must also handle the home’s expected flow without excessive pressure loss.
Decide whether this is a DIY job
A like-for-like replacement is the clearest DIY case when the old valve has usable unions, the shutoff works, and the pipe is sound.
Hire a plumber when the work involves:
- A new valve location or major pipe changes.
- Galvanized steel, badly corroded pipe, or damaged threads.
- Soldering near framing or other combustible material.
- Underground work or a flooded meter box.
- A shared fire sprinkler supply.
- Uncertain grounding or bonding on metal water piping.
Cutting metal water pipe can interrupt an electrical bonding path. Do not remove bonding clamps or assume the pipe is safe to cut.
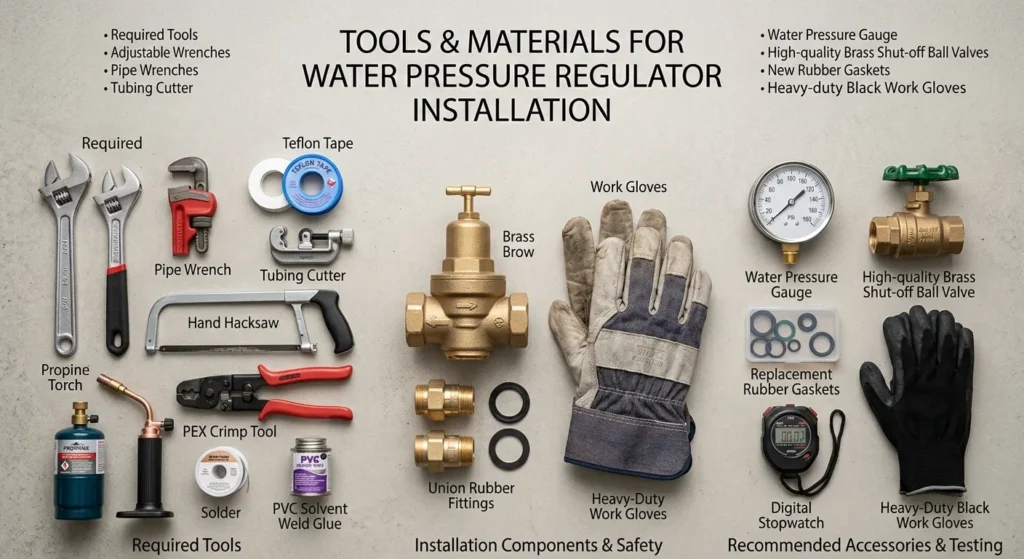
Tools and Materials You May Need
Choose tools and fittings for the actual pipe material and regulator connections. A threaded-union replacement needs different equipment from a new installation in copper or PEX.
Typical supplies include:
- A correctly selected potable-water regulator.
- A water pressure gauge.
- Two suitable wrenches for opposing force.
- Approved adapters, unions, and replacement union seals.
- Pipe supports, if needed.
- Thread sealant approved for the fitting material and potable water.
- A bucket, towels, and a flashlight.
- Eye protection and gloves.
- Pipe-specific cutting and joining tools, if alterations are planned.
Read the instructions for the exact regulator before buying fittings. Some valves use union gaskets; others have different sealing arrangements.
Apply thread sealant only where the joint design calls for it. Do not put tape or pipe compound on union gasket faces, compression sealing surfaces, or other connections that seal without it.
How to Install a Water Pressure Regulator Step by Step
The sequence below applies most directly to replacing an accessible regulator with compatible union connections. A first-time installation requires a piping layout and approved joining method suited to the home.
1. Plan the location and flow direction
Locate the incoming water service, the homeowner-operated main shutoff, and any existing regulator. Trace nearby branches so you know which lines will receive reduced pressure.
A regulator commonly sits downstream of the main shutoff and upstream of the household distribution piping. Its exact position relative to a meter, backflow device, filter, irrigation branch, or fire sprinkler connection depends on local rules and system design.
Leave room to adjust the valve, remove its strainer if fitted, and service or replace it. Do not bury it behind a finished wall without suitable access.
2. Check thermal expansion control
Before installing the valve, determine whether the home needs a thermal expansion control device.
Water expands as it heats. If a check valve, backflow preventer, or regulator prevents that expanded water from moving back toward the supply, pressure can rise inside the home. A properly selected and installed potable-water expansion tank is one common control method.
Some regulators include a thermal bypass feature, but a bypass is not a universal substitute for an expansion tank. It cannot provide the intended relief if another device blocks the return path or if system pressure conditions prevent bypass flow.
Have a plumber check the arrangement if it is unclear. Never cap or plug a water heater’s temperature-and-pressure relief discharge.
3. Shut off the water and relieve pressure
Close the approved supply shutoff. Open a downstream cold-water faucet and, where practical, a lower fixture to release pressure and drain the work area.
Wait until flow stops. If water continues to run, the shutoff may not be holding.
Follow the water heater manufacturer’s instructions if the work could drain or expose heating elements. Never energize an electric water heater unless the tank is full.
4. Remove the old regulator or prepare the pipe
For a union-connected replacement, place a bucket below the valve. Use two wrenches: one to turn the connection and one to hold the valve or adjoining fitting steady.
Avoid transferring torque into the wall, meter assembly, or unsupported pipe. Inspect the union faces, adapters, threads, and nearby pipe before reusing them.
Do not assume a new regulator will fit the old unions because its nominal size matches. Confirm the exact connection geometry and approved seals.
For a first-time installation, measure the full assembly length, including adapters and unions. Make clean cuts, remove burrs, and prevent debris from entering the supply. Any flushing before valve installation must use a controlled discharge point that cannot flood the work area.
5. Install the regulator in the correct orientation
Find the flow arrow cast or marked on the valve body. The arrow must point from the water supply toward the house.
Install the valve only in an orientation allowed by its manual. Keep it accessible and protect it from freezing where required.
Fit the approved seals and connectors, and tighten according to the manufacturer’s instructions. Do not use the regulator to pull misaligned pipes into place.
Support the piping so its weight does not hang from the regulator. Excess force, strain, or overtightening can damage the valve or create a later leak.
6. Restore water slowly
Leave a downstream cold-water faucet partly open. Slowly open the supply shutoff so the line fills without a sudden surge.
As air clears and flow becomes steady, close the faucet. Inspect the valve body, union joints, and all disturbed connections.
If a joint leaks, shut off the water and relieve pressure before correcting it. Do not keep tightening a pressurized joint in the hope that the leak will stop.
7. Adjust the outlet pressure
Attach the gauge to a confirmed downstream connection. Check the regulator’s instructions before turning the adjustment screw.
On many models, turning the screw clockwise raises the set pressure and counterclockwise lowers it. The exact procedure, adjustment range, and locking method are model-specific.
Where the manual calls for a static-pressure check:
- Close water-using fixtures and appliances.
- Loosen the adjustment locknut, if fitted.
- Make a small adjustment.
- Briefly run a cold-water fixture, then close it.
- Read the settled pressure.
- Repeat as needed, then secure the locknut as directed.
Releasing some water matters when lowering the setting: pressure already trapped downstream may remain above the new setpoint until water flows.
For many homes, 50–60 psi is a reasonable starting range, not a universal requirement. Choose a setting that meets local rules, the valve’s limits, and the home’s needs.
8. Test under normal use
Run a faucet, shower, and another normal household load while watching the gauge. Some pressure drop under flow is expected.
Check that fixtures work well without a severe drop, chatter, or repeated surges. Then close the fixtures and confirm that static pressure settles as expected.
Recheck for leaks after normal water use and a water-heater cycle. A joint that is dry at startup may reveal a slow seep later.
How to Tell Whether the Installation Worked
A successful installation controls pressure, supplies normal fixture flow, and stays leak-free. One acceptable gauge reading is not enough.
Look for all of these signs:
- Static pressure stays near the intended setpoint.
- Pressure remains within local limits.
- Normal household use does not cause an excessive pressure drop.
- The regulator does not chatter or repeatedly surge.
- All disturbed joints remain dry.
- Pressure does not rise excessively during water heating.
For example, reducing an inlet pressure of 110 psi to a 55 psi static outlet setting shows that the valve is reducing pressure. If the outlet then falls to 20 psi during ordinary use, the job still needs investigation. Valve capacity, debris, pipe restrictions, and supply conditions could affect that result.
If a maximum-reading gauge shows a later pressure increase, note when it happened. A rise tied to water heating points toward a different check than a steady increase while the heater is off.
Troubleshooting After Installation
Start with valve position, gauge location, and visible leaks before changing the pressure setting. These checks are useful and less likely to create a second problem.
| Problem | Possible causes | What to do |
|---|---|---|
| No water reaches fixtures | Closed shutoff, reversed valve, severe blockage | Check valve positions and the flow arrow; isolate before disassembly |
| Pressure is too low everywhere | Low setting, partly closed valve, clogged strainer, insufficient inlet pressure | Verify supply conditions and follow the valve’s service procedure |
| Static pressure is normal, but flow is poor | Restricted piping, undersized regulator, dirty filter | Compare upstream and downstream conditions during flow |
| Pressure slowly rises with no water use | Debris or wear at the valve seat; thermal expansion | Check whether the rise tracks water heating; arrange service if unclear |
| Pressure rises after the heater runs | Missing, failed, isolated, or incorrectly charged expansion control | Have the expansion system checked |
| A union leaks | Damaged seal, misalignment, incompatible parts | Shut off, depressurize, and inspect the connection |
| The valve hums or chatters | Debris, sizing issues, unstable conditions, loose piping | Check supports and obtain model-specific troubleshooting guidance |
Do not treat repeated adjustment as a repair. A regulator that will not hold its setting may need cleaning, rebuilding, or replacement.
Expansion-tank testing also needs the correct procedure. Checking or adjusting the air charge while the water side remains pressurized can give a misleading result.
Common Mistakes to Avoid
The main risks are wrong placement, damaged joints, and pressure problems left unresolved. Avoid these shortcuts:
- Using an upstream hose bibb to judge outlet pressure. Trace the piping first.
- Installing the valve backward. Follow the body’s flow arrow.
- Choosing by pipe size alone. Check capacity and pressure-loss data.
- Ignoring thermal expansion. A regulator does not control every cause of rising pressure.
- Reusing incompatible union parts. Confirm the exact fit and seal.
- Overtightening fittings. Follow the joint and valve instructions.
- Setting pressure above local limits to improve one weak fixture. Check that fixture for restrictions instead.
- Blocking service access. Leave room for adjustment and repair.
- Skipping leak checks after the heater runs. Test beyond the first refill.
If the installation affects fire protection, uncertain electrical bonding, or a utility-owned component, stop and involve the appropriate professional.
Frequently Asked Questions
Does a whole-house water pressure regulator need electricity?
Most common residential mechanical regulators do not need electricity. They use supply pressure, a spring, and a diaphragm to control the outlet pressure. Electronic control systems are a different category.
Will a regulator improve low water pressure?
Not if the incoming pressure is already too low. A failed or clogged regulator can cause low pressure, so servicing that fault may help. A new regulator cannot boost pressure above the available supply.
Why is the outdoor faucet pressure still high?
The faucet may branch off upstream of the regulator. That can be intentional, but it means the outdoor line is not protected by that valve. Confirm the layout before changing the installation.
How long does a water pressure regulator last?
There is no reliable lifespan that applies to every home. Water quality, sediment, inlet pressure, use, and valve design affect service life. Monitor pressure and follow the manufacturer’s maintenance guidance rather than relying only on age.
Can I adjust the regulator without a pressure gauge?
Do not set it by feel alone. A stronger shower does not prove the pressure is within a safe or permitted range. Use a suitable gauge at a confirmed downstream connection.
Evidence, Scope, and Further Reading
Use your adopted local code and the exact valve manual as the controlling installation references. National model codes explain common requirements but do not establish what your jurisdiction has adopted.
Primary references for verification include:
- International Code Council: International Plumbing Code — the 2024 IPC, Section 604.8, addresses excessive water pressure; Section 607.3 addresses thermal expansion control.
- IAPMO: Uniform Plumbing Code — another major U.S. model code; local adoption and amendments must be checked.
- Watts water pressure-reducing valves — model-specific specifications and installation documents illustrate why orientation, adjustment, bypass operation, and service requirements must be checked by model.
- EPA: Lead in drinking water — background on lead risks and the importance of suitable drinking-water plumbing components.
Live browsing, competitor-page inspection, and hands-on testing were not available for this article. Current local code adoption, product revisions, and permit requirements therefore remain unverified.
Next-question gap map
These are inferred reader needs, not verified search-demand findings. Competitor coverage was not checked.
| Question | Reader stage and basis | Reader benefit | Evidence needed | Priority and placement |
|---|---|---|---|---|
| Does my test point measure regulated pressure? | Before installation; inferred from branch-layout risk | Prevents a false diagnosis | Piping layout and downstream gauge reading | High; pressure checks |
| Will the new valve affect thermal expansion? | Planning; inferred from closed-system behavior | Prevents pressure rise after installation | Local code, valve manual, expansion-system details | High; installation steps |
| Why is static pressure good but flow poor? | After installation; inferred from pressure-versus-flow distinction | Avoids needless adjustment | Valve flow data and measurements under demand | High; troubleshooting |
| Can I reuse the old unions? | During replacement; inferred from connection differences | Prevents leaks and incompatible assembly | Exact manufacturer connection specifications | High; removal and fitting steps |
Conclusion
Install a water pressure regulator only after confirming the pressure, checking local requirements, and selecting a valve suited to the supply and expected flow. Fit it in the correct direction, restore water slowly, and verify both static pressure and performance during use.
Your next step is to measure pressure at a confirmed downstream test point. If a new valve location, unreliable shutoff, thermal expansion issue, or uncertain piping makes the job more than a straightforward replacement, have a licensed plumber plan the installation.