The best camper sewer hose offers secure fittings, flexible reach, easy rinsing, and compact storage between trips.
A sewer hose that falls short of the dump-station inlet—or leaks at a connection—can turn a routine stop into a messy problem. In my Best Camper Sewer Hose Review, I examine the Camco RhinoFLEX 20-foot kit, the product supplied for this review, with those practical concerns in mind.
I focus on its listed features, usable reach, connection compatibility, and storage requirements to help you decide whether it suits your RV. I also distinguish manufacturer specifications from hands-on findings, so you can judge its potential benefits and limitations without mistaking advertised features for verified performance.
“Not sure which hose length, fittings, or accessories you need? Start with my RV Sewer Hose Guide before choosing a hose for your camper.”
See the key features of my featured pick at a glance.
| Product | Listed Reach | Hose Layout | Key Fittings | Storage Claim | Shop |
|---|---|---|---|---|---|
| Camco RhinoFLEX 39742 | 20 feet total | Two 10-foot sections | 360° swivel fittings; clear elbow with sewer adapter | Listed to fit a standard 4-inch RV bumper; check usable space | View on Amazon |
Disclosure: I may earn a commission from qualifying purchases through the links in this article. This review assesses the supplied product listing, not a hands-on test. Prices, package contents, and availability can change.
Camco RhinoFLEX 20-Foot RV Sewer Hose Kit

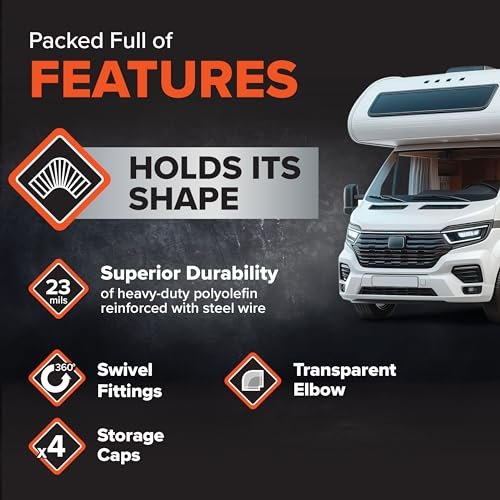
The Camco RhinoFLEX 39742 combines two 10-foot sewer hoses for up to 20 feet of listed reach. Its kit includes 360-degree swivel fittings and a clear elbow with a sewer adapter. The supplied listing also identifies it as made in the USA and designed to fit a standard 4-inch RV bumper. I see its main appeal in the split hose layout, which lets you choose the reach that suits the site.
At a close drain, one section can reduce the amount of hose you need to handle. At a more distant drain, you can join both sections instead of buying a separate extension right away. The clear elbow gives you a view of the flow, while the swivel fittings help you line up the hose ends. These features make it a strong kit to consider, but they do not replace sound seals, correct setup, or safe waste-handling habits.
Pros:
- Two useful lengths: Use one 10-foot section when the drain is close, or connect both for more reach.
- Clear view of the flow: The clear elbow helps you watch waste and rinse water pass through the outlet.
- Easier fitting alignment: The 360-degree swivel fittings help you position the ends without forcing the whole hose to turn.
- Core parts in one kit: The listed package brings together the hoses, clear elbow, and sewer adapter.
- More storage options: The listed standard 4-inch bumper fit may help save room in a storage bay.
- Less hose to rinse on short runs: A one-section setup can mean less equipment to clean and pack.
- Clear model number: Model 39742 makes it easier to check the exact kit and look for compatible parts.
Cons:
- Twenty feet is not enough for every site: A long or awkward route may still call for a compatible extension.
- Two sections add a joint: When you use both hoses, you gain reach but add another connection to inspect.
- Bumper storage needs a fit check: Actual inside space, end fittings, and the sewer adapter can affect what fits.
What Amazon Buyers Are Saying
I cannot verify current Amazon customer reviews from the supplied product details. For that reason, I will not invent buyer quotes, star averages, or claims about common praise and complaints. Before you buy, read recent verified-purchase reviews for model 39742. Look for clear reports on seal fit, hose wear, bumper storage, and use in hot or cold weather. Check that each review refers to this kit, since listings may group several sizes or versions.
My Recommendation
I recommend the RhinoFLEX 20-foot kit as a practical option for RV owners who want a flexible two-section setup. Its listed features address the main tasks well: reaching the drain, lining up fittings, and checking the flow. I would be more cautious if your usual sites need over 20 feet of hose or your RV has very tight storage. My overall editorial rating is 4.3 out of 5, based on the listed design and features, not a long-term leak or wear test.
| Review Category | Editorial Rating |
|---|---|
| Reach and Layout | 4.5/5 |
| Fitting Features | 4.5/5 |
| Flow Visibility | 4.5/5 |
| Storage Flexibility | 4.0/5 |
| Listed Feature Value | 4.0/5 |
| Overall Rating | 4.3/5 |
The value score depends on the price you see when you shop. A full kit can make sense if you need all the main parts. It may offer less value if you already own sound fittings and only need one replacement hose. I would compare the kit price with the cost of the parts you actually lack.
What This Best Camper Sewer Hose Review Evaluates
A sewer hose has one basic job: move RV tank waste to an approved drain without a spill. Yet a useful review needs to look beyond hose length. The route to the drain, joint design, storage space, and ease of cleaning all shape how well a kit fits your RV.
For this Best Camper Sewer Hose Review, I separate listed facts from practical judgments. The two 10-foot sections, swivel fittings, and clear elbow come from the supplied product information. My views on setup choices and storage trade-offs are assessments of those features. They are not claims that I camped with this exact kit.
I also avoid treating “complete kit” as a promise that you need nothing else. Your RV may still need a hose support, a site-specific drain fitting, gloves, or a separate storage bin. The right setup depends on your RV outlet, the campground drain, and the rules at the site.
No current price, verified review score, or service-life figure was supplied. Those details should not be guessed. A useful buying decision rests on what you can confirm, not on a bold claim that one hose will suit every camper.
How to Choose the Best Camper Sewer Hose
The best camper sewer hose for your trip is the one that fits your route, seals well, and stores cleanly. A long feature list matters less than those basics. Use these three checks before you place an order.
1. Match Hose Reach to Your RV and Campsites
Start at the RV’s waste outlet, not at the edge of the trailer. Measure the route from that outlet to the type of drain you use most. Leave room for turns and a smooth downward path. A hose stretched tight leaves little room to adjust a fitting or move around an obstacle.
Do not choose the longest hose just because it seems safer. Extra hose can sag, loop, or take more work to rinse. It also needs more storage space. The goal is enough reach with a small margin, not a long coil lying on the ground.
The RhinoFLEX kit’s two-section design gives you a useful choice. One 10-foot hose may work at a close hookup. Both sections provide up to 20 feet of listed reach when the drain sits farther away. In either case, check the route before you open a tank valve.
A 20-foot kit is not a guarantee of site fit. Some RV waste outlets sit well forward of the rear bumper. Some campground drains sit at the far edge of a pad. A rock, curb, or wheel can also force a longer route than a straight measurement suggests.
If you often use unfamiliar sites, a compatible extension may be worth carrying. Check both ends before buying one. Parts can share a general connection style yet still differ in fit or brand guidance. Never force a connection that does not seat with normal hand pressure.
My simple rule is to plan for your common sites first. Then decide how much backup reach makes sense. This keeps the kit useful without filling a storage bay with hose you rarely need.
2. Check Fittings, Seals, and Drain Fit
Length gets most of the attention, but joints deserve just as much care. Each connection must seat fully and hold its seal. A good hose cannot make up for a damaged gasket or a fitting that locks only partway.
Inspect the RV’s waste outlet before you order. Note its shape, condition, and clearance from nearby parts. A low outlet may leave less space for the hose to slope toward the drain. A tight service bay can also make a large fitting harder to grip.
The listed 360-degree swivel fittings are a useful feature here. They let you change the fitting’s position as you line up the hose. That can reduce the need to twist the full hose run. Still, a swivel feature does not prove that a joint is leakproof.
Check seals for grit, cracks, flat spots, or signs of wear. Make sure the locking points are intact. If a fitting feels loose, stop and find the cause before dumping. More force is not a sound fix for the wrong fit or a failed seal.
At the drain end, confirm that the supplied sewer adapter suits the site. Campground inlets can differ in size and layout. Some sites also set rules for how a sewer connection must seal or be supported. Ask the host if you are unsure.
The clear elbow adds a helpful view of the flow. It can show when waste slows and when rinse water begins to look clearer. Treat it as a viewing aid, not proof that the tank is fully clean. Residue can remain in the tank even when the water at the elbow looks clear.
3. Balance Storage, Care, and Total Cost
Think about where the hose will go before you think about its color or brand. Wet sewer gear needs a dedicated place away from drinking-water hoses and clean supplies. A kit that drains and stores neatly can be easier to live with than one that only looks good on a product page.
The supplied listing says the RhinoFLEX kit fits a standard 4-inch RV bumper. That is useful, but measure your actual bumper space. Check the inside width, usable length, openings, and any sharp edges. A bumper’s outside size does not tell the full story.
Also check how the end fittings fit through the opening. The sewer adapter may need its own storage spot. Do not assume that every part of a kit fits inside the same bumper just because the hose does. Test the fit without forcing or scraping the parts.
If your RV lacks suitable bumper space, a dedicated sewer-hose carrier may work better. A washable bin can also keep dirty gear apart from other items. Follow your RV’s storage guidance and keep the load secure for travel.
Compare the full cost of a working setup. That can include a support, an extra seal, a rinse hose, and storage. A low-priced hose may not be the cheapest choice if it lacks parts you need. On the other hand, a large kit is not a bargain if half its parts stay unused.
For this Best Camper Sewer Hose Review, I give more weight to useful features than to bundle size. Buy for the job you need to do. Then keep the hose clean, dry it as well as practical, and inspect it often. Good care helps, but no care routine makes a damaged hose safe.
How to Set Up an RV Sewer Hose Safely
A sound setup starts before you remove the outlet cap. Read your RV owner’s manual and the instructions for the hose and tank system. Those instructions take priority over general tips. Follow all dump-station and campground rules as well.
- Put on disposable gloves. Keep clean supplies out of the waste-handling area.
- Check that the tank valves are closed. Position a catch container if your RV’s instructions call for one before removing the cap.
- Inspect the hose and seals. Look for cracks, pinholes, worn spots, loose parts, and trapped grit.
- Choose the hose length. Use the shortest setup that reaches without pulling tight or making sharp bends.
- Attach both ends securely. Connect the RV end and seat the drain adapter as the product instructions direct.
- Support the run where needed. Aim for a steady slope toward the drain and avoid low spots.
- Check each joint. Make sure the locks are fully engaged before opening a valve.
- Dump as your RV maker directs. Stay close and watch for leaks or a hose that shifts.
- Rinse, drain, and pack safely. Keep sewer equipment separate from fresh-water gear.
Many RV owners empty the black tank before the gray tank. That lets gray water help carry waste out of the hose. Follow your RV maker’s process, though, since tank layouts and flush systems can differ.
At a full-hookup site, do not assume the black-tank valve should stay open. In many RV systems, leaving it open lets liquid drain away while solids remain. Keep to the tank maker’s advice for holding and dumping waste.
Use a dedicated hose for sewer rinsing. Do not use your drinking-water hose for this task. Keep dirty fittings away from potable-water outlets, hose ends, and storage bags. Gloves also do not replace handwashing after you finish.
If you spot a leak, close the tank valve if you can do so safely. Do not try to hold a leaking joint together while waste continues to flow. Follow the site’s spill process and replace or repair the failed part before trying again.
Do You Need a Sewer Hose Support?
A hose support can help keep a steady slope from the RV to the drain. Without one, a long hose may dip between high points. Those low spots can hold waste and rinse water, which adds weight and makes cleanup harder.
A support can also lift the hose off rough ground. That may reduce contact with sharp stones or hot surfaces. It does not make the hose safe to step on or drive over. Keep the whole run out of traffic paths where possible.
Some campgrounds require sewer hoses to stay off the ground. Check the rules before arrival if you plan to leave the hose connected. A support is not listed in the supplied RhinoFLEX product details, so do not assume one comes with this kit.
Choose a support that suits the hose length and the height of your RV outlet. Make sure it holds the run without sharp bends. If the drain sits too high for gravity flow, a support alone cannot solve that problem. You may need a different site or a system designed for that task.
How to Clean and Store a Camper Sewer Hose
Cleanup affects the next dump as much as the last one. A hose packed with trapped water can spill when you take it out. A dirty seal can also cause trouble the next time you try to make a tight joint.
After dumping, rinse the hose as the maker directs. Use the approved drain and a dedicated rinse-water source. Lift sections with care to guide trapped water toward the drain. Avoid splashing, and do not aim rinse water toward nearby people or clean gear.
Give the fittings a close look once the hose is drained. Check for grit around seals and locking points. Do not scrape a seal with a sharp tool. If a seal is damaged, replace it with a part approved for that fitting.
Let the hose drain and dry as well as practical before storage. Use caps or other closure parts if supplied or approved for the kit. Do not assume that a closed hose is clean enough to store next to fresh-water equipment.
Store the kit where rough edges will not rub against it during travel. Road vibration can turn a small contact point into a wear spot. If you use bumper storage, check inside for burrs, rust, or a loose end cap.
Avoid harsh cleaners unless the hose maker approves them. A product that works on a hard drain pipe may not suit flexible hose or rubber seals. More chemical strength does not always mean better care.
Check the hose again before each trip. Look at the folds, the areas near the fittings, and any point that dragged on the ground. Replace damaged parts before departure rather than hoping they last through one more weekend.
Common Sewer Hose Buying Mistakes
The biggest mistake is buying by length alone. A 20-foot hose that cannot connect well or fit your storage plan is not a good match. Measure, check the fittings, and plan where the wet gear will go.
Another mistake is treating swivel fittings as a reason to skip seal checks. Swivels help with alignment. They do not cancel wear, dirt, or poor assembly. Every joint still needs a quick check before use.
Do not confuse the fresh-water system with the waste system. A sewer-hose kit does not include everything needed for safe rinsing just because it includes a drain adapter. Keep drinking-water tools separate from all sewer tasks.
It is also easy to buy an extension from a photo alone. Confirm the connection type and maker guidance first. A close visual match is not enough when the part will carry tank waste.
Finally, do not treat an old review as proof of the current package. Product pages, bundle options, and prices can change. For a 2026 purchase, check the selected model, listed contents, seller terms, and recent reviews before checkout.
Who Should Consider the RhinoFLEX 20-Foot Kit?
This kit makes the most sense for an RV owner who wants both a short and a longer hose setup. The two 10-foot sections offer that choice without making a full 20-foot run necessary at every stop. That is the feature I value most in the listed design.
It also suits a buyer who needs the core hose and drain-end parts together. A clear elbow can help a new owner see what is happening during a dump. Swivel fittings may make alignment easier in a tight space, though careful checks still matter.
I would look more closely at other options if your normal route exceeds 20 feet. I would also pause if your storage bay cannot hold the fittings or your bumper has too little usable space. A good product can still be the wrong size for your RV.
The key lesson from this Best Camper Sewer Hose Review is simple: fit comes first. Choose a hose that works with your outlet, drain route, and storage plan. Brand features help only after those needs are met.
Final Verdict: Which Should You Buy?
The Camco RhinoFLEX 20-foot kit is my pick from the supplied product for its two-section layout, swivel fittings, and clear elbow. Buy it if those features suit your RV, drain distance, and storage space.
This Best Camper Sewer Hose Review favors secure fit and easy care over extra length alone. Confirm the current kit contents and inspect each joint before use.
FAQs Of Best Camper Sewer Hose Review
Is a 20-foot sewer hose long enough for most RV trips?
A 20-foot hose can suit many sites, but not all. Measure from your RV waste outlet to the drain and allow room for bends without stretching the hose tight.
Can I use just one section of the RhinoFLEX kit?
The kit has two 10-foot sections, so you can use one when it reaches the drain. Check the supplied instructions and confirm that both ends connect securely.
Will the Camco RhinoFLEX kit fit in my RV bumper?
The listing states that it fits a standard 4-inch RV bumper. Measure your bumper’s usable inside space and check fitting clearance. The sewer adapter may need separate storage.
Should I leave my black-tank valve open at a campsite?
Generally, keep it closed until it is time to dump, unless your RV maker directs otherwise. Leaving it open can let liquid drain away while solids remain in the tank.
When should I replace my camper sewer hose?
Replace it if you find leaks, cracks, pinholes, failed seals, or damaged locking parts. Inspect it before each trip and do not rely on age alone to judge its condition.