How to Clean RV Black Tank Sensors? Rinse, soak, and use enzyme cleaners.
My tank monitor showed three quarters full for three days straight. I dumped, flushed, and checked again. Still full. But the tank was completely empty. The sensors were coated in residue and had no idea what was actually going on in there. That was the day I got serious about learning how to clean RV black tank sensors the right way.
It is a problem almost every RV owner hits eventually. The good news is it is almost always fixable without buying new sensors or calling a technician. This guide on how to clean RV black tank sensors walks you through exactly what causes bad readings, what products actually work, and the simple step by step process I use every time. If your sensors have been giving you wrong readings, keep reading.
What IS RV Black Tank Sensors?
Black tank sensors are simple contact probes in most RVs. They sit on the wall of the tank and read when liquid or waste touches them. The problem is build-up. Toilet paper, fats, and dried waste stick to the walls. That tricks the probes and shows full when the tank is not full.
Knowing how to clean RV black tank sensors starts with this fact. You must soften and lift the build-up before you rinse it away. A quick blast of water alone will not fix old film. Warm water and time help. So do the right cleaners and plenty of flow.
Signs Your Sensors Need Cleaning
False readings creep up slowly, then drive you nuts on a road day. Watch for these:
- Tank reads full right after a dump.
- Lights change when you drive or stop.
- You smell the tank even with proper vents.
- Flushing seems slow or gurgles.
- You see bits of paper in the bowl after a flush.
If you see these, it is time to focus on how to clean RV black tank sensors before a long haul.

Tools and Safe Cleaners
You do not need harsh chemicals. Strong bleach and formaldehyde can harm seals and dump stations. Use products that break down waste and keep seals happy.
- Enzyme or bacterial tank treatments. These digest waste and paper.
- Dish soap that is non-foaming and biodegradable.
- Calgon or other water softeners that help lift film.
- Built-in tank rinser or a toilet wand sprayer.
- A clear elbow for the sewer hose so you can see progress.
- Rubber gloves, eye protection, and a hose with a backflow preventer.
- A five-gallon bucket and a measuring cup.
These make it easy to start and finish how to clean RV black tank sensors with less mess.

Step-by-Step: How to Clean RV Black Tank Sensors
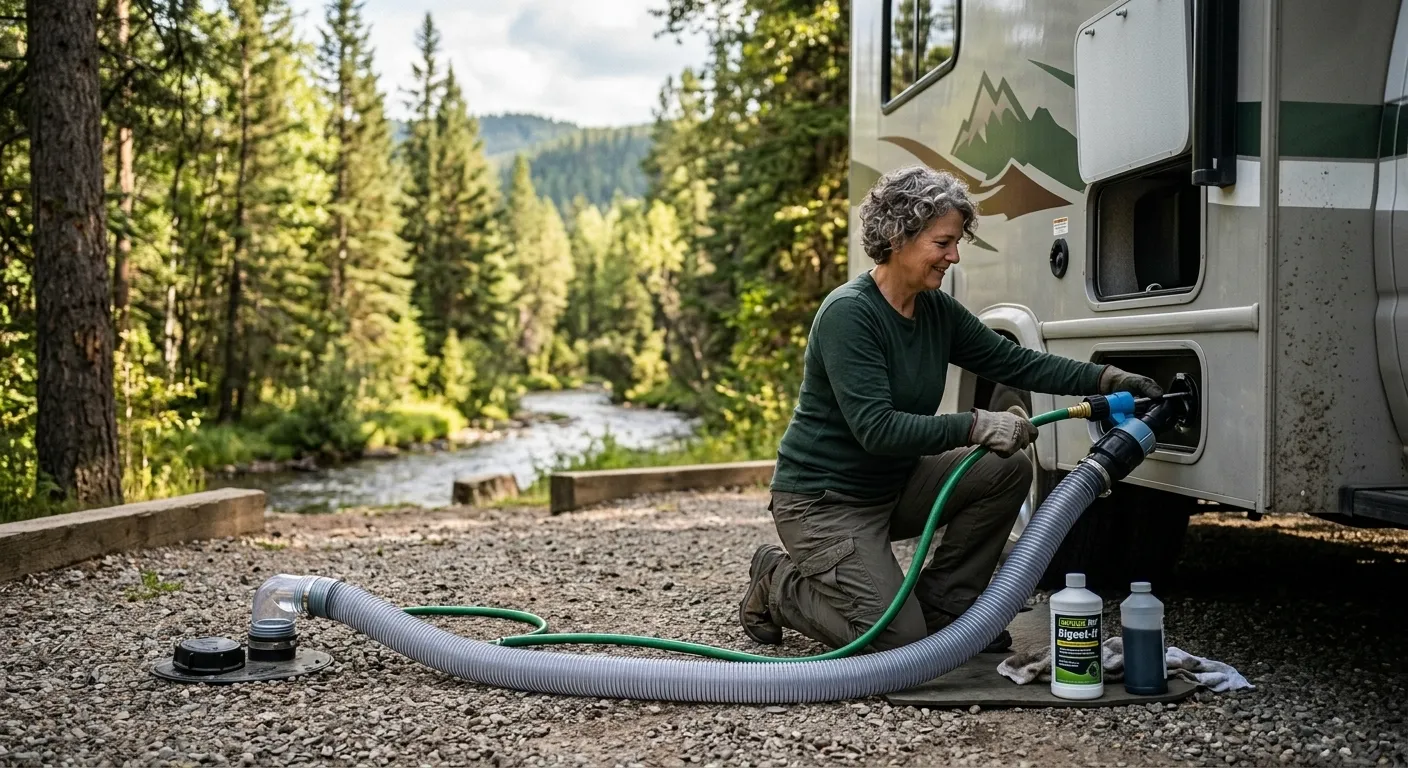
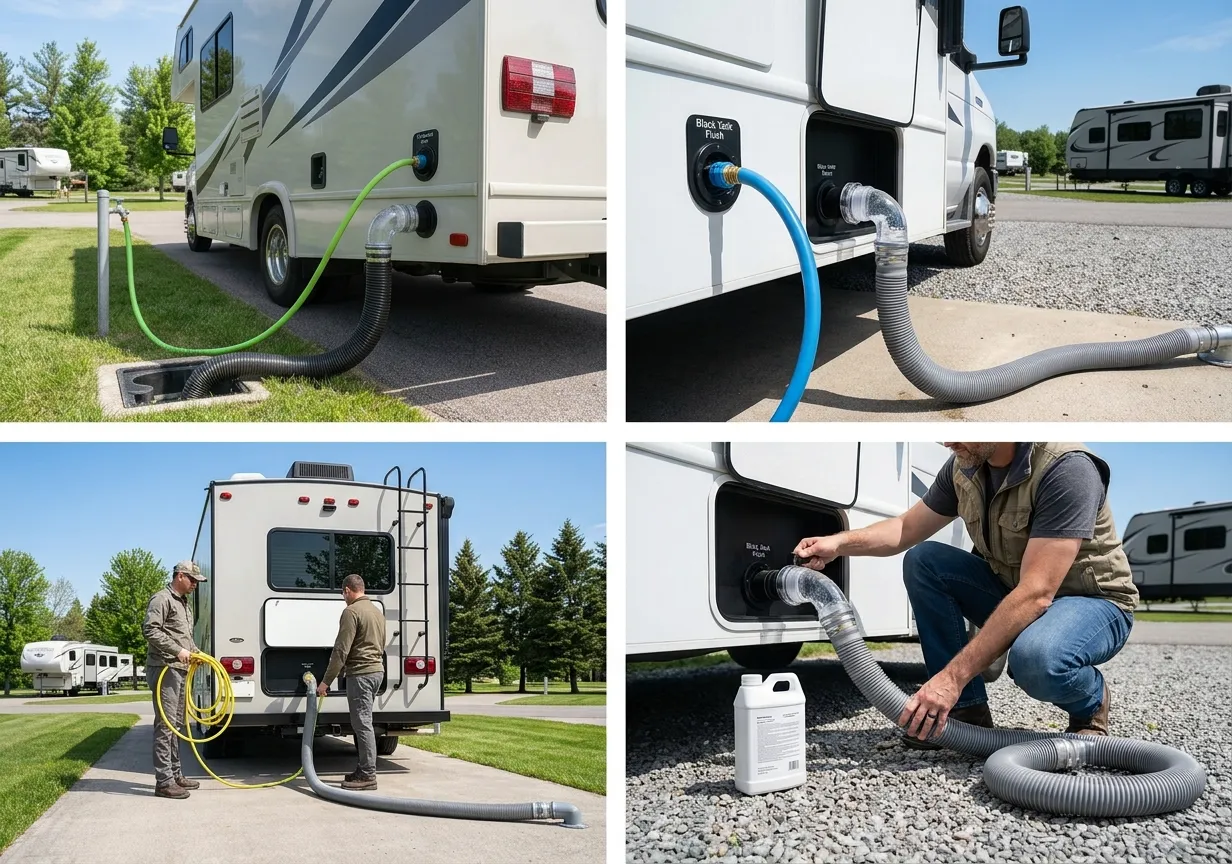
Follow this routine. It works at home with a sewer hookup or at a dump station with a rinse hose.
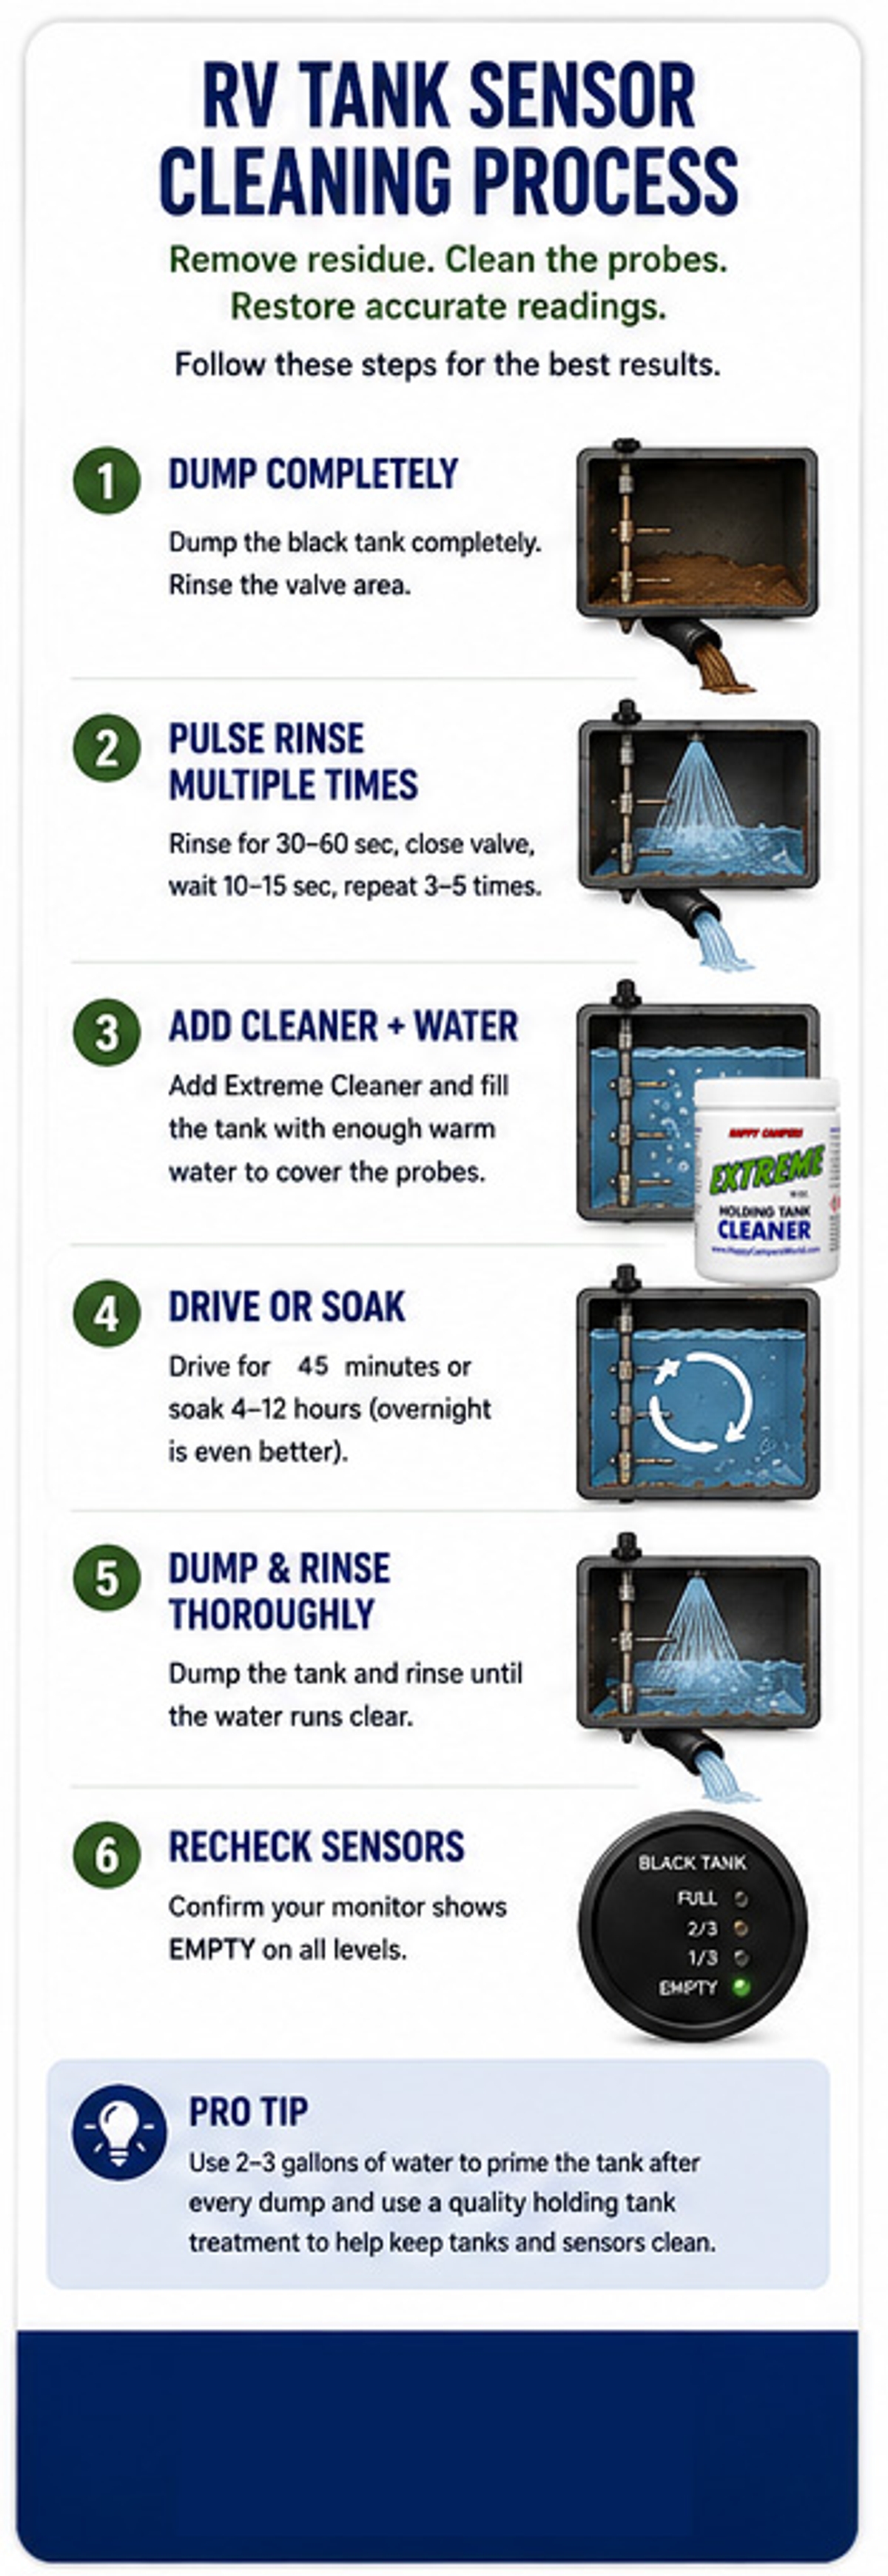
- Empty the black tank
- Hook up the sewer hose and empty the black tank first.
- Leave the gray tank closed for now. You will use it later to rinse the hose.
- Backflush or rinse
- Use the built-in rinser or a wand through the toilet.
- Rinse until the water runs clearer through the clear elbow.
- Add a cleaning mix and soak
- Close the valve. Add 3 to 5 gallons of warm water.
- Add one cup of enzyme cleaner or two ounces of high-quality bacterial treatment.
- Add a small squeeze of dish soap and one half cup of water softener.
- This mix supports how to clean RV black tank sensors by softening film.
- Drive and slosh
- If safe, take a short drive with the mix in the tank. Even a few miles helps.
- The motion scrubs the tank walls.
- Drain and rinse again
- Open the valve. Drain fully.
- Rinse with the rinser or wand until you see little to no debris.
- Test the sensors
- Close the valve. Add water to the tank in five-gallon steps.
- Watch the sensor panel as the water rises. Note where each light comes on.
- This confirms progress from how to clean RV black tank sensors.
- Finish with a holding dose
- Leave 3 to 5 gallons of water and a dose of enzyme treatment in the tank.
- Never store or travel with a dry black tank.
This process is simple. The soak and slosh step is the secret.
Deep-Clean Methods for Stubborn Sensors
Fresh build-up clears fast. Old film can take more work. Here is how I handle tough cases after busy rally weeks.
- Warm soak overnight. Fill the tank to one third with warm water. Add a strong dose of enzyme cleaner. Let it sit 8 to 12 hours. Then drive and dump.
- Wand focus. Use a right-angle wand through the toilet. Aim at the probe wall. Short bursts break loose the film.
- Double-cycle clean. Repeat the full clean two days in a row. Keep a mild treatment in the tank between cycles.
- Avoid risky tricks. The ice cube method sounds clever. It rarely helps and can jam in pipe turns. Very hot water can warp tanks. Skip it.
These steps show how to clean RV black tank sensors that have years of build-up. Take your time. You will win.

Preventative Habits to Keep Sensors Accurate
The best sensor cleaning is the one you do not need. Build these into your routine.
- Use more water. Start each flush with a bit of water. Hold the pedal longer when needed. Dry waste is your enemy.
- Pick the right paper. Use septic safe paper that breaks down fast. Do a jar test at home if unsure.
- Dose each dump. After every dump, add 3 to 5 gallons of water and a mild enzyme dose.
- Keep valves closed. Do not leave the black valve open at a full hookup site. Liquids drain and solids stack. That makes a pyramid plug.
- Rinse on a schedule. Use the rinser for two to three minutes every dump.
- Vent care. Make sure the roof vent is clear. A blocked vent slows flow and dries the tank walls.
These habits make how to clean RV black tank sensors a rare task, not a weekly chore.
Troubleshooting After Cleaning
Still see false lights after a solid clean? Try these checks.
- Wiring and grounds. Loose grounds or corroded spade connectors cause bad reads. Inspect and clean contacts outside the tank.
- Panel issues. Old monitor panels fail. Compare with a manual fill test to confirm.
- Vent and airflow. A clogged vent can make odd readings and odors.
- Tank geometry. Some tanks trap waste in corners. Aim your wand to those spots.
- Upgrade path. External strip sensors read through the tank wall. They do not touch waste. Consider this if you struggle, even after you learn how to clean RV black tank sensors well.
Take notes after each step. You will see what changed the reading.
Safety, Environmental, and Legal Tips
Dumping right keeps sites clean and everyone happy.
- Wear gloves and eye protection.
- Never mix bleach and ammonia. That makes toxic gas.
- Use a backflow preventer on the rinse hose.
- Follow dump station rules. Rinse the area if you spill.
- Choose treatments that are septic safe and formaldehyde free.
- Mind local rules on household cleaners. Some sites limit what you can use.
Safe habits support every step of how to clean RV black tank sensors and protect seals and tanks.
When to Repair or Upgrade Sensors
Sometimes parts fail or are not worth more cleaning.
- Replace worn probes if they short out or spin in the wall.
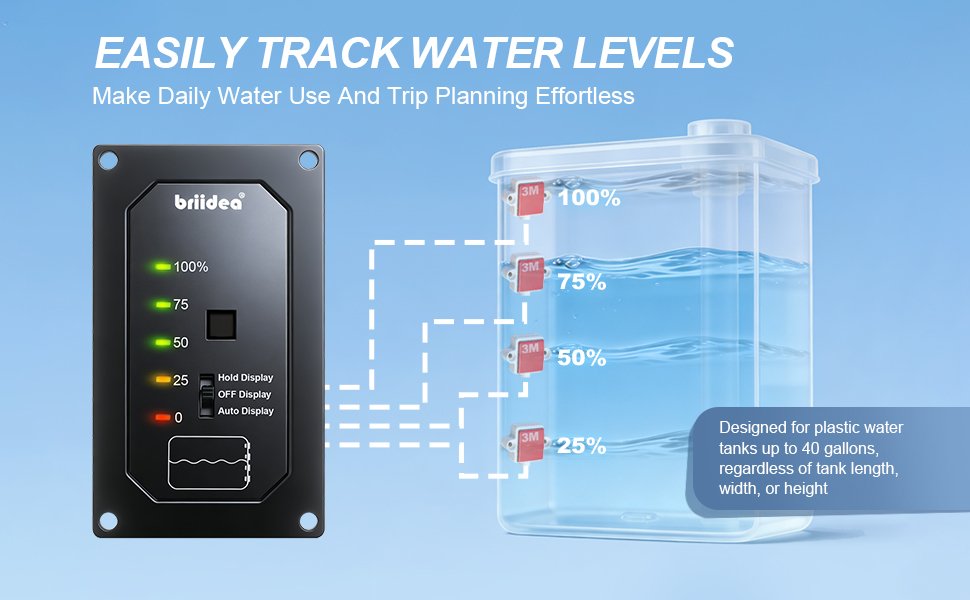
- Upgrade to external adhesive sensors if you want precise readings. These read the level from outside the tank.
- Replace the monitor panel if buttons or lights fail.
- If the tank wall is warped, no sensor reads well. Seek a pro check.
This is the honest end to how to clean RV black tank sensors when cleaning alone will not fix design or age limits.
Frequently Asked Questions of How to Clean RV Black Tank Sensors
How often should I clean the sensors?
Do a light rinse at every dump. Do a deep clean at the start and end of each season, or when readings go bad.
Can I use bleach to clean the black tank sensors?
Small, well-diluted bleach can help, but it can harm seals and good bacteria. Enzyme cleaners are safer for regular use.
Will driving with water in the tank help?
Yes. A few gallons and a safe cleaner will slosh and scrub the walls. Drive on smooth roads and secure all hoses.
What toilet paper is best for sensor health?
Use septic safe paper that breaks down fast in water. Do a jar test at home to see how it dissolves.
My panel still reads full after cleaning. What now?
Confirm with a measured water fill test. If the panel lies, check grounds, probe wiring, and consider an external sensor upgrade.
Does the ice cube trick work?
Not well. Ice melts fast and does little scrubbing. A warm soak and enzyme mix works much better.
How much water should stay in the tank after dumping?
Leave 3 to 5 gallons with a mild treatment. A wet start prevents dry build-up and protects sensors.
Conclusion
Clean sensors give you trust in your rig. Now you know how to clean RV black tank sensors with a clear plan. Rinse, soak, slosh, and test. Use more water, the right paper, and a routine dose. If readings still fail, fix wiring or upgrade.
Take one step today. Do a measured fill test and set a cleaning schedule. Share your results, ask a question, or subscribe for more RV care guides.