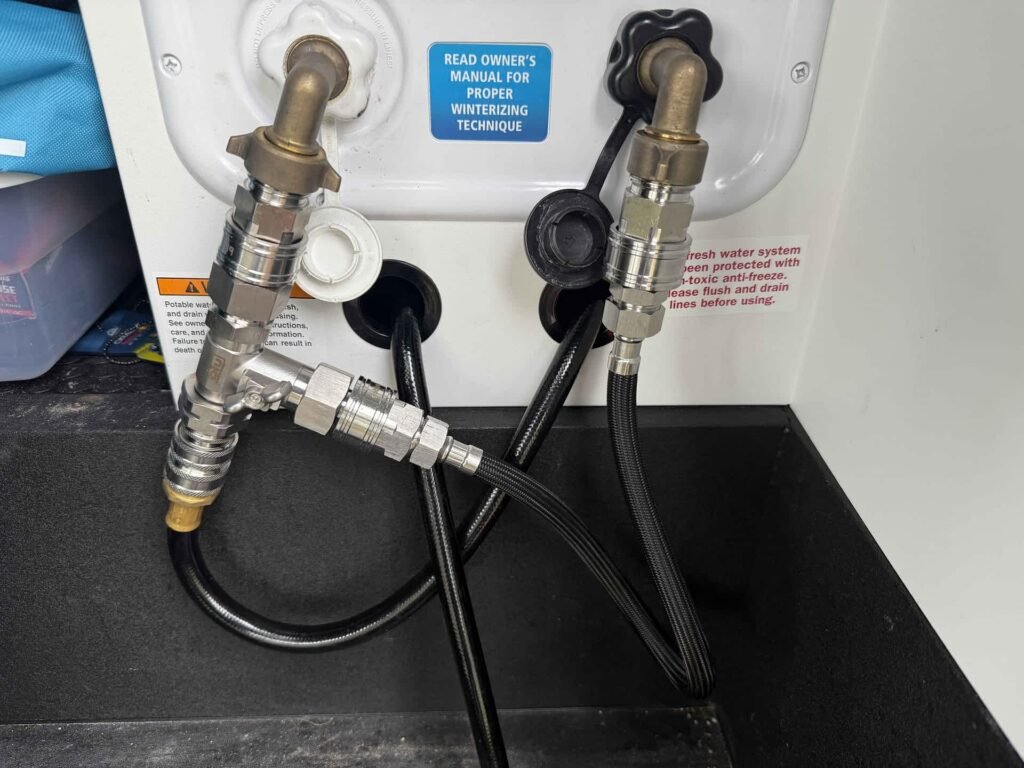
When I choose a Black Tank Flush Kit, I start with the RV’s tank layout, installation access, and existing plumbing—not just the price. These kits help rinse waste and toilet paper from the holding tank after dumping at an approved campground sewer hookup or RV dump station. Most permanent systems use a tank-mounted spray head, while portable options rinse through the toilet or sewer outlet.
Before connecting water, I check both the RV and kit manuals for compatibility, required backflow protection, and operating instructions. I use a dedicated non-drinking-water rinse hose and keep the waste outlet open during routine flushing unless the manufacturer specifies otherwise. I never leave running flush water unattended, and I discharge wastewater only into an approved sanitary sewer connection.

What Is a Black Tank Flush Kit?
A black tank flush kit is a rinse system for the tank that holds toilet waste. It helps loosen residue so that waste can leave through the sewer hose.
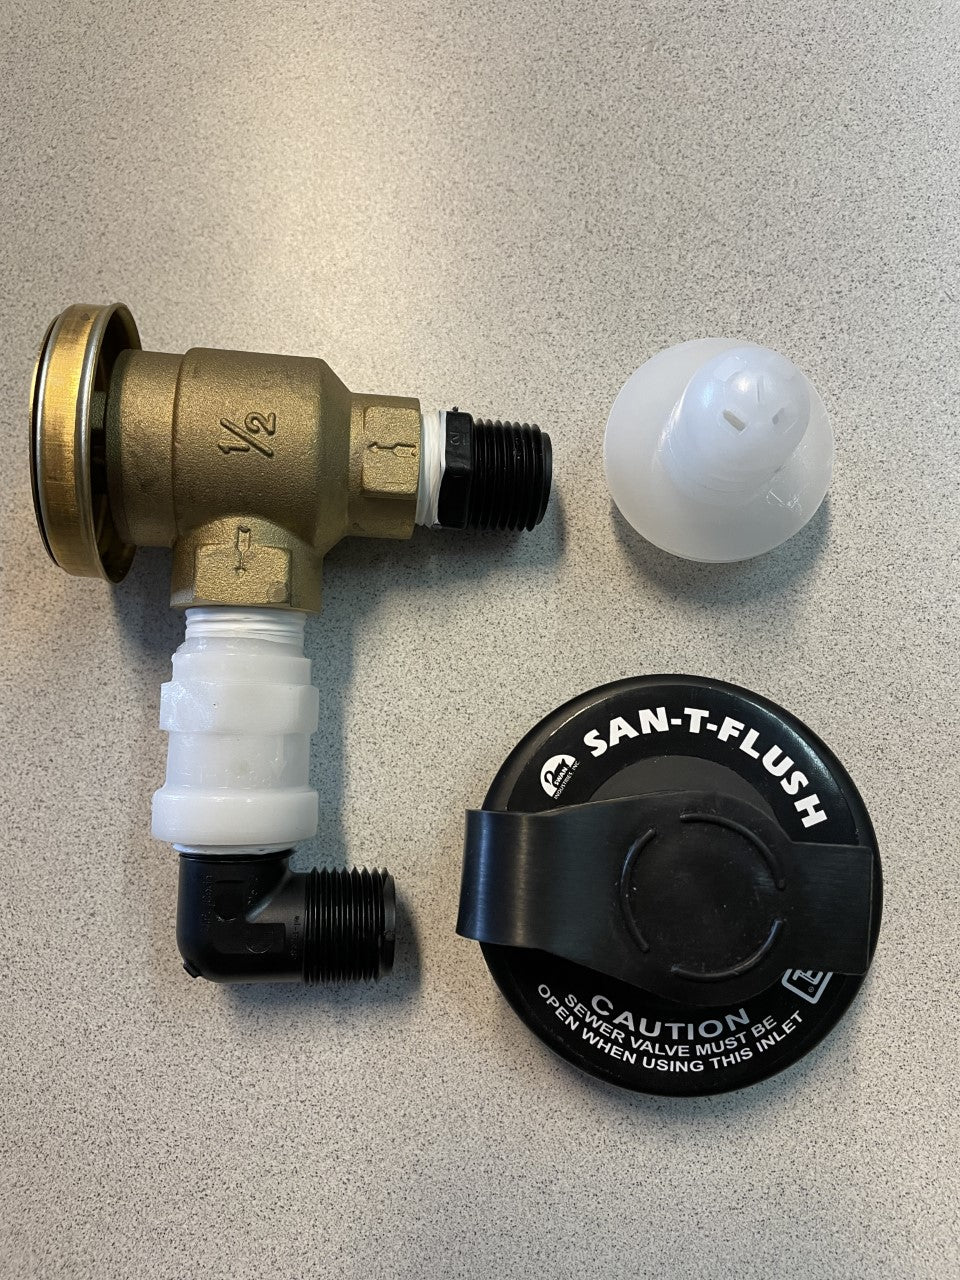
A permanent system commonly includes:
- A spray head or nozzle mounted in the tank.
- A water inlet on the RV’s exterior or in its utility bay.
- Tubing between the inlet and spray head.
- Backflow protection specified for that system.
- Seals, fittings, and mounting hardware.
Not every package includes every part. Some products are replacement spray heads rather than complete installation kits.
How the rinse system works
Water enters the flush inlet, passes through the supply line, and sprays inside the black tank. The rinse water then leaves through the tank’s drain valve and sewer hose.
Think of it as rinsing a bucket, not pressure-washing every inch of its walls. Spray coverage depends on the nozzle, its location, and the tank’s shape. Internal baffles or corners may keep some areas out of the spray.
A flush kit also has limits. It does not disinfect the tank, repair a stuck drain valve, or guarantee accurate tank readings. Persistent clogs or false readings may need a separate diagnosis.

Which Type of Black Tank Rinse System Fits Your RV?
Choose a system based on where you can safely reach the tank and how much installation work you want to do. A permanent sprayer offers a fixed connection, while a portable tool avoids drilling into the tank.
| System type | How it works | When it may fit | Main limitation |
|---|---|---|---|
| Permanent tank-mounted sprayer | Sprays water through a fitting installed in the tank | You want an external rinse connection and have suitable tank access | Installation requires a compatible mounting location and plumbing |
| Replacement factory flush component | Replaces a failed nozzle, inlet, or backflow device | Your RV already has a flush system | The replacement must match the existing system |
| Toilet rinse wand | Sends water through a wand lowered through the toilet | The toilet provides suitable access to the tank | Bends, offsets, and bathroom access can limit use |
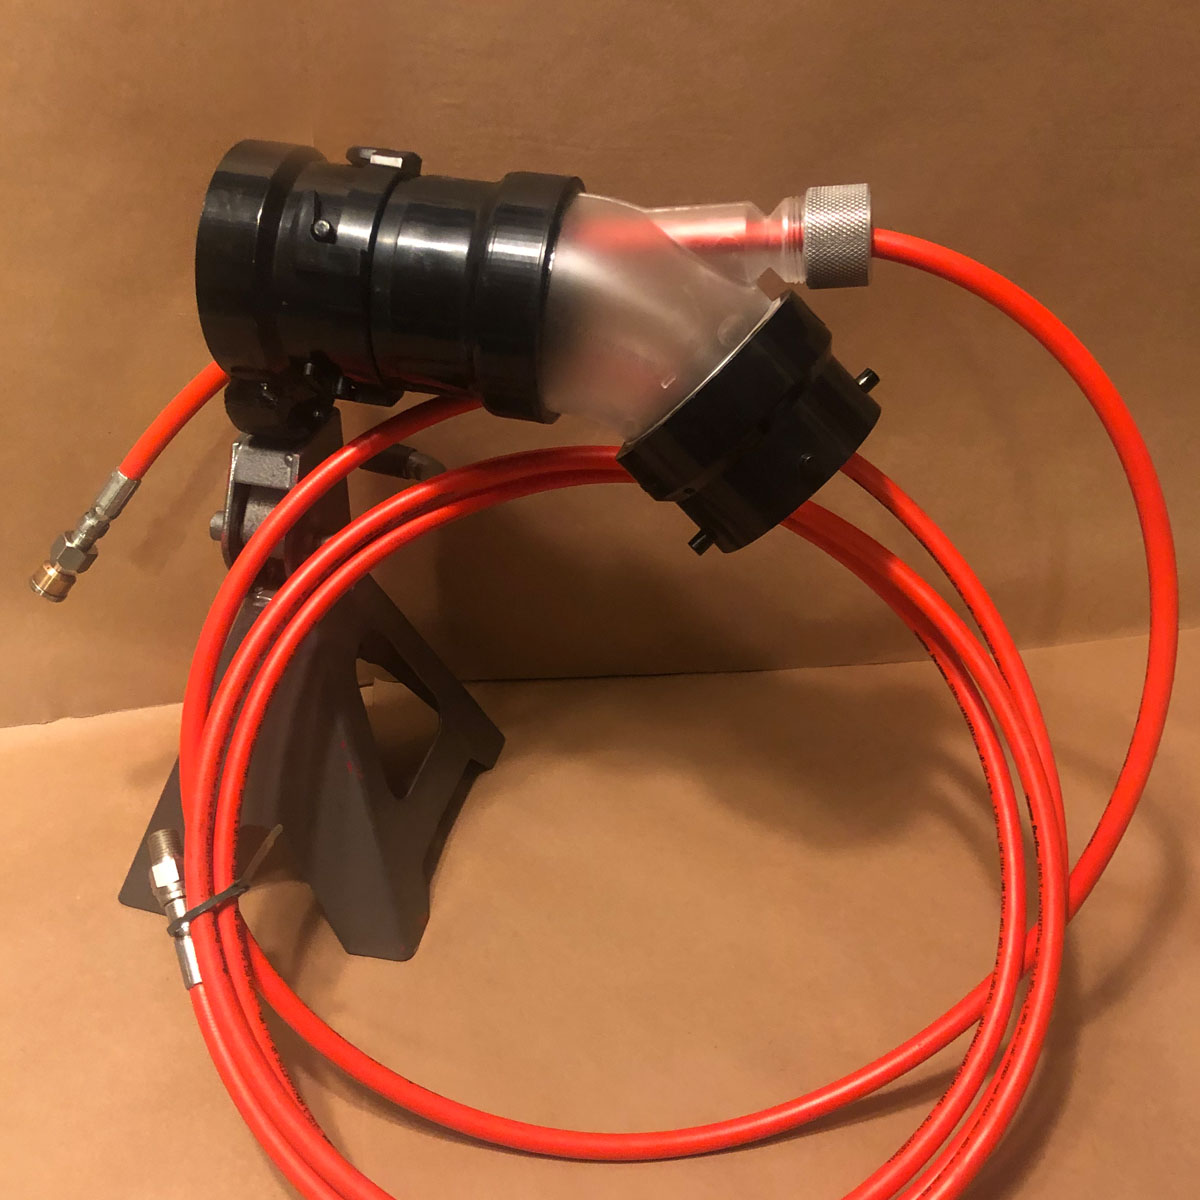
| Sewer-outlet rinse attachment | Directs water back through the drain connection | You want a portable tool without a new tank opening | Tank geometry and drain bends can restrict where water reaches |
A drain-outlet attachment is not the same as a tank-mounted sprayer. Neither should be assumed to reach every part of the tank.
Check these details before buying
start with your RV’s model-specific manual and the kit’s installation instructions. Confirm:
- Tank material: The tank must suit the kit’s mounting and sealing method.
- Access: You need room to install, inspect, and service the components.
- Mounting location: The approved position must clear nearby structures, wiring, and plumbing.
- Water limits: Use the pressure and flow requirements stated for the exact system.
- Backflow protection: Confirm what is included and what must be supplied.
- Winterization needs: The flush line may need its own freeze-protection procedure.
A sealed underbelly can make a simple-looking job much harder. If you cannot see the work area or verify the tank layout, ask an RV service technician to assess it.
Backflow Protection and Hose Safety Come First
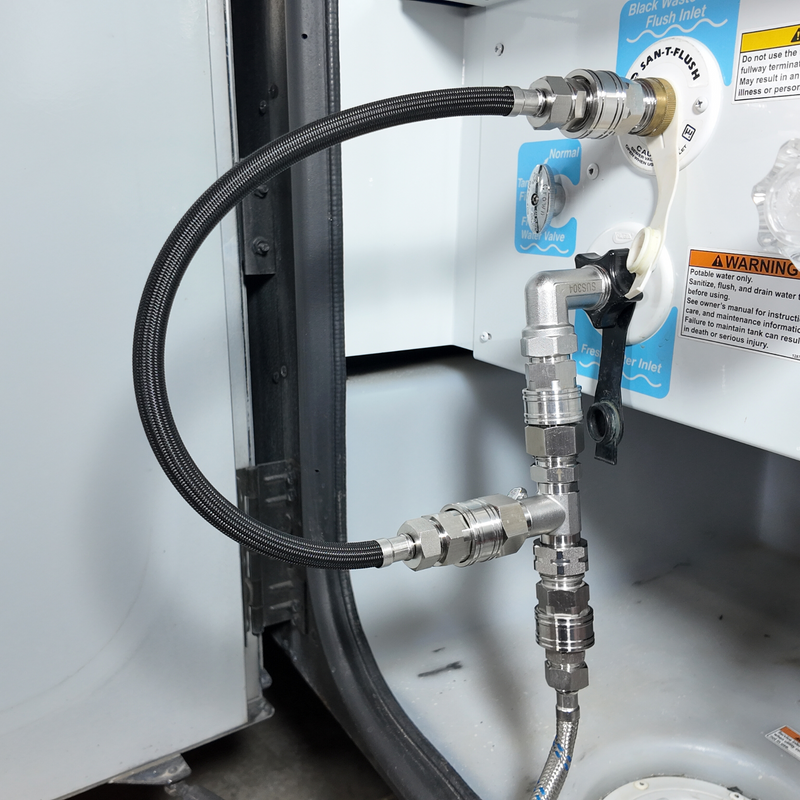
Never connect a black tank rinse system to a water source without the protection required by the RV, kit, and water supplier. This is a water-quality issue, not just a matter of keeping the hose clean.
A cross-connection is a path between a drinking-water supply and a possible source of contamination. EPA guidance explains that backflow can move contaminated water through such a connection when pressure conditions change.
RV systems may use a vacuum breaker, a check valve, or a combined assembly. These devices are not interchangeable in every installation. Their required location, height, orientation, and pressure limits depend on the device and system.
Follow these precautions:
- Use a dedicated hose for black tank flushing.
- Label that hose and keep it apart from drinking-water hoses.
- Keep hose ends off the ground and away from sewer fittings.
- Do not remove or bypass a leaking backflow device.
- Use only a water outlet the campground permits for tank rinsing.
- Follow posted water-use rules and local requirements.
A pressure regulator controls pressure; it does not, by itself, provide backflow protection. Likewise, a backflow device is not a pressure regulator.
If water leaks inside a cabinet when the flush system runs, shut off the supply. The fault could involve a connection, tubing, or a backflow assembly. Do not assume that the cure is to remove the device.
How to Use a Black Tank Flush Kit
For routine flushing, drain the tank first, then rinse with the black tank drain valve open. Use any different valve sequence only when your RV’s instructions expressly call for it.
Before you start
Have these items ready:
- Disposable gloves.
- A sound sewer hose with secure fittings.
- A dedicated rinse hose.
- Access to an approved sewer connection.
- Your RV and flush-system instructions.
Check that the sewer outlet is usable and the hose has no sharp bends or raised sections that could trap waste. If the black tank will not drain, address that problem before adding rinse water.
Step-by-step flushing
- Secure the sewer connection. Attach the hose to the RV and approved sewer inlet. Support it as needed for drainage.
- Dump the black tank. Open the black tank drain valve and let the initial discharge finish.
- Connect the rinse hose. With the water off, connect the dedicated hose to the labeled black tank flush inlet.
- Check the valve position. Keep the black tank drain valve open for the routine rinse.
- Turn on the water within the system’s limits. Stay at the controls and check for leaks.
- Watch the discharge. Water should leave through the sewer hose. A clear fitting can help you see changes, but it cannot prove the tank is clean.
- Stop if the flow looks wrong. Shut off the rinse supply if water backs up, leaks appear, or expected discharge fails.
- Turn off the rinse water. Let the remaining water drain before closing the black tank valve.
- Finish the dump process. If appropriate for your RV and the site, drain the gray tank afterward to help rinse the sewer hose.
- Restore water for use. Add water through the toilet as directed by the RV manufacturer. Do not leave the tank dry for normal use.
- Disconnect and clean up. Cap the fittings, store the rinse hose separately, and wash your hands.
Never leave a running flush system unattended. If the drain is shut or blocked, incoming water can fill the tank and escape through the toilet, roof vent, or another opening.
How long should you flush?
There is no universal flush time. Tank size, residue, spray coverage, flow rate, and drain conditions all affect the result.
Follow the manual rather than a fixed timer. Reduced visible debris is a useful sign, but it does not confirm full waste removal or sanitation. A false tank reading is not a reason to keep adding water without checking the discharge.

How to Install a Permanent Flush Kit
Install a permanent kit only when you can follow its exact mounting, plumbing, and backflow-protection instructions. A generic drilling guide cannot account for differences in tank construction and RV layout.
Prerequisites
Before work begins, obtain:
- The correct kit and its current instructions.
- Your RV’s plumbing information, if available.
- A verified, accessible mounting location.
- The specified tools, fittings, sealant, and protective gear.
- A way to contain and properly dispose of residual wastewater.
Drain and rinse the tank before opening it. Even an “empty” tank can retain contaminated liquid.
Installation sequence
The exact instructions control the job, but the planning order should be:
- Verify the tank and work area. Identify the black tank and check both the drilling location and nearby systems.
- Confirm the spray-head position. Use the kit’s stated location, orientation, hole size, and fastening method.
- Fit the tank connection. Use only sealants and hardware approved for the tank and kit.
- Route the water line. Protect it from road debris, heat, sharp edges, strain, and freezing.
- Install the specified backflow assembly. Preserve all required clearances and orientation.
- Mount and label the inlet. Make it clearly distinct from the freshwater connection.
- Test under observation. Keep the tank drain open and inspect each connection during a controlled test.
Do not assume that more sealant or tighter screws make a better seal. Excess force can damage a fitting or tank wall.
Signs of a successful installation
The system should admit rinse water, discharge it through the open drain, and remain dry at the tank fitting, inlet, tubing, and backflow assembly. Check again after the system has been used and the RV has traveled.
Stop and seek professional help if the tank wall cracks, a fitting will not seal, the mounting point is uncertain, or access prevents a full inspection. Plumbing repairs near hidden wiring or structural parts also call for qualified service.

Troubleshooting a Black Tank Flush System
Start with the water off when checking an unexpected fault. Adding more water can turn a minor issue into an overflow.
| Symptom | Possible causes | Safest first check |
|---|---|---|
| No rinse water enters | Supply is off, hose is kinked, inlet is blocked, or a component has failed | Check the source and hose before opening RV plumbing |
| Weak rinse flow | Restricted hose, blocked nozzle, low supply flow, or a line restriction | Check external restrictions and the system’s stated supply requirements |
| Water leaks inside the RV | Loose fitting, damaged tubing, or failed backflow assembly | Shut off the source and inspect only accessible areas |
| Water enters but little leaves | Closed valve, blocked outlet, restricted hose, or sewer backup | Stop the rinse supply and check the discharge path |
| Tank monitor still reads full | Residue, sensor fault, wiring issue, or actual retained contents | Confirm drainage before adding water; then follow the monitor’s diagnostic steps |
| Odor remains after dumping | Residue, a seal or vent problem, a leak, or an open drain valve | Check valve position and visible seals, then investigate the vent and plumbing |
When flushing does not solve the problem
Repeated rinsing will not fix every blockage or monitor fault. A compacted waste mass may require a different removal method, while a failed sensor needs repair rather than more water.
Do not push tools into a tank outlet without knowing the plumbing layout. Avoid household drain-opening chemicals unless the RV, tank, and chemical manufacturers expressly allow that use.
If wastewater backs up indoors, stop using the affected fixtures. Keep people away from the spill and arrange proper cleanup and repair.
Maintenance, Freeze Protection, and Common Mistakes
Keep the flush system dry when required, inspect its fittings, and follow a separate winterization procedure if the manual specifies one. Winterizing the freshwater system does not automatically protect the black tank rinse line.
Before storage or freezing weather:
- Drain and disconnect the external rinse hose.
- Check the flush inlet cap and visible seals.
- Inspect accessible tubing and fittings.
- Winterize the rinse circuit using the approved method.
- Record any leaks or weak flow for repair before the next trip.
Do not apply compressed air at an assumed pressure. Use only the procedure and limits stated for your RV and flush system.
The most costly mistakes are often simple ones: connecting to the wrong inlet, leaving the rinse water running, bypassing a leaking backflow device, or using the freshwater hose for waste-system work. Clear labels and a fixed dump routine help prevent those errors.
FAQs
Can I use a black tank flush kit on a gray tank?
Only if the kit and tank installation are approved for that use. Gray tanks can contain grease, soap residue, and food particles, but their layouts and service needs differ. Do not drill a gray tank based solely on black tank instructions.
Can I add bleach or tank treatment through the flush inlet?
Do not assume the inlet is a chemical dosing port. Use chemicals only as directed by their labels and your RV’s instructions. Never mix cleaning products, especially bleach with ammonia or acidic products.
Can I rinse the tank at every campground?
No. Use a rinse connection only where the campground or dump-station operator permits it. Water restrictions, shared facilities, and local wastewater rules can change what is allowed.
Does a flush kit reduce the need for water when using the toilet?
No. A rinse system is used during tank service; it does not replace the water needed to move waste and paper into the tank during normal use. Follow the toilet and RV instructions for operation.
Must I replace the whole kit if the nozzle stops working?
Not always. The fault may be a restricted hose, failed valve, damaged line, or blocked spray head. Diagnose the system first, then check whether the manufacturer supplies a compatible replacement part.
Evidence, Sources, and Next-Question Gaps
This guide was prepared without live web access or hands-on product testing. Current product versions, kit contents, and model-specific instructions were not verified. No competitor pages or live search results were inspected, so claims about their coverage or current rankings are not established.
For source verification and instructions, start with:
- EPA Cross-Connection Control Manual: Primary guidance on cross-connections and backflow principles. It does not approve a specific RV installation.
- Winnebago operator manuals: Model-specific operating instructions for applicable Winnebago RVs.
- Lippert support: A source for instructions when the installed component is identified as a Lippert product.
- Your RV manufacturer’s manual and the exact flush kit’s installation sheet: The deciding sources for mounting, pressure limits, valve sequence, and winterization.
The following next questions are inferred from the task, not verified search demand. Competitor coverage remains not checked.
| Question | Reader stage and basis | Reader benefit | Evidence needed | Priority and placement |
|---|---|---|---|---|
| Is this a full kit or only a replacement nozzle? | Before purchase; inferred from differing product scopes | Avoids missing parts | Exact parts list and installation sheet | High; selection section |
| What if water enters but does not drain? | During use; inferred from overflow risk | Helps prevent sewage damage | RV drain layout and operating instructions | High; use and troubleshooting |
| Does the flush line need separate winterization? | After use; inferred from a separate water circuit | Helps prevent freeze damage | Model-specific winterization procedure | High; maintenance section |
| Can one failed part be replaced? | Repair stage; inferred from component-based construction | Avoids needless replacement | Manufacturer parts diagram | Medium; FAQ |

Conclusion
A black tank flush kit can make RV waste-tank rinsing more practical, but safe setup matters more than added features. Choose a system that fits your tank, preserve the specified backflow protection, and use a dedicated rinse hose.
Before buying or connecting one, find your RV’s flush-system instructions. Confirm the parts, water limits, drain-valve procedure, and winterization steps. If the system will not drain or a hidden connection leaks, stop the water and repair the fault before flushing again.