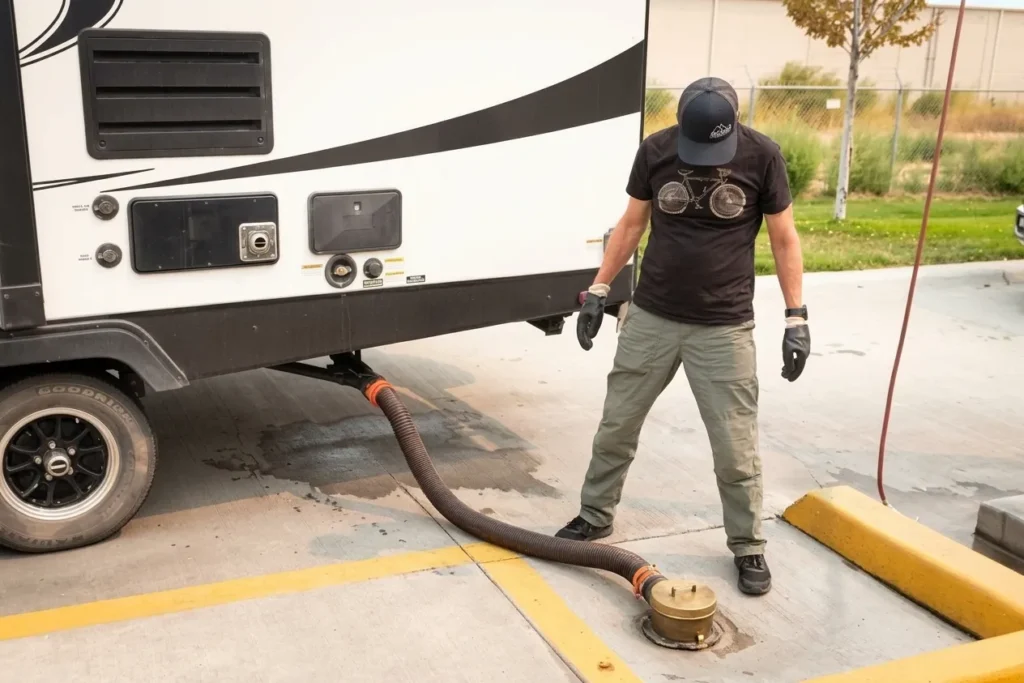
I approach every Camper Black Tank Flush with one priority: safely rinsing out toilet waste and paper after dumping. At an approved campground sewer hookup or designated RV dump station, I start by checking the instructions for the camper’s exact flush system.
For most built-in systems, I connect a dedicated non-drinking-water hose to the labeled flush inlet, keep the black tank drain valve open, and run water as the manufacturer directs. I never leave the flush unattended, and I stop the water before closing the drain valve unless the manual specifies a different procedure.
I use only an approved sanitary sewer connection—never a storm drain, the ground, or a waterway. The RV manufacturer’s instructions always take priority over general advice.
What Is a Camper Black Tank Flush?
A black tank flush is a rinse system that sends water through a spray head inside an RV’s toilet-waste holding tank. The spray helps loosen waste and toilet paper so they can leave through the sewer outlet.
The parts serve different jobs:
| Part | What it does |
|---|---|
| Black water tank | Holds toilet waste and flush water |
| Black tank drain valve | Opens or closes the tank’s outlet |
| Black tank flush inlet | Receives rinse water through a separate hose |
| Internal spray head | Directs rinse water inside the tank |
| Gray water tank | Holds wastewater from sinks and showers |
| Fresh water inlet | Supplies the RV’s drinking-water plumbing; it is not the flush connection |
A rinse can remove loose debris, but it may not clean every surface or restore every tank sensor. Think of it as rinsing a bucket: water helps carry residue out, but a brief spray does not guarantee a spotless tank.
Built-in flush, toilet wand, and sewer-outlet rinser
These tools are not interchangeable.
- A built-in flush sends water through a fixed spray head inside the tank.
- A toilet rinse wand reaches the tank through a suitable toilet opening. Its use depends on the toilet and tank layout.
- A sewer-outlet rinser introduces water at the drain connection. Its reach depends on the fittings and tank layout.
Do not assume a sewer-outlet attachment will wash the whole tank. Follow the tool’s instructions and confirm that it suits your camper’s plumbing.

What You Need Before Flushing the Black Tank
You need a secure sewer connection, an approved water source, and a hose kept separate from drinking-water gear. Read the flush label and your owner’s manual before turning on the water.
Have these items ready:
- Disposable gloves.
- An intact RV sewer hose with suitable fittings.
- A dedicated, clearly marked rinse hose.
- Access to a water outlet approved for tank rinsing.
- Any pressure-control or backflow equipment specified for your system.
- A clear sewer fitting, if permitted and useful for viewing discharge.
Never use your fresh water fill hose for black tank rinsing. Keep rinse fittings and sewer gear away from potable-water equipment during use and storage.
At a U.S. dump station, read the posted signs. A rinse faucet may supply nonpotable water, and the facility may restrict how its hose can be used. Never put a shared hose end into the RV toilet.
Read related article on Camper Black Tank Flush: Safe Steps for RV Owners
Check the pressure limit and backflow protection
Use the pressure range stated for the flush system. Do not assume the pressure limit for the RV’s fresh water plumbing also applies to its tank-rinse equipment.
Backflow protection helps keep contaminated water from moving toward the supply. Depending on the design, the flush plumbing may include a vacuum breaker, check valve, or combined device.
Do not remove or bypass that protection to solve a flow problem. If a device leaks, is missing, or has been altered, stop using the flush until a qualified RV technician checks it.

How to Use a Camper Black Tank Flush
The basic sequence is dump, rinse with the outlet open, stop the rinse water, let the tank drain, and reset the tank for use. The steps below apply to a typical built-in system; the exact RV manual takes priority.
1. Connect the sewer hose securely
Put on gloves. With the waste valves closed, connect the sewer hose to the RV outlet and the approved sewer inlet.
Secure both ends before opening a valve. Support the hose as needed so wastewater can drain without a large low spot that traps it.
2. Empty the black tank
Open the black tank drain valve and let the contents drain. Keep the gray tank valve closed for now if you plan to use gray water to rinse the shared sewer hose later.
If the black tank seems full but little or nothing comes out, stop. Adding rinse water could make an outlet blockage worse or cause an overflow.
3. Connect the dedicated rinse hose
With the water supply off, attach the rinse hose to the port labeled “Black Tank Flush,” “Tank Flush,” or the equivalent label on your RV.
Confirm the port before making the connection. A nearby city-water inlet or fresh tank fill has a different purpose.
4. Run the flush with the black valve open
For the common open-drain procedure, leave the black tank valve open and turn on the water within the system’s stated pressure limits.
Stay at the controls. Check for leaks at the inlet, nearby plumbing, and sewer fittings. Water should leave through the sewer hose, though the visible flow may be modest.
Do not close the black valve to build pressure or leave the rinse running unattended. A black tank is a vented holding tank, not a pressure vessel.
5. Stop the water when the rinse is complete
Use the rinse duration or completion method given in your manual. There is no single safe flush time for every camper.
If you have a clear sewer fitting, the discharge should become less dirty, with fewer visible solids. That is a useful sign, not proof that every part of the tank is clean.
Turn off the water source before you close the black tank valve. Let the remaining rinse water drain.
6. Close the black valve and drain the gray tank
Once the black tank has finished draining, close its valve. Then open the gray tank valve, if needed and allowed, to help rinse the shared sewer hose.
Gray water is still wastewater. It does not disinfect the hose or make the fittings safe to handle without care.
7. Restore water to the black tank
Close the gray valve after draining. Add clean water to the black tank through the toilet in the amount recommended by the RV or toilet manufacturer.
A working layer of water helps keep new waste from landing on a dry tank floor. Add a holding-tank treatment only if desired or specified, and follow its label.
8. Disconnect and clean up
With the rinse supply off, disconnect the rinse hose and cap the flush inlet. Disconnect the sewer hose only after both waste valves are closed and the hose has drained.
Store sewer gear apart from drinking-water supplies. Remove gloves and wash your hands with soap and water.

How Long Should You Flush, and How Often?
Flush for the time or endpoint your manufacturer specifies, rather than using a fixed number of minutes from a general guide. Tank shape, spray-head design, water flow, and the amount of residue all affect the result.
These checks help you decide what to do next:
| What you observe | What it may mean | Next action |
|---|---|---|
| Discharge becomes clearer and solids taper off | The rinse is removing less loose debris | Stop at the manual’s endpoint and let the tank drain |
| Debris continues to appear | More loose material remains | Continue only within the approved procedure |
| Water enters but little or nothing drains | There may be a closed valve, blockage, or flow restriction | Shut off the water and investigate |
| The gauge still reads partly full after draining | The tank may retain liquid, or the sensor may be fouled or faulty | Check drainage before assuming the tank is full |
| A fitting or indoor device leaks | A seal, line, or backflow component may have failed | Stop and repair the fault |
Do not use a timer as your only overflow safeguard. As a hypothetical example, a hose flowing at 3 gallons per minute adds 15 gallons in five minutes. If the outlet is closed or blocked, that water can use up the tank’s remaining capacity quickly.
Rinse after dumping when the manual calls for it and the facility permits it. A more complete rinse can also be useful before storage. At a busy dump station, follow posted limits and save lengthy cleaning for a suitable full-hookup site or service location.
Troubleshooting a Black Tank Flush That Is Not Working
Stop the water first if the system leaks, the tank does not drain, or waste rises in the toilet. Then check simple, visible causes before taking apart plumbing.
No water seems to reach the tank
Start with the water source and hose:
- Confirm that the faucet works.
- Check the hose for kinks or a closed shutoff.
- Confirm that you connected to the flush inlet.
- Check any accessible inlet screen as the manual directs.
- Verify that the supply meets the system’s pressure requirements.
If those checks do not solve the issue, a blocked spray head, failed valve, or damaged line may be involved. Do not use compressed air, high pressure, or improvised chemicals to force a blockage through.
Water leaks inside the camper
Turn off the rinse supply at once. A leak near a cabinet, wall, or plumbing chase may come from a loose fitting, damaged line, or failed vacuum breaker.
Dry the area and inspect only what is safely accessible. Concealed leaks and backflow-device repairs are good reasons to call a qualified RV technician.
The tank will not empty
A flush is not a safe substitute for clearing a blocked outlet. First confirm that the sewer hose is not kinked and that the valve is operating.
If the tank remains full or the outlet appears blocked, stop adding water. Do not remove a drain valve from a full tank or open fittings that may release trapped sewage. Arrange RV waste-system service.
The tank gauge still reads full
A full reading does not always mean the tank is full. Some sensors can give false readings when residue bridges their sensing points; other systems use different sensing methods.
Check whether the tank actually drained before chasing the gauge reading. Use the sensor manufacturer’s cleaning procedure, and seek service if the reading remains wrong after proper cleaning.
The tank still smells after rinsing
Odor does not prove that the flush failed. Check toilet seals, venting, nearby plumbing, and whether waste has built up from too little water.
If odor enters the living space, address the source rather than adding more fragrance or tank treatment. A rinse cannot repair a bad seal or blocked vent.
Common Mistakes That Can Damage the Tank or Contaminate Water Gear
The main risks are overfilling the tank, mixing clean and dirty equipment, and treating the rinse system as a clog-removal tool. Avoid these mistakes:
- Leaving the rinse unattended. A closed valve or blocked outlet can cause an overflow.
- Using the drinking-water hose. Keep separate hoses and fittings for sanitation work.
- Bypassing backflow protection. Repair a faulty device rather than removing it.
- Leaving the black valve open during normal camping. Liquids can drain away while solids remain. Keep it closed between dumps unless the manufacturer specifies otherwise.
- Adding random cleaners. Never mix bleach with ammonia, acids, or other cleaners. Use only products approved for the system.
- Using a pressure washer in the tank. High-pressure tools can damage parts and spread contaminated spray.
- Flushing a frozen system. Do not add water when the tank, outlet, or rinse plumbing may be frozen.
Flush only waste and toilet paper suitable for the system. Wipes, paper towels, and hygiene products can cause trouble even when their packaging uses the word “flushable.”
Evidence, Source Limits, and Next-Question Gap Map
This guide provides general operating guidance, not instructions for a verified RV model. Live browsing was not available for this draft, so current manuals, competing pages, and search results were not inspected. No hands-on testing or current competitor-ranking claim is made.
Before acting, check the manual for your RV’s model year and any separate instructions for its flush equipment. Useful primary-source starting points include:
- Jayco owner resources for model-specific owner information.
- Winnebago operator manuals for applicable vehicle instructions.
- Lippert support for applicable component documentation.
- EPA drinking-water resources for general water-supply protection context, not RV-specific operating steps.
The following questions are inferred from the task, not presented as verified search demand. Competitor coverage remains not checked.
| Next question | Reader stage and basis | Reader benefit | Evidence needed | Priority and placement |
|---|---|---|---|---|
| What if rinse water enters but nothing drains? | During use; inferred overflow risk | Helps prevent overfilling | Exact drain layout and model manual | High; procedure and troubleshooting |
| Why does the gauge still read full? | After rinsing; inferred diagnostic need | Avoids needless rinsing | Sensor type and cleaning instructions | Medium; troubleshooting |
| Does winterizing the fresh water system protect the flush line? | Storage; inferred separate-plumbing issue | Helps prevent freeze damage | Model-specific winterization procedure | High; FAQ below |
The key limitation is model variation: pressure limits, valve procedures, and winterization methods must come from the actual equipment instructions.
FAQs
Can I use the black tank flush without a sewer hookup?
For routine rinsing, use an approved sewer connection so the added water can drain as directed. Adding water without a discharge path uses tank capacity and increases overflow risk.
Will a flush remove a hardened waste buildup?
Not reliably. A spray head may remove loose material without breaking up a hardened mass. If drainage is poor or the tank is blocked, stop adding water and seek a manufacturer-approved clearing method or professional service.
Should I add bleach to the flush hose?
Do not improvise a bleach treatment through the flush inlet. Chemical compatibility and safe procedures vary, and leftover cleaners may react with one another. Use only an expressly approved cleaning method.
Does winterizing the fresh water system protect the black tank flush?
Not necessarily. The rinse line may be separate from the fresh water plumbing and may trap water. Follow the RV’s specific winterization instructions for the flush inlet, line, and backflow device.
Can I dump black tank waste into my home septic system?
Do not assume that you can. Use only a connection approved for RV waste discharge, and check local requirements and the septic system’s suitability. A septic professional or local wastewater authority can advise on a particular property.
Conclusion
A safe camper black tank flush starts with the correct inlet, a separate rinse hose, and a secure sewer connection. Dump first, rinse according to the manual, stay at the controls, and stop the water before closing the drain valve.
Before your next dump, find the flush instructions for your exact camper. If water will not drain or a backflow device leaks, stop and fix the fault rather than adding more water.