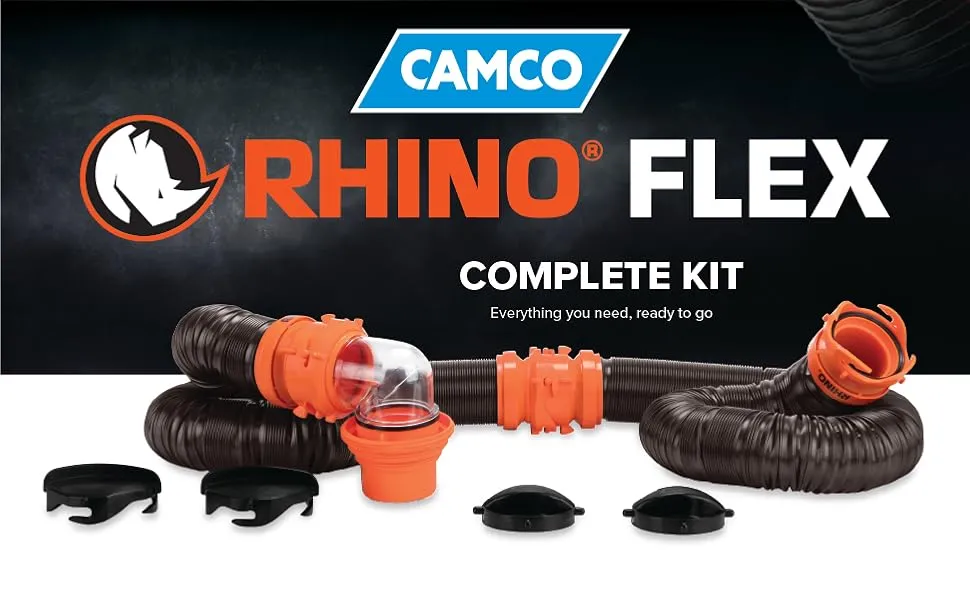
The right RV sewer hose helps me empty my holding tanks with less hassle and a lower risk of spills. I want a setup that reaches the campground inlet without stretching, seals securely at every connection, drains properly, and stores separately from my freshwater equipment.
In this guide, I explain how I choose the right length, compare materials, match fittings, connect safely, and recognize when a replacement is necessary. My approach is straightforward: prioritize compatibility, control the wastewater, and follow the instructions for the equipment actually installed on the RV.
My Quick Recommendation: What Should a Good Setup Include?
For a typical North American RV with a gravity-drain waste system, I start with:
- A sewage-rated hose compatible with the RV’s outlet—commonly a nominal 3-inch system.
- Enough usable length to reach the sewer inlet without pulling on either connection.
- Secure vehicle-side fittings and a compatible campground sewer adapter.
- Intact sealing gaskets.
- A hose support that maintains a steady downhill route.
- Storage caps and a dedicated wastewater storage area.
- Disposable gloves and a separate, clearly labeled rinse hose.
A 15- or 20-foot setup is a common starting point, but I measure the route rather than assume one length will work everywhere.
“These recommendations apply to conventional gravity-drain systems. Macerator pumps and proprietary waste systems may require different hoses and connections.”
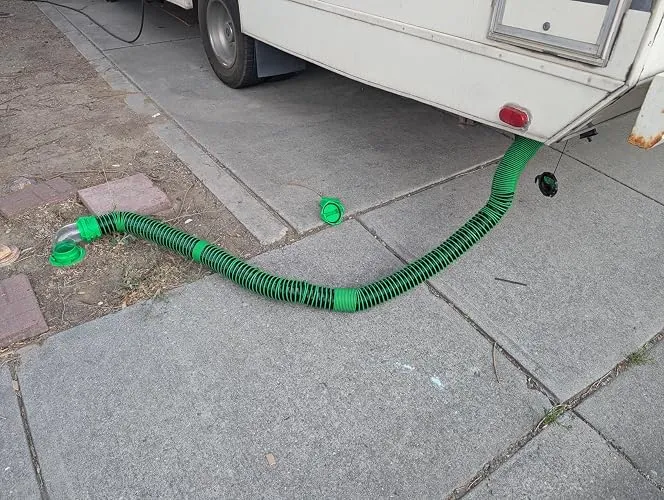
“Ready to make dump-station visits less of a hassle? Explore my Best Camper Sewer Hose Review to compare options for your camper’s waste-water setup.”
What Does an RV Sewer Hose Do?
This flexible wastewater hose connects the RV’s holding-tank outlet to an approved disposal point.
On many RVs, it handles waste from two different tanks:
- Black-water tank: Usually collects toilet waste.
- Gray-water tank: Usually collects wastewater from sinks and showers.
Some RVs have multiple gray tanks, separate outlets, or different plumbing arrangements. I identify the valves and consult the owner’s manual before assuming how the system is configured.
Are camper, sewer, septic, and drain hoses the same thing?
The terminology can be confusing, so I separate the product’s name from its actual purpose.
A camper sewer hose generally serves the same function as one marketed for a motorhome. The RV’s outlet, the disposal connection, and the required reach matter more than the vehicle label.
An RV septic hose usually refers to the same wastewater-transfer equipment. The name does not mean the RV treats sewage onboard; most RVs store wastewater until it reaches an approved disposal system.
The term RV drain hose is broader. It may describe a holding-tank discharge hose or another drainage component. For sewage disposal, I choose equipment specifically intended for that job—not a generic sink-drain tube or freshwater hose.
How I Choose a Sewer Hose for RV Camper Use
When I compare a sewer hose for RV camper use, I focus on four things: usable reach, connection compatibility, construction, and storage.
1. I measure the route, not just the distance
The straight-line distance between the RV outlet and sewer inlet does not tell the whole story. I account for bends, outlet height, the position of the hose support, and enough slack to avoid stressing the fittings.
| Hose configuration | When I consider it | Main trade-off |
|---|---|---|
| 10-foot section | Close hookups and compact storage | Limited reach |
| 15-foot section | Sites with moderate outlet-to-inlet distance | May still need an extension |
| 20-foot section | Longer campsite connections | More hose to support and store |
| Two 10-foot sections | Flexible short or long configurations | Adds another connection to inspect |
I also check whether the advertised length is the fully extended length. A hose that reaches only when pulled tight is not a comfortable fit.
My rule is to use the shortest practical setup that reaches securely while maintaining a downhill route. Excess hose can create low spots that retain wastewater.
2. I confirm the diameter and connection system
Many conventional RV gravity systems use a nominal 3-inch waste connection, but I never treat that as a universal guarantee.
Before buying, I check:
- The outlet size and style.
- The locking-lug arrangement.
- Whether the hose has permanently attached fittings.
- Whether any existing extension uses compatible ends.
- Whether the RV uses a gravity outlet or a pumped discharge system.
A smaller macerator discharge hose is not a direct substitute for a conventional gravity hose.
3. I compare construction—not just the thickness claim
A thicker wall can be useful, but thickness alone does not tell me how well the product will perform.
I look for:
- Reinforcement that helps resist crushing and kinking.
- Flexibility suitable for the temperatures where I camp.
- Abrasion resistance.
- UV resistance where specified by the manufacturer.
- Secure attachment between the hose and its end fittings.
- A design that compresses without damaging the hose.
I do not assume any flexible hose is puncture-proof or safe to drag over sharp gravel.
4. I check storage dimensions before buying
A hose can fit the plumbing perfectly and still be inconvenient to store.
I check the compressed length and the widest fitting—not just the hose body. Some factory storage tubes and bumpers will not accommodate bulky elbows or connectors.
If I use a bumper-style holder, I inspect it for rough edges and corrosion that could damage the hose.
“For a closer look at hose length, fitting compatibility, and storage, I recommend reading my Best RV Septic Hose guide.”
RV Sewer Hose Fittings and Connectors: What I Check
The hose body is only one part of the system. A damaged gasket or mismatched adapter can create a leak even when the hose itself is in excellent condition.
I group RV sewer hose fittings by where they sit in the waste path.
| Component | What it does | What I verify |
|---|---|---|
| RV-side bayonet fitting | Locks onto a compatible termination outlet | Correct size, locking engagement, and gasket condition |
| Extension coupler | Joins compatible hose sections | Matching connection styles and secure seals |
| Sewer elbow or adapter | Connects the hose to the disposal inlet | Correct fit for the inlet’s size and design |
| Storage cap | Contains residual drips during storage | Compatibility and secure closure |
RV-side fittings
Many RV outlets use bayonet-style connections: the fitting engages the outlet’s lugs and twists into place.
I check that the connector seats squarely and locks as its manufacturer intends. I do not force it past its stop or use excessive force to compensate for a damaged seal.
A rotating fitting can make alignment easier, but it still needs a compatible outlet and an intact gasket.
Hose-to-hose connectors
When comparing RV sewer hose connectors, I verify the actual ends rather than relying on words such as “standard” or “universal.”
Product listings sometimes use fittings and connectors interchangeably. What matters is whether the two components lock together and form the intended seal.
Every added connection is another point to inspect. I carry extensions when useful, but I avoid unnecessary joints.
Campground sewer adapters
The campground end may require a threaded adapter or an approved sealing arrangement for a smooth inlet.
I confirm the inlet style before opening a holding-tank valve. Setting an unsecured hose end into an opening is not equivalent to making a proper connection.
When choosing camper sewer hose fittings, I also check clearance around the RV outlet. A fitting may technically match yet be difficult to use because of nearby bodywork, a low outlet, or limited access.
What I Look for in an RV Sewer Hose Kit
A compatible RV sewer hose kit can simplify a first purchase, but I read the contents list carefully. “Complete kit” does not mean the same thing across manufacturers.
My kit checklist
I look for:
- A suitable main hose or modular hose sections.
- A compatible RV-side connection.
- A sewer-inlet adapter appropriate for the intended connection.
- Necessary gaskets.
- Caps for the included hose ends.
- An extension connection, if the kit is modular.
- Clear instructions identifying any compatibility limitations.
Accessories I may need separately
A kit may not include:
- Hose supports.
- Disposable gloves.
- A dedicated rinse hose.
- A storage container or carrier.
- Replacement seals.
- An additional extension.
A clear elbow or viewing section can help me see when discharge has slowed, but it does not prove that a tank is clean.
I choose the kit that fits my system—not the one with the largest accessory count.
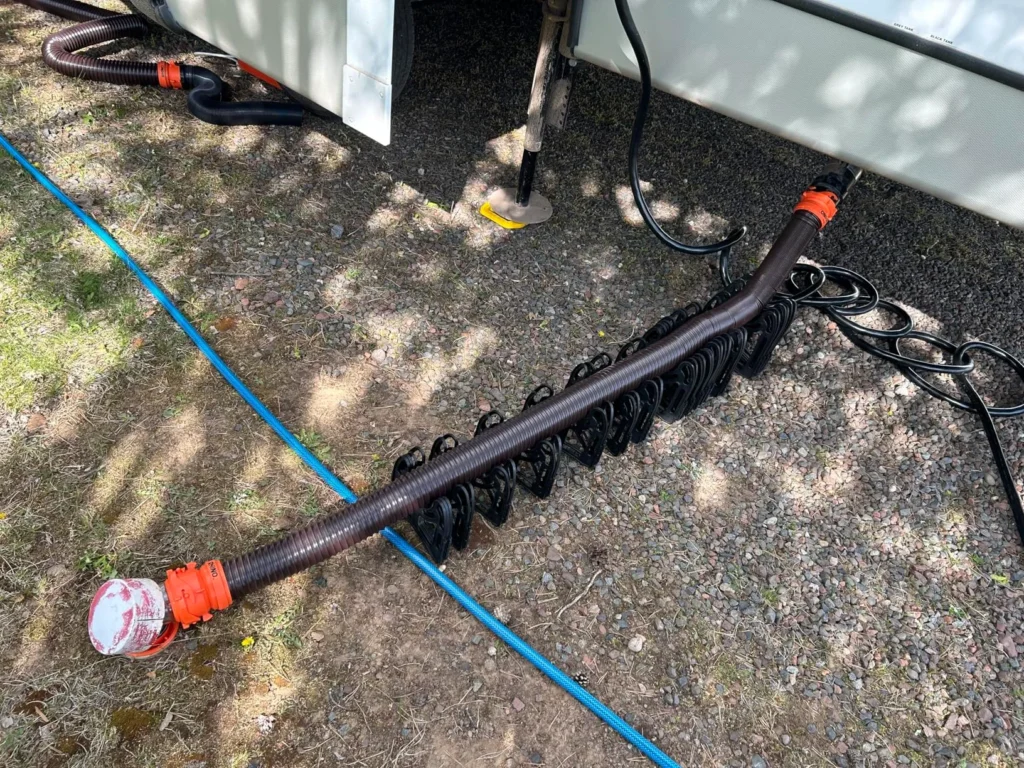
“To help complete your waste-hose setup, I cover supports, adapters, and storage solutions in my RV Sewer Accessories guide.”
How I Connect and Dump Safely
My priorities are to secure the entire waste path before opening a valve, remain nearby throughout dumping, and keep wastewater equipment away from drinking-water equipment.
I use only a designated disposal point and follow campground rules.
1. Prepare the area and equipment
I put on gloves, inspect the hose, and make sure the disposal inlet is accessible.
I keep the hose away from sharp edges, vehicle traffic, and areas where someone could trip over it.
2. Confirm that the tank valves are closed
Before removing the RV’s termination cap, I confirm the black- and gray-tank valves are closed.
I remove the cap cautiously because trapped liquid may remain behind it. If significant wastewater is present despite a closed valve, I address that problem rather than proceeding as though the valve is sealing correctly.
3. Secure both ends
I attach the vehicle-side fitting and confirm that it is properly engaged.
Next, I connect the disposal-end adapter using the inlet’s approved connection method. I check both ends before releasing any wastewater.
4. Support the hose
I create a continuous downhill route where the site layout allows it.
I avoid:
- Deep sags.
- Tight bends.
- Uphill loops.
- Tension on either fitting.
If the inlet is too high for gravity drainage, extra hose will not solve the elevation problem.
5. Empty the black tank
For the main dumping sequence, I open the black-tank valve first and allow the tank to drain.
I stay nearby. If a leak develops, I stop the flow as soon as it is safe to do so.
6. Use the tank-flush system only as directed
If the RV has a built-in black-tank flush, I follow its specific instructions.
I keep the black-tank drain valve open during flushing, never leave the process unattended, and turn off the flush water before closing the valve.
For flushing, I use a dedicated hose and the required backflow protection—never my drinking-water hose.
7. Empty the gray tank
Once black-tank draining and any approved flushing are finished, I close the black valve and open the gray valve.
Gray water helps move remaining residue through the discharge hose, but it is still wastewater and does not disinfect the equipment.
I close the gray valve when draining is complete.
8. Drain and rinse the hose
With the tank valves closed, I disconnect the RV end first while keeping the disposal end secured.
I carefully drain residual wastewater toward the inlet. If rinsing is permitted, I use the designated rinse supply and a separate hose, keeping all rinse water directed into the approved disposal point.
I do not insert or submerge a rinse-hose end in sewage.
9. Disconnect and secure everything
After the hose has drained, I disconnect the disposal end, replace the RV outlet cap, and cap the hose ends for transport.
I check that the campsite inlet is left as required by the facility.
10. Wash up and reset the tank
After removing my gloves, I wash with soap and clean water for at least 20 seconds, consistent with CDC handwashing guidance.
Before using the toilet again, I add the starting amount of water recommended by the RV or tank-system manufacturer. I do not intentionally leave a black tank dry for normal use.
Should I Leave the Tank Valves Open at Full Hookups?
I keep the black-tank valve closed between dumps.
Leaving it open allows liquid to drain away while solids can remain behind. That can contribute to buildup and difficult dumping.
I also generally keep the gray valve closed so I have water available for the final rinse-through. Some setups allow different gray-water operating practices, but I follow the RV manufacturer’s guidance and campground rules.
A hose may remain connected during an approved full-hookup stay without the tank valves remaining open.
Using an RV Sewer to PVC Adapter
An RV sewer to PVC adapter may be useful for certain approved long-term connections, but I treat it as a plumbing compatibility question—not a shortcut.
Before buying an adapter, I identify:
- The RV-side connection type.
- The PVC connection’s nominal size.
- Whether the PVC end is threaded, a slip socket, or another connection style.
- Whether the adapter is designed for a removable or permanent installation.
- Whether the campground and local wastewater rules permit the proposed arrangement.
A nominal 3-inch RV connection does not automatically fit every nominal 3-inch PVC component. Nominal pipe size and actual dimensions are not interchangeable.
I do not glue a bayonet fitting, force mismatched parts together, or use a storm drain for disposal.
For a home or permanent campsite connection, I ask the wastewater authority or a qualified plumber to confirm the approved disposal point and installation requirements. An accessible cleanout is not automatically an authorized RV dump connection.
For general background—not site-specific approval—the EPA’s septic-system guidance is a useful reference.
How I Clean, Store, and Inspect the Hose
Cleaning
I rinse the inside only where wastewater can enter an approved disposal system.
If additional cleaning or sanitizing is needed, I use products compatible with the hose, seals, and receiving system, following the manufacturer’s instructions and product label.
I never mix cleaning chemicals.
Draining and storage
I let the hose drain thoroughly and dry when a sanitary, permitted location makes that practical.
For transport, I cap the ends and keep the equipment in a dedicated wastewater storage area. I do not store it alongside drinking-water hoses, filters, or clean fittings.
Caps help contain residual drips; they do not make contaminated equipment clean.
Inspection
Before each use, I check for:
- Pinholes or splits.
- Cracks around folds.
- Flattened or damaged seals.
- Loose fittings.
- Exposed or distorted reinforcement.
- Unusual stiffness or brittleness.
- Damage caused by dragging or poor storage.
I replace compromised equipment rather than waiting for a failure during a tank dump.
Common Problems and What I Check First
| Problem | Likely possibilities | My first action |
|---|---|---|
| Leak at the RV connection | Damaged gasket, poor engagement, incompatible fitting | Close the valve, let the line drain safely, then inspect the connection |
| Leak at an extension joint | Mismatched ends, worn seal, partially engaged connector | Stop flow before adjusting or disconnecting anything |
| Pinhole in the hose body | Abrasion, puncture, age-related damage | Replace the damaged section; I do not rely on tape for routine service |
| Slow drainage | Sagging hose, kink, uphill route, or a tank-side blockage | Check the external route first without forcing the system |
| Waste remains in low spots | Too much hose or inadequate support | Shorten the route where practical and improve support |
| Odor near the hookup | Poor inlet seal or residual wastewater | Inspect the connection and clean only into an approved disposal point |
| Persistent odor inside the RV | Possible trap, toilet-seal, vent, or other plumbing issue | Investigate beyond the external hose |
If wastewater spills, I stop the discharge and follow the facility’s spill-reporting and cleanup procedure. I do not wash sewage onto the ground or into a storm drain.
If the tank itself appears blocked, I consult its instructions or a qualified RV service professional rather than using uncontrolled pressure or improvised drain-clearing chemicals.
Frequently Asked Questions
How long should an RV sewer hose last?
I do not rely on a universal replacement schedule. Service life depends on construction, sunlight, temperature, handling, and storage.
Visible damage, unreliable seals, or fittings that no longer lock securely are reasons to replace the affected component regardless of age.
Can I connect two hoses together?
Yes, when the sections use compatible connectors or an adapter designed for that purpose.
I inspect the added joint and support the full route. Extra length is helpful only if the hose can still drain without deep sags or uphill sections.
Will any 3-inch hose fit my RV?
Not necessarily.
The nominal diameter is only one compatibility detail. I also check the fitting style, locking arrangement, gasket, available clearance, and whether the system is gravity-fed or pumped.
Can I use a garden hose instead?
Not for a conventional gravity-dump connection.
Some macerator systems permit specific smaller discharge hoses, but I follow that system’s instructions and permanently dedicate the discharge hose to wastewater. I never return it to drinking-water use.
What if the campground sewer inlet is higher than my outlet?
A gravity hose cannot reliably overcome an uphill route.
I first look for an approved way to reposition the RV or use a different site. If a pumped solution is necessary, I choose a system rated for the required lift and distance rather than improvising.
Do I need a hose support?
I consider a support highly useful for maintaining the drainage route, preventing low spots, and keeping the hose off rough surfaces.
Some campgrounds require hoses to be elevated. I check the site’s rules rather than assuming the same setup is acceptable everywhere.
Can I empty my tanks into a septic system?
Only through a connection specifically approved for that use and with permission from the system owner or responsible authority.
I do not assume every residential septic system, access opening, or cleanout is suitable for an RV discharge.
My Final Checklist Before Buying
Before choosing a setup, I ask:
- Does it match my RV’s waste outlet?
- Will it reach without being stretched tight?
- Can I maintain a practical downhill route?
- Does the disposal adapter match the intended inlet?
- Are the fittings and seals serviceable or replaceable?
- Will the hose and fittings fit my storage space?
- Do I need an extension, support, or separate storage caps?
The best RV sewer hose setup for my needs is not automatically the longest, thickest, or most expensive. I prioritize compatible connections, dependable seals, controlled drainage, and sanitary storage.
Getting those basics right makes the rest of the dumping routine more manageable.