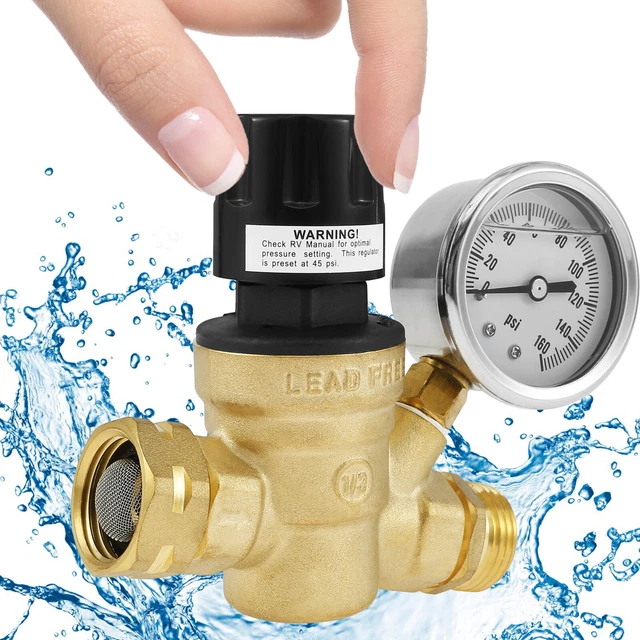
At U.S. campgrounds and RV parks, an RV pressure reducer limits the water pressure entering your RV from a city-water hookup. Also called an RV water pressure regulator, it helps protect hoses, fittings, faucets, and other plumbing parts from supply pressure that exceeds their ratings.
Choose a regulator made for drinking water, install it at the campground spigot, and set it according to your RV’s owner’s manual. About 40–50 pounds per square inch (psi) is a common operating range, not a universal safe limit. The correct setting depends on your RV and every part connected downstream.

What Does an RV Pressure Reducer Do?
An RV pressure reducer lowers incoming water pressure and controls the pressure on its outlet side. Its main job is to protect the water system, not to make a weak campground supply stronger.
A regulating valve responds to downstream pressure. As that pressure reaches the set point, the valve restricts incoming water. When you open a faucet, the valve allows more water through while trying to maintain the selected pressure.
Three terms help explain what you will see:
- Inlet pressure: Water pressure before the regulator.
- Outlet pressure: Water pressure after the regulator.
- Flow rate: The amount of water delivered over time, often measured in gallons per minute (gpm).
Pressure and flow are related, but they are not the same. A narrow hose or clogged filter can cause a weak shower even when a gauge shows adequate pressure with all faucets closed.
Pressure reducer vs. flow restrictor
A true regulator controls downstream pressure. A simple flow restrictor limits how fast water can pass through it.
That distinction matters when all faucets are closed. A fixed restriction alone does not reliably keep downstream static pressure below the supply pressure. Choose a device identified as a pressure regulator or pressure-reducing valve, not just a water-saving restrictor.
What a regulator does not do
A standard RV regulator does not:
- Filter sediment or make unsafe water drinkable.
- Increase low supply pressure.
- Replace a backflow prevention device.
- Guarantee protection from every water-hammer event.
- Relieve all pressure caused by water heating in a closed system.
Think of it as a pressure gate, not a complete water-treatment system.
What Water Pressure Should You Use in an RV?
Use the pressure specified by your RV manufacturer, while staying within the limits of all connected components. Do not assume that a number found online applies to your model.
Check the owner’s manual for the correct model and year. Then check the pressure ratings of the drinking-water hose, filter housing, fittings, and any other accessory exposed to that pressure.
The lowest applicable limit controls the setup. A high rating on one hose does not make the rest of the system safe at that pressure.
| Situation | Practical action |
|---|---|
| The RV manual gives a recommended operating pressure | Use that recommendation and check accessory limits |
| The manual gives only a maximum pressure | Treat it as a ceiling, not a target |
| The pressure limit is unclear | Ask the RV manufacturer before selecting a setting |
| A filter or accessory has a lower limit | Keep pressure within that component’s operating limits |
| Flow is weak at an acceptable setting | Check restrictions before raising pressure |
If the manufacturer permits it, an adjustable regulator set around 40–45 psi can be a conservative starting point. Open a faucet, check performance, and adjust only within the documented limits.
Static pressure vs. flowing pressure
Static pressure is measured with fixtures closed. Flowing pressure is measured while water is running. Both readings are useful.
A system might show 45 psi with no water running, then fall sharply when you turn on the shower. That drop points toward inadequate supply or a restriction somewhere in the water path.
A gauge reading is also location-specific. A gauge on the regulator outlet cannot show the exact pressure loss through a filter and hose farther downstream.

How to Choose an RV Water Pressure Regulator
Choose a regulator based on pressure control, drinking-water suitability, connection type, and usable flow—not on an unsupported “best” label.
Fixed vs. adjustable regulators
A fixed regulator has a preset outlet pressure. An adjustable model lets you change the setting within its stated range.
| Type | Useful when | Main limitation |
|---|---|---|
| Fixed-pressure regulator | You want a simple setup with few adjustments | Its preset must suit your RV; performance varies by design |
| Adjustable regulator with gauge | You want to set pressure and monitor changes | It requires correct adjustment and a readable, sound gauge |
| Regulator with a published flow curve | You need to assess performance while fixtures run | Published conditions may differ from your campsite setup |
A larger body or a “high-flow” claim does not, by itself, prove better performance. Look for a manufacturer’s flow rating and the conditions behind it. Flow depends partly on the pressure difference across the valve.
Drinking-water materials and certifications
Use a regulator intended for potable water. For U.S. drinking-water plumbing, useful certification references include:
- NSF/ANSI/CAN 61: Addresses health effects from substances that may enter drinking water from materials and components.
- NSF/ANSI/CAN 372: Addresses lead-content requirements.
These standards cover different issues. Lead-content compliance alone does not establish every aspect of drinking-water material safety.
Under the U.S. Safe Drinking Water Act, the federal definition of “lead free” for relevant wetted plumbing surfaces generally uses a weighted average lead content of no more than 0.25%. It does not mean that a product contains no lead at all.
Check any certification claim against the exact model in the certifier’s directory. Do not assume that every product from the same brand has the same certification.
Connections, gauges, and service parts
Many U.S. RV drinking-water hoses use nominal 3/4-inch garden-hose connections. Check both ends before buying; garden-hose threads and pipe threads are not interchangeable.
A downstream gauge is useful because it shows the pressure delivered after regulation. Also check whether the inlet screen, washers, gauge, or internal parts can be serviced. Follow the manufacturer’s instructions rather than assuming that every regulator can be rebuilt.
How to Install and Set an RV Pressure Reducer
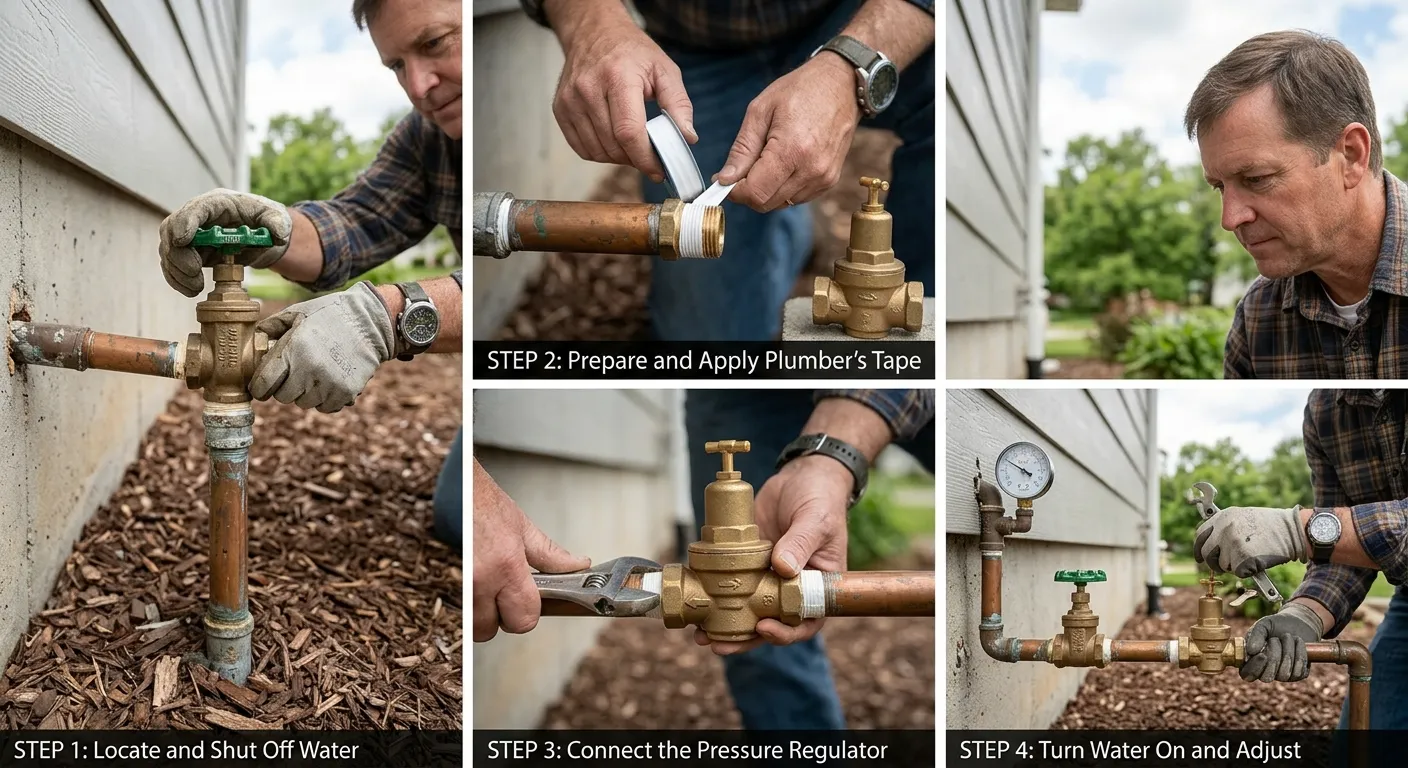
Place the regulator at the campground spigot whenever the equipment instructions allow it. This protects the downstream hose and accessories as well as the RV.
A typical arrangement is:
Campground spigot → pressure regulator → drinking-water hose and filter → RV city-water inlet
The filter’s exact position can vary with its instructions and your setup. Keep pressure-sensitive parts downstream of the regulator, and do not remove or bypass a required campground backflow device.
Before you connect
You will need:
- A regulator rated for potable water.
- A drinking-water hose.
- Sound hose washers and compatible fittings.
- A downstream pressure gauge, built in or separate.
- Your RV’s operating instructions and pressure limits.
Keep drinking-water fittings away from sewer equipment and contaminated surfaces. Do not connect to a spigot marked as nonpotable.
Installation steps
- Turn off the campground spigot. Inspect the regulator, hose, washers, and inlet screen for damage or debris.
- Flush the spigot briefly. Direct the water away from people and equipment. Turn it off again.
- Attach the regulator. Follow its flow-direction arrow. Support heavy assemblies so they do not strain the spigot.
- Connect the hose, filter, and RV inlet. Follow the accessory instructions and select the RV’s city-water mode where required.
- Open the spigot slowly. Check each connection for leaks.
- Purge air through a cold-water faucet. Let the water run until it flows steadily.
- Set an adjustable regulator. Follow its instructions; some models require water to be flowing during adjustment.
- Check both flowing and static pressure. Close the faucet, allow the reading to settle, and confirm it remains within the allowed limit.
- Check again after several minutes. Look for leaks or a continued rise in pressure.
Most washer-sealed garden-hose joints do not need thread tape. Use sealants only where the fitting manufacturer calls for them.
Signs the setup is working
Water should flow steadily, connections should remain dry, and pressure should stay within the permitted range. A small change when a faucet closes can be normal; a continued rise toward inlet pressure needs investigation.
If pressure exceeds the RV’s limit, shut off the supply. Depressurize the system safely before disconnecting or servicing anything.
Troubleshooting Low Flow, Pressure Creep, and Leaks
Check simple restrictions before changing the regulator setting. Raising pressure can hide a clogged part without fixing it.
The table below separates symptoms from possible causes.
| Symptom | Possible causes | First useful check |
|---|---|---|
| Weak flow at every fixture | Low campground supply, kinked hose, clogged filter, restricted regulator | Inspect the hose, screen, and filter |
| Only one fixture has weak flow | Clogged aerator, showerhead, or local valve | Inspect that fixture |
| Normal static pressure but poor flowing pressure | Supply shortage or excessive restriction | Compare readings with water off and running |
| Pressure rises after fixtures close | Regulator seat leakage, thermal expansion, or gauge trouble | Note whether the water heater is heating |
| Leak at a hose connection | Missing washer, damaged washer, cracked fitting, or cross-threading | Shut off water and inspect the joint |
| Gauge reads zero while water flows | Failed gauge, blocked gauge port, or very low pressure | Check with a suitable known-good gauge |
When shower flow is weak
Start with the easiest checks:
- Confirm that the spigot is fully open and the hose is not kinked.
- Inspect the regulator’s inlet screen.
- Check the filter’s service condition.
- Clean the showerhead or aerator if the problem affects only one fixture.
- Follow the manufacturer’s procedure for checking regulator performance.
Do not connect an RV directly to unknown campground pressure just to test whether the regulator is causing poor flow. Keep pressure protection in place during any comparison.
When pressure keeps rising
A gradual pressure rise with all fixtures closed is often called pressure creep. Debris or wear can prevent the regulator valve from sealing, allowing downstream pressure to move toward inlet pressure.
Water heating can also raise pressure in a closed system. A pressure-reducing valve is not an expansion tank or a pressure-relief valve, so these causes need to be separated.
If the gauge exceeds the allowed pressure, shut off the supply. Have an RV service technician assess repeated pressure rise, unexplained leaks, or suspected thermal-expansion problems. Never plug a water-heater relief valve or use it as a routine pressure-control device.

Maintenance and When to Replace the Regulator
Inspect the regulator during setup and store it according to its instructions. A low-cost part can still cause costly water damage if it fails unnoticed.
Check the body for cracks, the hose connections for damage, and the screen for debris. Replace worn washers and verify a suspect gauge before relying on it.
Freezing can damage the valve body, gauge, or internal parts. Drain and winterize the regulator as directed; do not assume that shaking out visible water removes all trapped water.
Replace or professionally service a regulator when it:
- Cannot hold its setting after permitted maintenance.
- Shows cracks, freeze damage, or persistent leaks.
- Has damaged threads or a failed adjustment mechanism.
- Cannot deliver acceptable flow despite a clear supply path.
- Has unknown drinking-water suitability or unreadable specifications.
There is no single replacement interval that fits every regulator. Condition, use, water quality, storage, and the manufacturer’s service guidance matter more than an arbitrary age.
Evidence, Sources, and Useful Follow-Up Questions
This guide provides a U.S.-focused explanation, not a hands-on product test. Live browsing was unavailable, so current competing pages, model specifications, certification listings, prices, and revisions were not inspected. No current product ranking or model-specific performance claim is made.
For decisions about your own system, use these primary references:
- Your RV’s model-year owner’s manual: The controlling source for the RV’s operating limits and connection procedure. Winnebago’s operator manual library is one manufacturer example.
- Your regulator and filter manuals: The sources for adjustment, installation, operating limits, and service instructions.
- U.S. EPA guidance on lead-free plumbing: The source for the federal lead-free definition and its scope.
- NSF consumer resources: A starting point for understanding drinking-water standards and checking certification information.
The following next-question map identifies practical needs inferred from the setup task. These are not claims of verified search demand or gaps found on inspected competitor pages.
| Next question | Reader stage and basis | Competitor coverage | Benefit and answer evidence | Priority and placement |
|---|---|---|---|---|
| Should the regulator protect the hose too? | Before setup; inferred from component exposure | Not checked | Helps prevent unprotected upstream accessories; verify equipment installation instructions | High; installation section |
| Why is flow weak when the gauge looks normal? | During use; inferred from pressure/flow confusion | Not checked | Avoids unsafe pressure increases; use static and flowing checks | High; troubleshooting section |
| Is rising pressure always a failed regulator? | After setup; inferred from closed-system behavior | Not checked | Separates valve leakage from thermal expansion; needs model-specific service checks | High; troubleshooting section |
| Does “lead free” establish all water-contact safety? | Before purchase; inferred from certification scope | Not checked | Clarifies distinct standards; EPA and certification documentation | Medium; selection section |
FAQs
Do I need a pressure reducer when using the onboard water pump?
An external campground regulator normally controls incoming city water, not water drawn from the fresh-water tank by the onboard pump. The pump has its own pressure controls. Follow the RV manual for pump use and any pressure adjustments.
Can an RV pressure reducer increase low campground pressure?
No. A passive pressure reducer cannot raise inlet pressure. If the supply is weak, check restrictions first. Where campground rules and the RV manual allow it, filling the fresh-water tank and using the onboard pump may provide more consistent service.
Should I use two water pressure regulators?
Two regulators are usually unnecessary and can add restriction. An RV may already have built-in regulation, but an external regulator can still protect the hose ahead of the RV. Confirm the built-in regulator’s function and follow the manufacturer’s guidance.
Will an RV regulator work on hot water?
Do not assume so. Check the regulator’s temperature rating and intended use. A unit designed for a cold-water campground connection may not be suitable for a hot-water application.
Should I turn off campground water when leaving the RV?
Turning off the spigot when leaving the RV unattended reduces the amount of water available to feed a leak. It does not remove water already in the plumbing. If the onboard pump is on, it can also supply a leak from the fresh-water tank.
Conclusion
An RV pressure reducer belongs at the start of a protected city-water hookup. Choose a potable-water model, follow your RV’s pressure limits, and check performance both with faucets open and closed.
Before your next U.S. campground stay, find the pressure guidance for your exact RV and inspect the regulator, hose, washers, and filter. If flow is poor, look for restrictions before turning up the pressure.