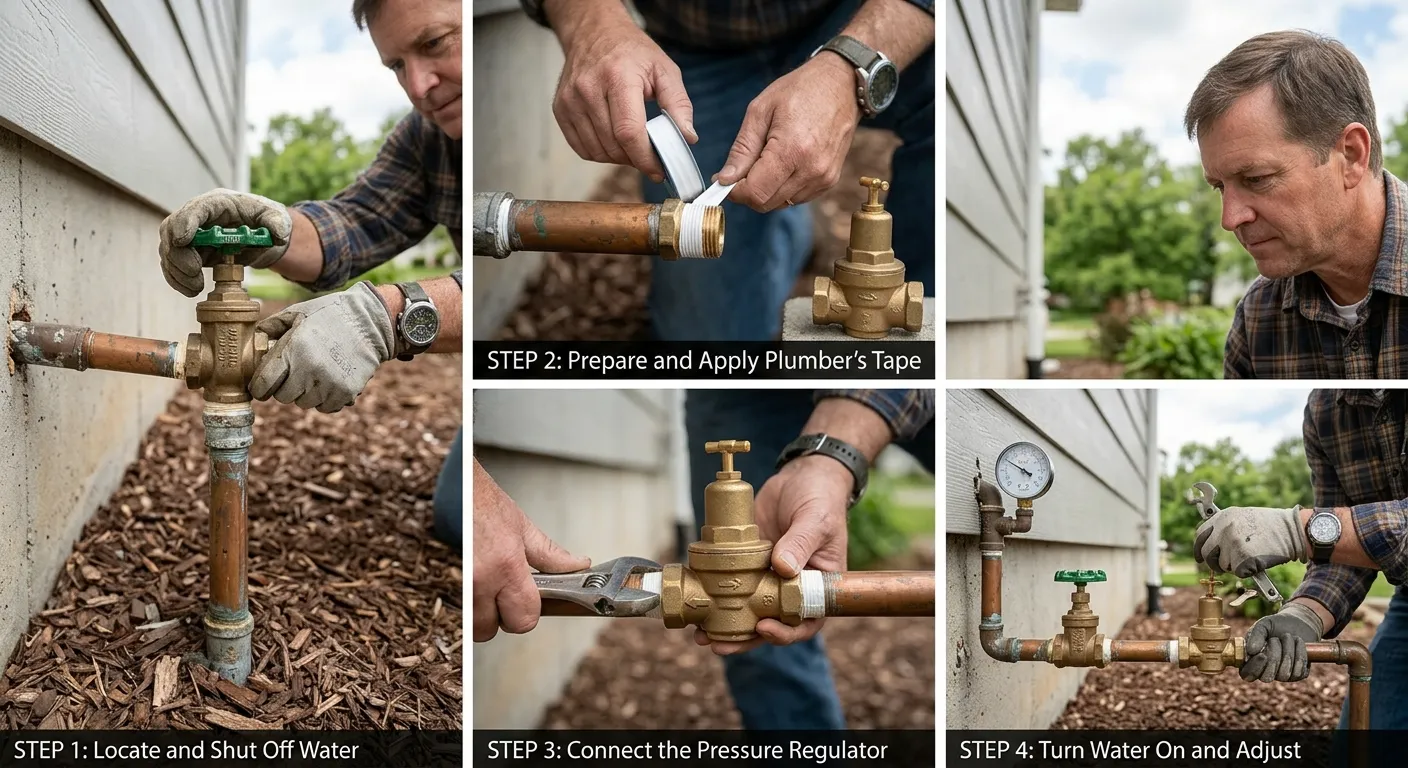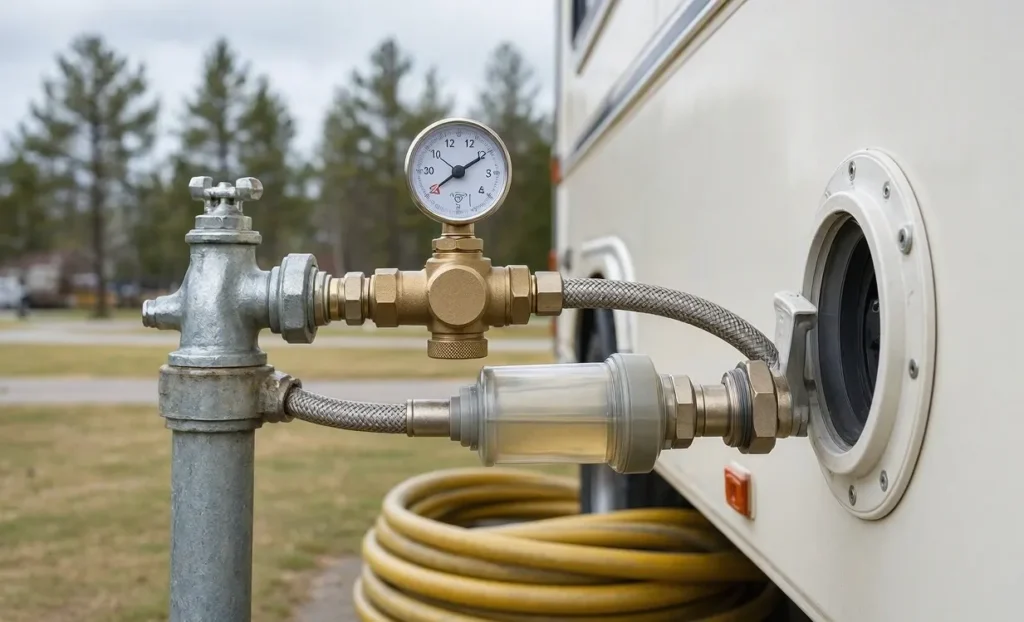
I treat campground water pressure as an unknown—not a promise. A hookup that looks ordinary can supply more pressure than an RV’s plumbing, filter housing, or drinking-water hose is designed to handle. At the same time, weak shower flow does not automatically mean I should increase the pressure.
That is why I consider an RV water pressure regulator an important part of a city-water connection. In this guide, I explain how I choose a suitable model, determine an appropriate pressure setting, install it in the right place, and troubleshoot problems without guessing.
My goal is straightforward: controlled pressure, usable flow, and a hookup that respects the limits of the entire water system.
My Quick Answer: What Should I Use?
For a typical city-water hookup, I recommend a genuine pressure-reducing regulator installed near the water source, after any required backflow protection and usually before the drinking-water hose and filter.
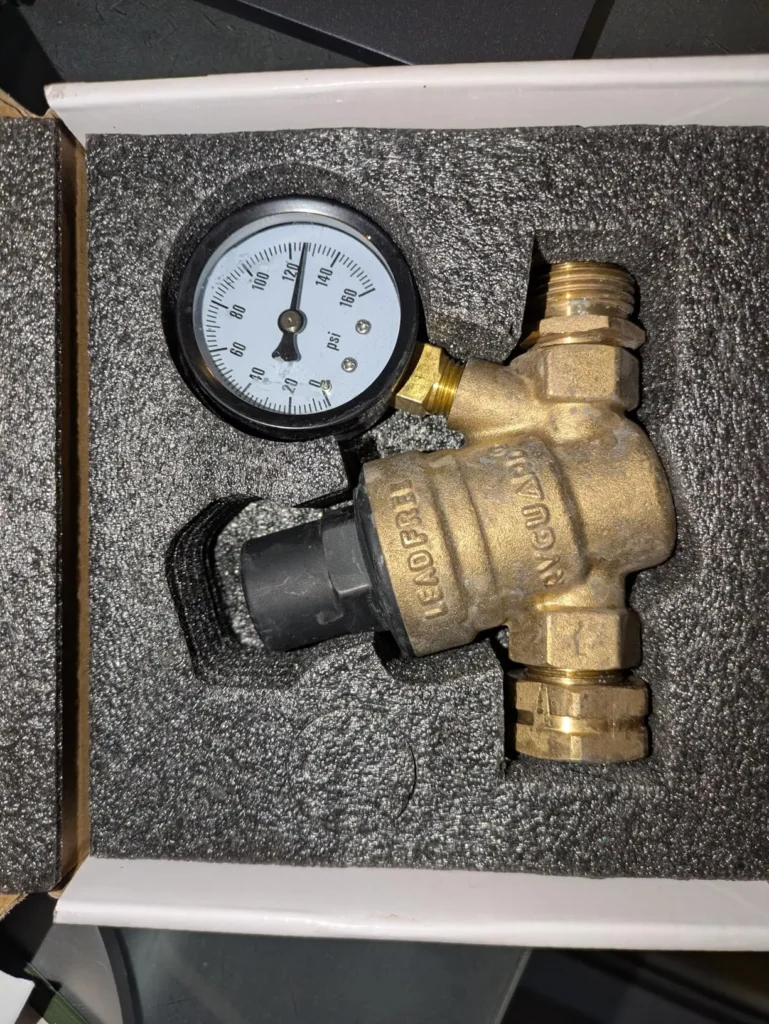
An adjustable model with a downstream gauge makes pressure easier to check, but a correctly rated fixed-pressure model can also work well.
Around 40–50 PSI is a common operating range, not a universal safe specification. I follow the RV manufacturer’s instructions and any lower limits specified for downstream components.
What Does a Water Pressure Regulator Actually Do?
An RV pressure regulator reduces higher incoming supply pressure to a controlled downstream level. Within its operating limits, its internal valve responds to pressure changes rather than simply leaving a fixed opening for water to pass through.
That distinction matters when campground pressure changes with local demand.
A suitable regulator can reduce the risk of pressure-related leaks and component damage. However, it cannot:
- Increase pressure from a weak water supply.
- Repair damaged plumbing or worn seals.
- Guarantee unrestricted flow through a clogged filter.
- Act as an automatic leak shutoff.
- Replace a water heater’s temperature-and-pressure relief valve.
A Pressure Reducer Is Not the Same as a Flow Restrictor
When I see a product described as an RV pressure reducer, I check whether it actually regulates downstream pressure.
A simple flow restrictor slows moving water. When every faucet closes, however, downstream static pressure can still rise toward the supply pressure.
For plumbing protection, I want documented pressure regulation—not merely reduced flow.
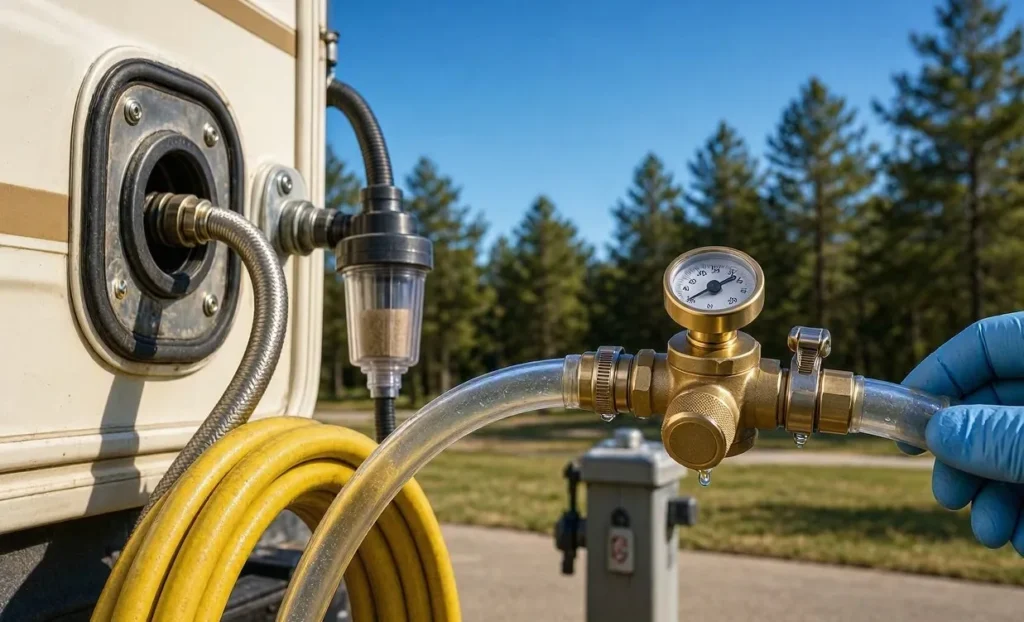
What Water Pressure Should I Set for My RV?
I start with the owner’s manual, not a generic online recommendation.
The correct setting depends on the RV’s plumbing design and the ratings of its hoses, filters, fittings, and connected equipment.
My decision process is:
- Check the RV manufacturer’s recommended operating pressure and maximum limit.
- Check the ratings of every downstream component.
- Keep the final static pressure within all applicable limits.
- Leave reasonable headroom rather than deliberately operating at the maximum.
For a system whose manufacturer permits it, approximately 40–45 PSI can be a reasonable starting point. I would then check performance and the final static reading before making further adjustments.
I do not assume that 60 or 65 PSI is safe simply because another RV owner uses that setting. I also do not use a pipe’s advertised burst-pressure rating as the operating limit for a complete RV water system.
Static Pressure vs. Flowing Pressure
I separate these two measurements:
- Static pressure: The pressure when all fixtures are closed.
- Flowing pressure: The pressure while water is being used.
An RV water pressure gauge helps me understand both, provided I know where it is measuring.
A gauge on the regulator’s outlet shows pressure at that location. During water use, pressure at the RV can be lower because of losses through the hose, filter, fittings, and plumbing.
If static pressure looks appropriate but the shower becomes weak when another faucet opens, I investigate flow restrictions before increasing the setting.
Fixed vs. Adjustable Regulators: Which Would I Choose?
I choose between fixed and adjustable designs based on pressure requirements, monitoring needs, and documented flow performance.
| Regulator type | What I like about it | What I check carefully |
|---|---|---|
| Fixed pressure, no gauge | Simple operation with fewer adjustments | The specified outlet setting and whether I can verify it with a separate gauge |
| Fixed pressure, with gauge | A visible reading without an adjustment mechanism | The gauge location, accuracy, and actual regulated pressure |
| Adjustable, with gauge | More control over the setting and easier pressure checks | Adjustment instructions, inlet-pressure limits, flow performance, and maintenance requirements |
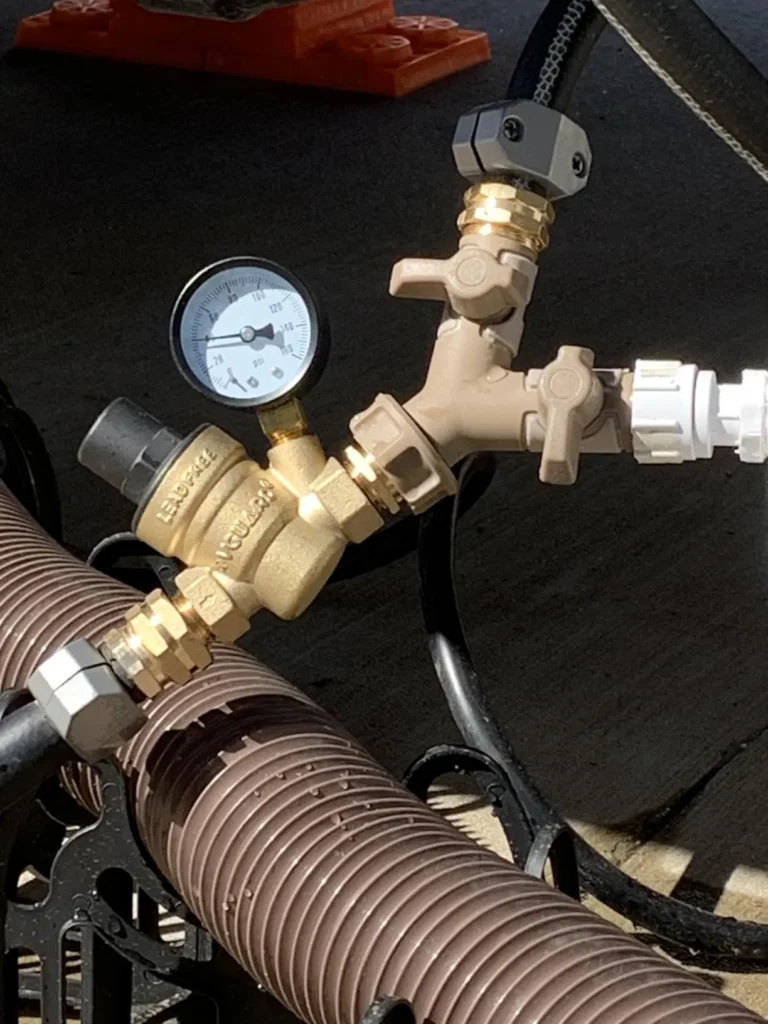
An RV water regulator with gauge is convenient, but the gauge does not perform the regulation. It only displays pressure.
I also verify whether the gauge reads inlet or outlet pressure. For checking the pressure being supplied toward the RV, a downstream reading is generally more useful.
My usual recommendation is an adjustable model with a readable downstream gauge and clear specifications. However, I would choose a well-documented fixed regulator over an adjustable model with questionable construction or no meaningful performance information.
“I recommend an RV Water Regulator With Gauge to control incoming pressure and check the reading at a glance.”
Pressure and Flow: Why PSI Is Only Half the Story
Pressure is measured in PSI. Flow is commonly measured in gallons per minute, or GPM.
They are related, but they are not interchangeable.
For example, a shower using 2 GPM and a faucet using 1 GPM create approximately 3 GPM of combined demand. That is a sizing example—not a specification for every RV.
When comparing candidates for the best RV pressure regulator, I look for useful flow information at realistic operating conditions. An unsupported “high-flow” label tells me much less than a published performance curve or clearly explained test.
I also consider:
- Hose length and internal diameter.
- Filter condition and pressure loss.
- Screens, adapters, and restrictive fittings.
- How many fixtures may operate simultaneously.
- The campground’s available pressure and flow.
My Simple Flow Check
If I need a basic comparison, I use a clean container and a timer:
GPM = gallons collected × 60 ÷ collection time in seconds
One gallon collected in 30 seconds equals 2 GPM.
I compare measurements at the same fixture under similar conditions. This helps me identify changes without assuming that a higher pressure setting is the solution.
My Buying Checklist
For me, the best RV water pressure regulator is the one that suits the water system—not the model with the biggest pressure number or the most impressive packaging.
Before buying a water pressure regulator for RVs, I check the following details.
1. Documented Drinking-Water Suitability
I look for materials intended for potable-water service.
Where a manufacturer claims certification, I verify the exact model rather than assuming every product from that brand has the same approval.
Two standards worth understanding are:
- NSF/ANSI/CAN 61: Addresses health effects associated with drinking-water system components.
- NSF/ANSI/CAN 372: Addresses lead content.
A lead-content certification alone does not establish overall pressure-regulation performance or every aspect of drinking-water suitability.
The NSF certification directory provides a way to check applicable listings. The EPA’s guidance on lead-free plumbing products provides additional context.
2. Suitable Inlet and Outlet Pressure Ratings
I check both sides of the specification:
- The maximum pressure the regulator can safely accept.
- The fixed outlet setting or adjustable outlet range.
A 45-PSI outlet setting does not mean the regulator can accept unlimited incoming pressure.
3. Adequate Flow Performance
I want enough usable flow at an approved pressure for the fixtures I expect to operate.
I do not assume every adjustable regulator flows better than every fixed model. The actual design and published performance matter more than the category.
4. Compatible Connections
At many North American RV hookups, 3/4-inch garden-hose-thread connections are standard.
I still verify the fittings before purchasing. Garden hose threads and tapered pipe threads are different connection types, even when their nominal size sounds similar.
5. A Useful Gauge
I prefer a gauge with:
- A readable scale around the intended operating pressure.
- A stated accuracy specification.
- A clearly identified measurement location.
- Replacement availability where practical.
Liquid filling can damp needle movement, but it does not automatically make a gauge more accurate.
6. Serviceability and Support
When choosing the best RV water regulator for value, I consider the full ownership picture: accessible screens, replaceable parts, clear instructions, warranty support, and documented specifications.
A low purchase price becomes less attractive if the entire assembly must be discarded because of one failed gauge or unavailable seal.
Does a Camper Need Something Different From a Motorhome?
When selecting a pressure regulator for camper hookups, I focus on the trailer’s plumbing limits, connection space, and expected fixture demand.
For a motorhome water pressure regulator, I follow the same principles. A coach with several fixtures operating together may benefit from greater flow capacity, but vehicle size alone does not justify a higher pressure setting.
Where Should I Install the Regulator?
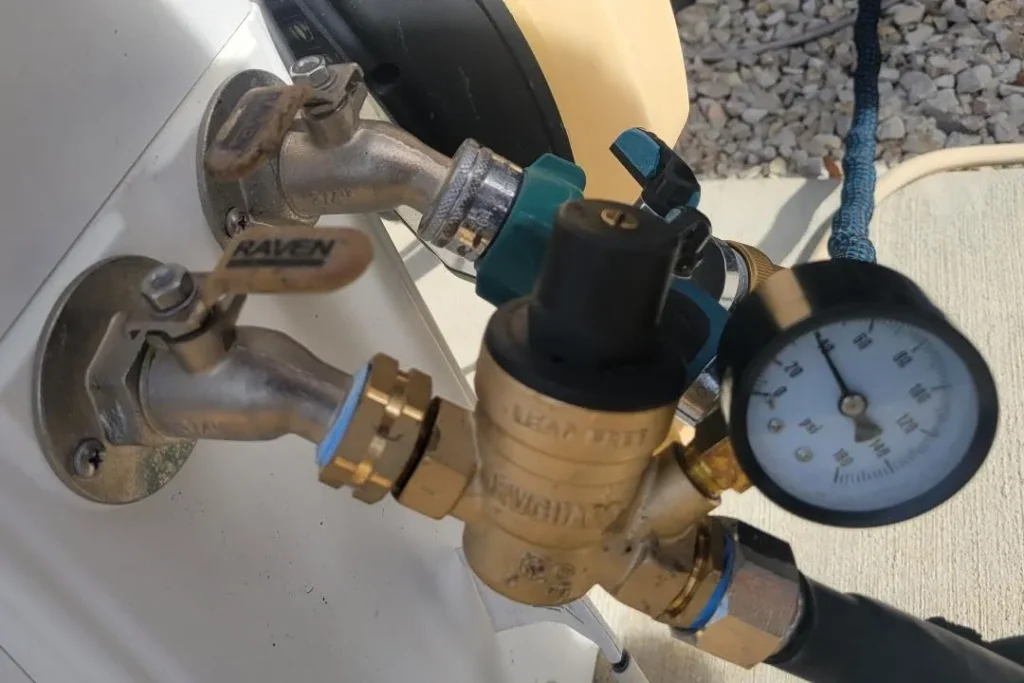
For a typical hookup, I place an RV water hose regulator near the supply connection so the drinking-water hose receives regulated pressure too.
My usual arrangement is:
Campground spigot → required backflow protection → regulator → drinking-water hose → approved filter → RV city-water inlet
I leave campground backflow-protection equipment in place and follow the instructions for every component.
Why I Usually Put the Regulator Before the Hose and Filter
If I install the regulator only at the RV inlet, the upstream hose and filter may remain exposed to full campground pressure.
Locating it near the source generally protects more of the hookup.
There are exceptions. If a manufacturer requires a particular filter or strainer upstream of the regulator, I follow that arrangement and confirm that the upstream component can withstand the unregulated supply pressure.
My Step-by-Step Installation Process
Step 1: Confirm the Ratings and Starting Setting
I check the RV manual, regulator instructions, and downstream component limits.
I also establish the regulator’s initial setting using the manufacturer’s procedure. I do not assume an unknown adjustable unit is ready to connect safely.
Step 2: Shut Off the Supply and Release Trapped Pressure
Before changing connections, I turn off the water source and relieve pressure.
I inspect the hose ends, sealing washers, regulator screen, and fittings. I also keep potable-water connections away from the ground and wastewater equipment.
Step 3: Connect the Regulator in the Correct Direction
I follow the flow arrow or inlet/outlet labels.
I avoid using the gauge as a handle and support heavier assemblies so they do not place unnecessary strain on the spigot.
Step 4: Attach the Hose and Filter
I connect a drinking-water-rated hose and arrange the filter according to its instructions.
Garden-hose connections normally seal against a washer—not against the threads. I replace a damaged washer rather than trying to compensate with excessive tightening or thread tape.
Pipe-thread connections may require a different sealing method, so I follow the relevant fitting instructions.
Step 5: Admit Water Slowly
I open the supply gradually and use a cold-water faucet to release trapped air.
I watch for leaks while the system fills.
Step 6: Adjust According to the Regulator Manual
I make small adjustments using the manufacturer’s procedure.
Many regulators are non-relieving: reducing the adjustment does not immediately release pressure already trapped downstream. Briefly opening a faucet allows that pressure to fall.
Step 7: Check Static and Flowing Pressure
After adjusting, I close the fixtures and confirm the final static reading.
Then I run water and check performance under demand. I do not keep raising the setting simply because the gauge drops while water is flowing.
Step 8: Inspect and Recheck
I inspect every connection, then recheck after several minutes.
If pressure exceeds an applicable limit, I shut off the supply and correct the problem before continuing. I also turn off the city-water source when leaving the RV unattended; a regulator is not a leak detector.
Troubleshooting Common Pressure Problems
| What I notice | Possible causes | My first action |
|---|---|---|
| Outlet pressure is too high immediately | Incorrect setting, wrong flow direction, misunderstood gauge location, or regulator failure | Shut off the supply and verify the installation and specifications |
| Static pressure is acceptable, but flow is weak | Clogged filter or screen, restrictive hose or fittings, insufficient source flow | Check restrictions systematically rather than increasing pressure |
| Pressure slowly rises with fixtures closed | Regulator-seat leakage, trapped pressure after adjustment, or water-heater thermal expansion | Verify the gauge and compare readings under controlled conditions |
| Pressure is low before and after the regulator | Weak source pressure or a supply-side restriction | Check the campground connection; remember that a regulator cannot boost pressure |
| A hose connection drips | Damaged washer, cross-threading, debris, or a cracked fitting | Shut off and depressurize before inspecting the connection |
| The gauge sticks or behaves erratically | Gauge damage, freezing, blockage, or internal failure | Compare against a known-good gauge before changing the pressure setting |
Pressure Creep vs. Water-Heater Expansion
A rising gauge does not automatically prove that the regulator has failed.
Heating water in a closed system can increase downstream pressure. A supply regulator may not relieve that increase.
I compare readings with the water heater cool and not heating, following its instructions, and seek qualified service if the cause remains unclear or pressure exceeds the permitted limit.
I never plug, cap, or disable a water heater’s temperature-and-pressure relief valve.
How I Maintain the Regulator
My maintenance checklist is simple:
- Inspect connections and sealing washers.
- Clean accessible inlet screens as directed.
- Check the body and gauge for damage.
- Confirm that the unit still holds an appropriate static pressure.
- Use only manufacturer-approved cleaners, lubricants, or replacement parts.
- Drain, remove, and store the unit according to its winterization instructions.
I do not assume a heated hose also protects an exposed regulator from freezing.
After freezing, impact damage, or unexplained pressure changes, I verify operation before trusting the unit again. A regulator that cannot control pressure properly needs service or replacement—not a more aggressive adjustment.
Frequently Asked Questions
Do I Need a Regulator if My RV Already Has One Built In?
I first confirm that the built-in device is actually a pressure regulator.
A city-water check valve prevents reverse flow; it does not necessarily reduce pressure.
If the RV has an integrated regulator, I follow the manufacturer’s guidance. An external unit near the spigot may still be useful for protecting the hose and external filter, although regulators in series can affect flow.
Does an External Regulator Control My Onboard Water Pump?
Generally, no.
When water comes from the freshwater tank, the onboard pump and its controls determine pump-side pressure. A regulator attached to the city-water hose does not normally regulate that separate supply.
I diagnose pump-pressure problems using the pump and RV manuals rather than adjusting the external regulator.
Can I Reduce Pressure by Opening the Campground Faucet Only Partway?
I do not use that method as pressure protection.
Partially closing a faucet can restrict flow, but downstream static pressure can still rise toward supply pressure when fixtures are closed.
A true pressure-regulating device serves a different purpose.
Is an RV Water Pressure Valve the Same as a Regulator?
The phrase RV water pressure valve can describe different components, so I check the actual function.
- A pressure regulator controls downstream supply pressure.
- A shutoff valve opens or closes the water supply.
- A check valve helps prevent reverse flow.
- A relief valve opens under specified conditions to relieve excess pressure.
I do not treat these parts as interchangeable.
Will Increasing the Setting Fix a Weak Shower?
Not necessarily.
Before changing the setting, I check the showerhead, hose, filter, screens, and available source flow.
If pressure is already within the RV’s recommended range, turning it higher may add risk without resolving the restriction.
Can I Fill the Freshwater Tank Through the Regulated Connection?
That depends on the RV’s plumbing and selector-valve arrangement.
Some RVs fill the tank through a city-water connection; others use a separate gravity-fill opening.
I follow the labeled filling procedure and owner’s manual. I never try to pressurize a vented freshwater tank by sealing a gravity-fill opening.
“Need to replace or repair your rv tank valve? Read guide on How to Change Black Tank Valve: RV Replacement Guide for step-by-step instructions and helpful replacement tips.
My Final Recommendation
I choose a regulator by working backward from the RV’s requirements: permitted pressure, expected flow, component ratings, and connection compatibility.
For many setups, an adjustable model with a downstream gauge is a practical choice. A properly rated fixed model can also provide effective pressure control.
What matters most is the complete setup: correct placement, a verified setting, suitable drinking-water components, and regular checks. I would rather investigate a restriction than turn up the pressure and hope for the best.
References I Recommend Checking
For a specific installation, I use these references in order:
- The RV owner’s manual: City-water pressure limits, inlet functions, and tank-filling procedures.
- The regulator’s installation manual: Inlet limits, adjustment procedure, orientation, and freeze protection.
- The hose and filter documentation: Pressure, temperature, and installation requirements.
- NSF certification listings and EPA guidance: Verification and context for drinking-water material claims.