Replacing Black Tank Valve components on your RV starts with safe waste handling—not loosening bolts. For a typical bolt-in gate valve, the job involves emptying and rinsing the black tank at an approved dump station, removing the failed valve, and installing a compatible replacement with new seals. It can be a manageable DIY repair when the valve is accessible and the mounting flanges and surrounding plumbing are undamaged.
Before opening any connection, wear protective gloves and eye protection, and prepare to contain residual wastewater. An “empty” tank-gauge reading does not confirm that the tank or drain line is clear. If a stuck valve prevents draining, sewage remains trapped, or the plumbing is damaged, stop and contact an RV service technician.
This guide covers accessible, serviceable, bolt-in RV waste gate valves. Cable-operated, electric, glued-in, and enclosed assemblies may need different procedures or professional service. Always follow the instructions for your specific valve and RV over general guidance.
“For guidance on choosing and installing a compatible waste valve, see our RV Dump Valve Replacement guide.”
How the Black Tank Valve Works
The black tank valve controls the discharge of toilet waste from an RV’s holding tank. A flat gate slides between two seals. When closed, the gate blocks flow. When open, it lets the tank drain through the sewer outlet.
On many U.S. RVs, the black tank uses a nominal 3-inch valve. Gray-water valves are often smaller, though some also use 3-inch valves. Match the installed part rather than buying by tank type alone.
Three parts matter during replacement:
- Valve body: Houses the sliding gate and its operating mechanism.
- Seals: Fit between the valve body and the adjoining flanges.
- Flanges: Connect the valve to the tank outlet and downstream drain plumbing.
A new valve will not fix a cracked flange, a leaking pipe joint, or a misaligned drain assembly. Check those parts before ordering a replacement.
“If you notice wastewater dripping near the valve, our RV Black Tank Valve Leak guide can help you identify the source before replacing parts.”
Confirm That the Valve Needs Replacement
Replace the valve when its body is damaged, its gate cannot work correctly, or its sealing surfaces cannot be restored with an approved repair. First, rule out a cable fault, trapped debris, and leaks from nearby fittings.
Use the symptoms below to narrow the cause.
| Symptom | Possible cause | Useful first check |
|---|---|---|
| Waste collects behind the sewer cap while both tank valves are closed | A leaking black or gray valve, or residual liquid in the shared outlet | Drain the outlet into a connected sewer hose, then test the tanks separately |
| Handle is hard to pull | Debris, dry or damaged seals, bent rod, or cable friction | Inspect the mechanism without forcing it |
| Handle moves, but the valve does not open | Loose connection, failed cable, broken rod, or gate fault | Check the linkage and actual gate movement where accessible |
| Liquid leaks around the valve body | Displaced seals, cracked body, damaged flange, or uneven clamping | Find the highest wet point after cleaning and drying the area |
| Valve will not close fully | Debris in the gate path, cable adjustment, or damaged internal parts | Empty and rinse the tank, then inspect the mechanism |
| Odor occurs without a visible drain leak | Possible vent, toilet seal, or other waste-system problem | Check those systems before replacing the valve |
A leak behind the sewer cap does not identify which tank valve is leaking when black and gray tanks share an outlet. Test them separately with clean water after the system has been emptied.
Do not pull harder on a stuck handle. Excess force can damage the rod, cable, or plumbing and turn a small repair into a larger one.
Choose the Correct Replacement Valve
Choose a replacement by valve size, mounting pattern, operating type, and installation clearance. A part that looks similar may still fit poorly or leave the handle inaccessible.
Before buying, record:
- The valve manufacturer and part number, if visible.
- The nominal valve size.
- The bolt pattern and body dimensions.
- Whether operation is direct-pull, cable-operated, or electric.
- The handle direction and space needed for full travel.
- Any clearance limits from insulation, framing, or tank supports.
A photo of the full assembly is useful. Include the valve, both flanges, the handle or cable, and nearby pipe supports.
Direct-pull, cable, and electric valves
A direct-pull valve has a handle attached to its operating rod. A cable-operated valve lets the handle sit away from the valve body. An electric valve uses a powered actuator.
A stiff cable handle does not always mean the valve needs replacement. A damaged cable, tight bend, loose bracket, or poor adjustment can prevent full travel. Test the mechanism according to its manufacturer’s instructions before replacing the gate.
For an electric valve, isolate power as directed before service. Do not assume that switching the control off prevents accidental movement.
Replace the seals with the valve
Use the new seals supplied or specified for the exact valve. Old seals may be flattened, nicked, or swollen even when they look usable.
Do not assume that seals from another brand or an older assembly are interchangeable. The seal profile and how it sits in the flange matter as much as the nominal size.
Tools, Supplies, and Safety Checks
Gather the parts and containment supplies before opening the drain assembly. Once the old valve is loose, stopping to find a wrench or catch pan becomes much harder.
Tools and supplies
- Correct replacement valve and matching seals.
- Manufacturer-specified bolts and nuts, if the old hardware is unsuitable.
- Wrenches or sockets that fit the installed fasteners.
- A shallow catch pan and absorbent material.
- Disposable gloves and splash protection.
- Work clothes and closed-toe shoes.
- A light and inspection mirror.
- Cleaning supplies suitable for the valve and flange materials.
- Seal lubricant only if the valve manufacturer permits it.
- A connected RV sewer hose and access to approved waste disposal.
Do not use petroleum grease, solvent, pipe cement, or sealant on the seals unless the manufacturer calls for it. A product that works elsewhere on the RV may damage the seal material.
Set up a safe work area
Park on firm, level ground. Apply the parking brake and secure the RV against movement. Do not crawl under an RV supported only by a jack or by leveling equipment not approved for that purpose.
If access requires lifting the RV, use the vehicle manufacturer’s lifting and support procedure or hire a qualified technician. Stop if the repair would require moving a tank, cutting structural parts, or disturbing unfamiliar wiring or fuel lines.
Keep children and pets away. Keep sewage tools separate from drinking-water gear, and wash your hands with soap and water after removing gloves.
How to Replace a Black Tank Valve
The procedure below applies to a typical serviceable valve held between two flanges by four bolts. Stop if your assembly does not match this layout or the replacement instructions require a different method.
1. Empty both holding tanks
Connect the sewer hose to an approved disposal point before opening a waste valve. Drain the black tank, then drain the gray tank if both use the same outlet.
Rinse the black tank using the RV manufacturer’s method. If the RV has a built-in tank flush, follow its instructions for valve position and water supply. Do not leave the flush running unattended or let the tank overfill.
Prevent anyone from using the toilet, sinks, or shower during the repair. Switch off the water pump and shut off the city-water supply where needed to prevent accidental inflow.
2. Account for trapped waste
Close the tank valves after draining. Let the shared outlet drain through the connected hose.
If the black valve is stuck closed and the tank still contains waste, do not remove the valve body. Arrange controlled emptying with an RV service technician or an appropriate waste service.
Even an emptied tank can leave liquid in the outlet pipe. Place a catch pan directly beneath the valve and keep absorbent material ready.
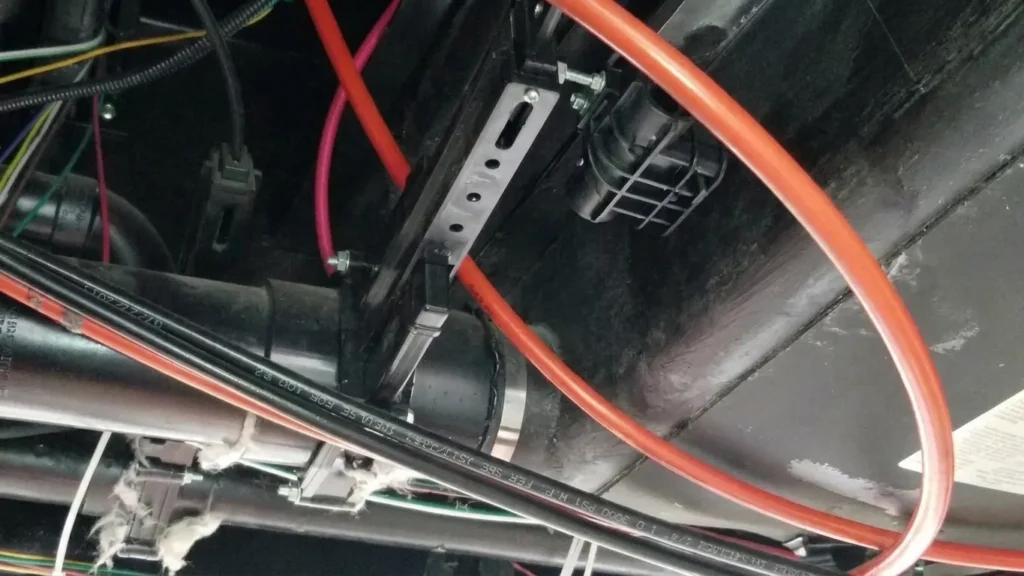
3. Expose and inspect the assembly
Remove an access panel only if you can do so safely and restore it correctly. Take photos before disconnecting cables, brackets, or supports.
Look for:
- Cracked or distorted flanges.
- Loose or damaged pipe supports.
- Signs that the plumbing is under strain.
- Water damage or sewage inside an enclosed underbelly.
- Nearby wires, heat pads, or other parts that could be damaged.
If the assembly needs force to stay aligned, fix the support or alignment issue before installing a valve.
4. Remove the old valve
Support the adjoining plumbing so it cannot sag when the bolts come out. Loosen the fasteners gradually and remove the hardware.
Ease the flanges apart only enough to release the valve body and seals. Do not pry hard against plastic pipe or use the tank outlet as a lever.
If the valve will not come free without heavy force, stop. A technician may need to revise or support the plumbing.
5. Clean and inspect the sealing faces
Remove the old seals and any loose debris. Clean the flange recesses and contact surfaces with products suitable for the materials.
Check for cracks, deep scratches, warped faces, and damaged bolt holes. A clean surface helps a sound seal work; it cannot make a damaged flange sound.
Avoid scraping with a tool that can gouge the sealing face. Remove any material that could hold the new seal out of position.
6. Fit the new valve and seals
Seat the seals exactly as shown in the replacement valve’s instructions. Some designs hold the seals in the adjoining flange recesses; others use a different arrangement.
Use only an approved lubricant if one is specified. Do not add silicone caulk, pipe cement, or thread tape to make up for poor fit.
Place the valve between the flanges without rolling or pinching either seal. Check the required gate position during assembly rather than assuming every model installs the same way.
7. Tighten the hardware evenly
Start all fasteners by hand. Draw the assembly together in small, even steps, alternating across the valve.
Use the manufacturer’s torque specification when one is provided. There is no single safe torque value for every RV waste valve.
Do not use an impact driver or overtighten the bolts to stop a leak. Too much force can distort the valve body, damage a flange, or make the gate bind.
8. Restore the operating mechanism
Reconnect the handle, cable, or actuator as directed. Check that it has room for full travel.
For a cable valve, confirm that the cable housing and brackets are secure. A moving handle is not proof that the gate reaches fully open and fully closed.
Restore electrical power only after the assembly is secure and the area is clear.
9. Test with clean water
Keep the sewer hose connected to approved disposal. With the new valve closed, add a controlled amount of clean water through the toilet—enough to reach the outlet and load the valve seal.
Dry the outside of the assembly, then inspect for drips. Check whether water passes the closed gate into the downstream outlet. Follow the valve or RV manufacturer’s test procedure if one is provided.
Open the valve and confirm normal drainage. Close it and check operation again.
10. Recheck and restore access
Confirm that the valve moves smoothly, the joints remain dry, and the closed gate holds water. Check pipe supports and cable routing.
Restore access panels, insulation, weather barriers, and any removed protective parts. Dispose of captured waste at an approved facility, then clean the tools and work area.
“If your valve handle stops short or feels stuck, read RV Black Tank Valve Won’t Close before forcing it and risking damage.”
What to Do if the New Valve Leaks or Binds
A new valve that leaks needs inspection, not more bolt force. Drain the clean test water before loosening any part of the assembly.
| Problem after installation | Likely checks | Next action |
|---|---|---|
| Leak between valve and flange | Seal position, flange condition, alignment | Remove and reseat the seals; replace damaged parts |
| Water passes through the closed gate | Full gate travel, debris, internal seal fit | Check operation and inspect the sealing path |
| Gate becomes stiff after tightening | Uneven clamping, excessive tightening, pipe strain | Follow the specified assembly procedure and correct alignment |
| Cable handle will not complete its stroke | Cable routing, brackets, adjustment | Correct the cable setup under the manufacturer’s instructions |
| Leak comes from a nearby joint | Pipe, adapter, or tank fitting damage | Repair the leaking joint rather than replacing the valve again |
| Plastic body or flange is cracked | Part damage or installation stress | Replace the damaged component; do not rely on an exterior patch |
Before returning the tank to service, confirm three signs of success: no external leak, no unwanted flow past the closed gate, and full opening and closing movement.
If the source remains unclear, have an RV technician inspect the system. Repeated disassembly can damage otherwise usable flanges and hardware.
Common Mistakes and When to Hire an RV Technician
The most costly mistakes are opening a tank that still holds waste, forcing old plastic plumbing apart, and tightening bolts to compensate for a misplaced seal. Each can make the spill or repair worse.
Avoid these shortcuts:
- Trusting the tank monitor as the only empty-tank check.
- Reusing damaged seals.
- Mixing parts based only on nominal valve size.
- Letting unsupported plumbing hang from the tank fitting.
- Adding unapproved grease or sealant.
- Closing the underbelly before completing a clean-water test.
- Treating an add-on outlet valve as a repair for a failed upstream valve.
Hire a technician when the tank cannot be emptied safely, the valve is inaccessible, the flange is damaged, or contaminated liquid has entered an enclosed area. Professional help is also appropriate when the job involves tank removal, glued plumbing changes, or electrical faults beyond the documented actuator procedure.
For routine use, keep the black tank valve closed between dumps unless the RV manufacturer specifies otherwise. Leaving it open at a full-hookup campsite can let liquid drain while solids remain in the tank.
“Unsure whether replacement is necessary? Our Repair RV Black Tank Valve guide explains how to assess repair options.”
Frequently Asked Questions
Can I replace just the seals?
Sometimes. If the valve body, gate, and operating parts are sound, a manufacturer-approved seal kit may be enough. Replace the complete valve when the body is cracked, the gate is damaged, or the mechanism is worn beyond service limits.
Can I add a twist-on valve at the sewer outlet instead?
An outlet valve may provide a secondary barrier if it fits the assembly and is used as directed. It does not repair the upstream valve. Waste can remain trapped between the two valves, so that space still requires careful handling.
Can freezing damage a black tank valve?
Yes. Water or waste trapped in the valve or nearby pipe can freeze and damage parts. Do not force a frozen handle or use an open flame to thaw the assembly; follow the RV’s cold-weather guidance.
How long does replacement take?
Access and plumbing condition determine the time. An exposed bolt-in valve is a different job from one hidden above an enclosed underbelly. Allow time for draining, cleaning, testing, and restoring access—not just removing four bolts.
How much does black tank valve replacement cost?
A useful estimate must separate the valve, seals, other damaged parts, labor, access work, and any waste-removal charge. Current prices and local labor rates have not been verified for this guide, so a nationwide price range would be unreliable. Ask the shop whether its quote includes leak testing and underbelly restoration.
Conclusion
Replacing a black tank valve starts with safe emptying and correct diagnosis. Match the valve to the installed assembly, use the proper seals, keep the plumbing aligned, and test with clean water before returning the tank to use.
Your next step is to identify the valve model and inspect its access. If the tank will not drain, the flanges are damaged, or the assembly cannot separate without force, arrange professional service before removing any bolts.
Research Scope and Next-Question Gap Map
This guide is a practical synthesis, not a hands-on test or a live competitor review. Live browsing was unavailable, so current manuals, product revisions, prices, and competing pages could not be inspected. No current search positions, observed search questions, or competitor omissions are claimed.
For model-specific verification, obtain the installation instructions from the valve manufacturer, the RV owner’s manual, and any actuator or cable manual. Manufacturer resources include Valterra and Lippert Support. These links are verification starting points, not claims that a specific manual was reviewed.
The following questions are inferred next needs based on the repair sequence. Competitor coverage is not checked in each case.
| Question | Reader stage and basis | Reader benefit | Evidence needed for exact application | Priority and placement |
|---|---|---|---|---|
| What if the valve is stuck closed with waste in the tank? | Before repair; inferred from a failed drain path | Prevents uncontrolled sewage release | RV drain layout and a service provider’s controlled-emptying method | High; replacement steps |
| Which part is leaking at a shared outlet? | Diagnosis; inferred from shared plumbing | Avoids replacing the wrong valve | Separate clean-water tests and the RV plumbing layout | High; symptom table |
| Will the new valve fit? | Parts selection; inferred from valve variations | Prevents unsafe adaptation and repeat work | Exact part number, dimensions, and installation drawing | High; compatibility section |
| Why does a new valve leak? | After repair; inferred from seal and alignment risks | Directs checks without harmful overtightening | Valve instructions and inspection of seals and flanges | High; troubleshooting table |
| Does an outlet valve fix the original fault? | Temporary containment; inferred from add-on valve use | Distinguishes containment from repair | Accessory instructions and the actual drain layout | Medium; FAQs |
No site map or related pages were supplied, so parent pages, neighboring articles, and site-wide content patterns were not assessed.