Does your RV’s sewer cap release an unpleasant surprise even though both tank valves are closed? Or has the dump-valve handle become so stiff that you hesitate to pull it? Those are good reasons to investigate the valve before your next dump-station visit.
RV dump valve replacement can be a manageable repair when the assembly is accessible and the holding tanks are empty. However, a leaking valve is not always the problem, and hidden plumbing can make a seemingly simple job considerably harder. My advice is to diagnose first, identify the exact replacement, and plan for wastewater containment before loosening anything.
Here is how I recommend approaching the job, from checking symptoms to installing new seals and testing the repair.
Understand What You Are Replacing
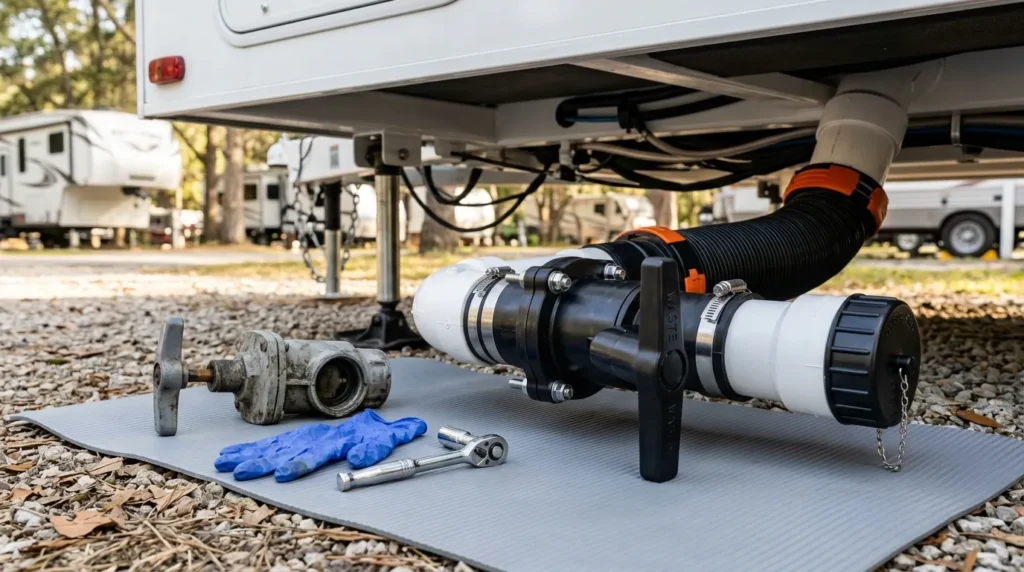
Many RV waste systems use sliding gate valves. Pulling the handle moves a gate out of the flow path; pushing it closes the passage. Seals on either side of the gate keep wastewater contained. The valve body commonly sits between plumbing flanges secured with bolts.
Your RV may have separate black-water and gray-water valves feeding one outlet, additional gray tanks with separate outlets, or remote valves operated by cables or electric actuators. Compact campers and camper vans may use cassette toilets or other systems that do not follow this procedure.
Check your RV and valve manufacturer’s documentation before ordering parts or dismantling the assembly. Valve size, seal design, operating mechanism, installation orientation, and tightening requirements are not universal.
Confirm That the Valve Is Actually the Problem
A little liquid behind the sewer cap does not automatically mean the black-water valve has failed. Residual water can remain in shared outlet plumbing, and either tank valve may be leaking. I would inspect the system before deciding which component to replace.
- External leakage: Moisture around the valve body or flange may indicate damaged seals, loose hardware, cracked plastic, or plumbing misalignment.
- Internal leakage: Liquid repeatedly collecting downstream of a closed valve suggests the gate is not sealing completely.
- Hard operation: Debris, seal damage, a bent rod, or a binding cable can prevent smooth movement.
- A freely moving handle without drainage: The operating mechanism may be disconnected, or the plumbing may be obstructed.
Check that each handle travels fully to its closed position without forcing it. For a cable-operated valve, inspect accessible cable routing and mounting points. Replacing the valve will not solve a kinked cable or loose cable housing.
A qualified technician can help isolate an internal leak when several tanks share inaccessible plumbing. Do not disconnect a valve as a diagnostic shortcut when wastewater may still be behind it.
Choose the Correct Parts and Gather Supplies
Match the existing valve’s size, flange arrangement, and operating style. Black-water outlets are often larger than gray-water outlets, but that is not a reliable ordering method. Use markings, measurements, and component documentation. A photo of the assembled valve and its identification markings can help a parts supplier confirm compatibility.
A seal-only repair may be appropriate when the gate, rod, and housing are sound and the manufacturer offers compatible service parts. Replace the complete valve if the body is cracked, the mechanism is damaged, or wear prevents reliable closure.
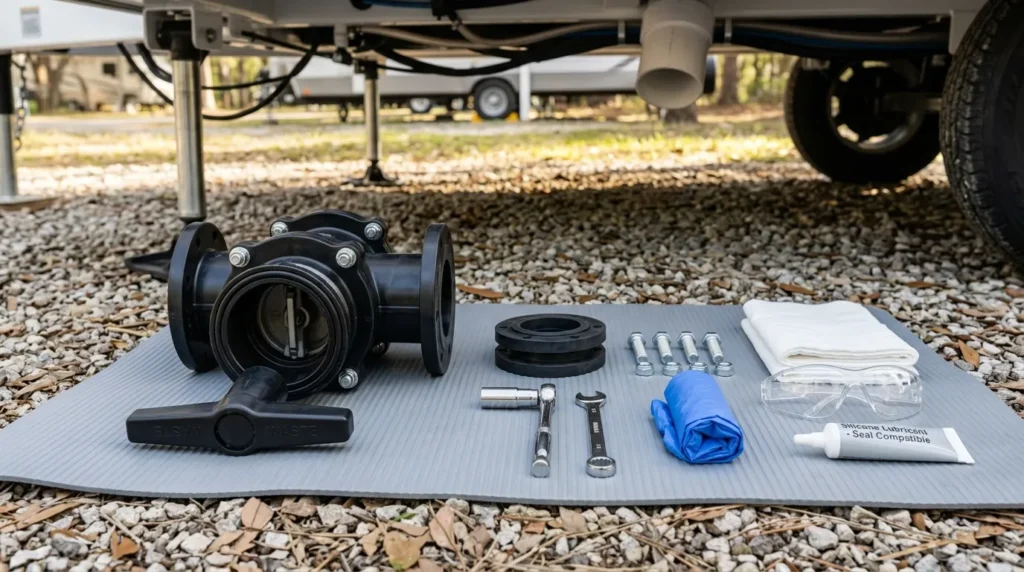
My pre-job checklist
- Correct replacement valve or approved seal kit, with compatible hardware if needed.
- Suitable hand tools, including a way to hold bolt heads while turning nuts.
- Chemical-resistant gloves, eye protection, and washable footwear.
- A shallow catch pan, absorbent material, waste bags, and cleaning supplies.
- A dedicated non-potable-water hose for tank rinsing, where permitted.
- Approved seal lubricant only if the installation instructions call for it.
- Safe lighting and access equipment appropriate to the work area.
Keep sewer-service tools separate from drinking-water equipment. I also recommend having the replacement parts in hand before removal; an apparently similar valve may have incompatible seals or mounting dimensions.
Empty the Tanks and Make the Work Area Safe
Never loosen or remove a dump valve with a loaded tank behind it. A cap or temporary valve farther downstream does not make upstream disassembly safe. If the existing valve will not open and the tank cannot be emptied normally, arrange professional service rather than trying to contain the tank contents yourself.
At an approved disposal connection, drain the affected tanks using your RV’s specified procedure. Where black and gray tanks share an outlet, draining black water first and gray water afterward helps rinse the downstream hose. Follow any different instructions supplied for your system.
Rinse the affected tank as directed, then drain it again. Turn off the rinse-water supply when finished. Never leave a tank flush running unattended or assume an open valve prevents overfilling. Avoid adding new wastewater before the repair.
Park securely, set the parking brake, and chock the wheels. Never crawl beneath an RV supported only by a jack or rely on leveling equipment as service support. If safe access requires lifting the vehicle, I recommend a properly equipped professional.
Place the catch pan beneath the assembly before removing the outlet cap or hardware. Even drained plumbing can retain contaminated liquid. Keep children and pets away, prevent spills from reaching storm drains or soil, and dispose of collected wastewater legally.
Replace an Accessible Bolted Gate Valve
The following sequence applies to a conventional, accessible valve held between bolted flanges. It is not a substitute for the component’s installation instructions. If your valve is glued into an assembly or uses a different design, stop and obtain the correct procedure.
1. Record the existing arrangement
Photograph the valve, handle direction, flange positions, and hardware. Note any brackets supporting the outlet plumbing. Examine nearby fittings for cracks or sagging before proceeding; a new valve cannot correct damaged surrounding pipework.
2. Support the plumbing and remove the hardware
Support the adjoining pipes so their weight does not pull on the tank outlet. Remove the flange hardware while keeping the assembly controlled. Some bolts may require a wrench on both ends.
If hardware is badly corroded, avoid using enough force to twist the plastic flanges. Cutting seized hardware near tanks or enclosed spaces introduces additional hazards; professional help is sensible when ordinary hand tools are insufficient.
3. Remove the valve and old seals
Separate the flanges only enough to withdraw the valve. Do not pry aggressively, bend the pipes, or use the tank connection as leverage. If there is insufficient movement, the plumbing may require a model-specific disassembly method.
Remove both old seals and account for all pieces. Depending on the design, seals may stay on the flange or come away with the valve. Let residual liquid drain into the pan rather than onto the ground.
4. Clean and inspect the sealing surfaces
Wipe away residue and inspect the flange faces and seal seats. Avoid aggressive scraping or solvents that could damage plastic. Look for cracks, distortion, chips, or debris that would prevent the new seals from seating evenly.
If a flange is damaged or the pipes do not align naturally, stop. Tightening the new assembly harder is not a repair for poor alignment and can create another leak.
5. Fit the new seals and valve
Install each seal in the location and orientation specified by the manufacturer. Use only approved lubricant, if required; petroleum-based products can damage some seal materials. Do not add caulk, adhesive, or thread sealant unless the instructions explicitly require it.
Position the valve without rolling, pinching, or dislodging the seals. Keep the gate in the installation position specified by its manufacturer. Confirm that the handle or actuator has clearance throughout its full travel.
6. Tighten evenly and check operation
Start all fasteners loosely, then tighten progressively in an alternating pattern so the flanges draw together evenly. Follow the specified torque or tightening procedure. There is no single safe torque value for every RV dump valve.
Overtightening can distort the housing, crack flanges, or make the gate bind. Operate the handle as directed and confirm smooth, complete travel. If it becomes stiff after tightening, investigate alignment, seal placement, and hardware tension rather than forcing it.
Test Before Returning to Normal Use
I recommend a staged clean-water test rather than immediately filling the tank. Close the new valve and add a small amount of clean water to the affected tank. With an appropriate downstream collection or approved sewer connection in place, check for water passing through the closed gate.
Keep the flange exterior dry so fresh seepage is easy to identify. If the initial test passes, add more water gradually according to the manufacturer’s testing guidance. A tiny amount of water alone may not reveal a leak that appears under greater tank pressure.
Open the valve and confirm unobstructed flow, then close it and repeat the inspection. Test each serviced valve separately where the system allows. Check remote controls as well as the actual valve movement.
If leakage continues, drain the test water before loosening anything. Recheck seal seating, valve compatibility, and flange condition. Do not try to cure persistent leakage by repeatedly tightening the bolts.
When RV Layout Changes the Job
On travel trailers and fifth wheels, valves may be exposed beneath the frame or concealed behind an enclosed underbelly. Removing panels can reveal insulation, wiring, heating equipment, and multiple tank connections. Restore protective panels correctly, and avoid disturbing structural supports or other systems.
Motorhomes may place valves in a service compartment, but convenient handles do not necessarily mean convenient access to the valve bodies. Cable-operated and electric valves need additional checks for adjustment, mounting, and actuator compatibility.
For electrically operated valves, follow the manufacturer’s power-isolation instructions. I would leave uncertain electrical work, major plumbing alterations, and inaccessible tank connections to a qualified RV technician. The same applies when accessing the valve would disturb propane lines or structural components.
Common Mistakes and Ongoing Care
- Replacing the wrong valve: Identify whether black water, gray water, or retained outlet liquid is causing the symptom.
- Reusing questionable seals: Old, distorted seals can undermine an otherwise sound replacement.
- Forcing a sticky handle: Investigate debris or mechanism problems before damaging the rod or cable.
- Ignoring pipe support: Unsupported plumbing can stress the new valve and tank connection.
- Working on frozen plumbing: Let the system thaw safely; never use an open flame.
For maintenance, follow your tank-cleaning and valve-lubrication instructions, inspect accessible joints periodically, and pay attention to changing handle resistance. Before freezing weather, drain and winterize the waste system according to your RV’s documentation.
Frequently Asked Questions
Can I replace only the dump-valve seals?
Sometimes. A compatible seal kit makes sense when the valve body and operating mechanism are undamaged. If the gate or housing is worn, replace the assembly rather than expecting new seals to compensate.
Should I replace both tank valves together?
Not automatically. Inspect both, but replace based on condition. Combined access may make servicing both convenient, especially behind an underbelly, without making it necessary.
Can an add-on outlet valve fix a leaking tank valve?
An appropriate outlet valve may temporarily contain seepage at a compatible outlet, but it does not repair the original valve. Wastewater can accumulate between them, so plan for controlled drainage and a proper repair.
What if the new valve still leaks?
Drain the tank and inspect the seals, flange faces, alignment, and part compatibility. Also confirm that another valve is not leaking into the shared outlet. Seek professional diagnosis if the cause remains unclear.
Is this a reasonable beginner DIY job?
It can be when the tanks drain completely, the valve is accessible, and the plumbing separates without strain. Hidden connections, seized hardware, or a full tank behind a stuck valve are reasons to call a technician.
My Final Advice on RV Dump Valve Replacement
I would start with diagnosis and safe access, not a wrench. Identify your valve, get the correct parts, empty the tanks, and follow the component’s installation instructions. After replacement, test with clean water before normal use. Careful preparation matters more than speed—and stopping when the plumbing resists is often the smartest repair decision you can make.