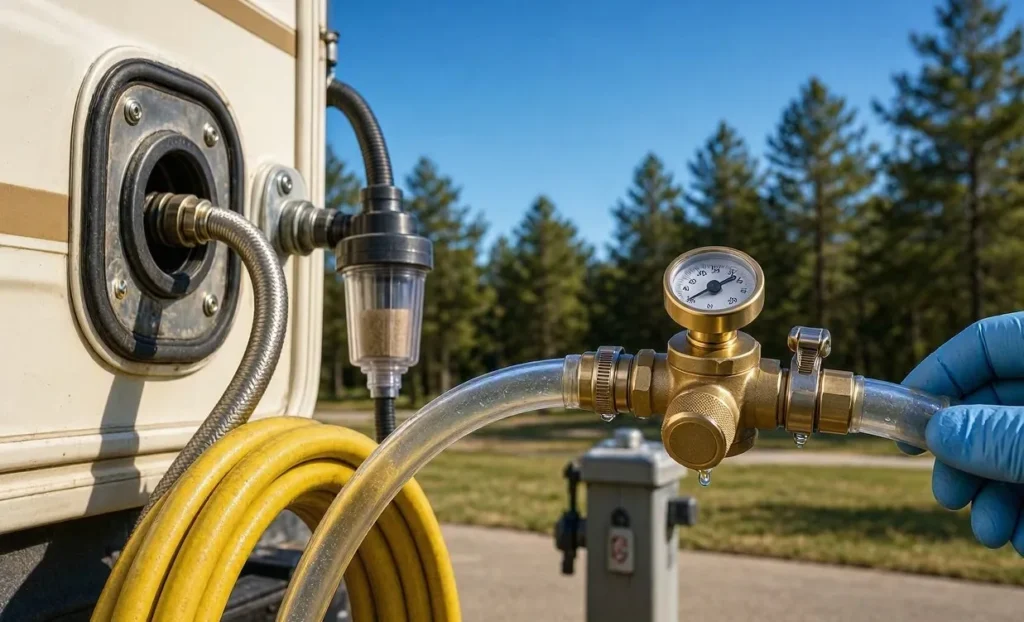
Before connecting to city water at a U.S. campground or RV park, I make pressure protection a priority. An RV Water Hose Regulator reduces incoming water pressure before it reaches my drinking-water hose and RV plumbing, helping prevent damage from excessive supply pressure. I recommend using one at campground hookups unless your RV manufacturer specifies another approved setup.
I consider 40–50 pounds per square inch (psi) a practical starting range for many RVs—not a universal setting or safety limit. My first reference is the RV owner’s manual, followed by the working-pressure ratings of every connected hose, filter, and fitting. When the equipment instructions allow, I position the regulator at the campground faucet so it helps protect the hose as well as the RV’s plumbing.
What Does an RV Water Hose Regulator Do?
An RV water pressure regulator reduces higher inlet pressure to a controlled outlet pressure. It helps protect water lines, faucet connections, toilet valves, and other parts exposed to the campground supply.
Most portable units use a spring-loaded valve. As downstream pressure rises, the valve reduces incoming flow. When you open a faucet, the valve responds to the change in demand.
A regulator does not:
- Raise water pressure when the supply pressure is too low.
- Remove sediment, germs, or dissolved contaminants.
- Replace an approved backflow-prevention device.
- Guarantee protection from freezing or every pressure surge.
- Control pressure produced by the RV’s onboard water pump.
A regulator is also different from a simple flow restrictor. A restrictor limits how much water can pass, but it may not limit pressure when all faucets are closed. Choose a device expressly identified as a pressure regulator for potable-water service.
Pressure and flow are different
Pressure, measured in psi, is the force that pushes water through the system. Flow, often measured in gallons per minute (gpm), is the amount of water delivered over time.
A system can have adequate pressure but poor flow. A clogged filter, kinked hose, small regulator passage, or blocked faucet aerator can cause a weak shower even when the pressure gauge looks normal.
What Pressure Should You Set for an RV?
Use the pressure specified by your RV manufacturer, not the highest number printed on the regulator. If the manual does not give a clear limit, ask the manufacturer before choosing a higher setting.
A 40–50 psi setting is a common practical starting point for RV use. Some RVs allow more, while a connected filter or other part may require less. The lowest applicable working-pressure limit governs the setup.
Do not confuse a hose’s burst-pressure claim with its approved working pressure. Burst pressure is not a suitable operating target.
| Situation | Best next step | What to avoid |
|---|---|---|
| The RV manual states a maximum inlet pressure | Keep delivered pressure within that limit | Treating the maximum as a required target |
| A filter has a lower pressure limit than the RV | Protect the filter within its stated limit | Assuming the RV’s rating covers all accessories |
| The pressure limit is unknown | Seek model-specific guidance; use a conservative setting in the meantime | Turning up pressure to solve an unexplained flow problem |
| Campground pressure is low | Check supply flow and restrictions | Expecting a regulator to boost pressure |
| Pressure rises with all faucets closed | Check the regulator and possible thermal expansion | Ignoring the rise because running pressure seems normal |
Check both static and flowing pressure
Static pressure is the pressure with all fixtures closed. Flowing pressure, also called dynamic pressure, is the pressure while water is moving.
Check both. A regulator that reads 45 psi during a shower but rises above the equipment’s allowable pressure after the faucet closes has not passed a useful safety check.
Hypothetical example: A regulator reads 45 psi with all fixtures closed and 37 psi while the shower runs. That drop alone does not prove a fault. If shower flow is poor, check the supply, filter, hose, and regulator’s flow capacity before raising the setting.

How to Choose an RV Water Pressure Regulator
Choose a regulator based on its pressure range, potable-water suitability, connection type, and flow performance—not appearance or price alone.
Fixed-pressure versus adjustable models
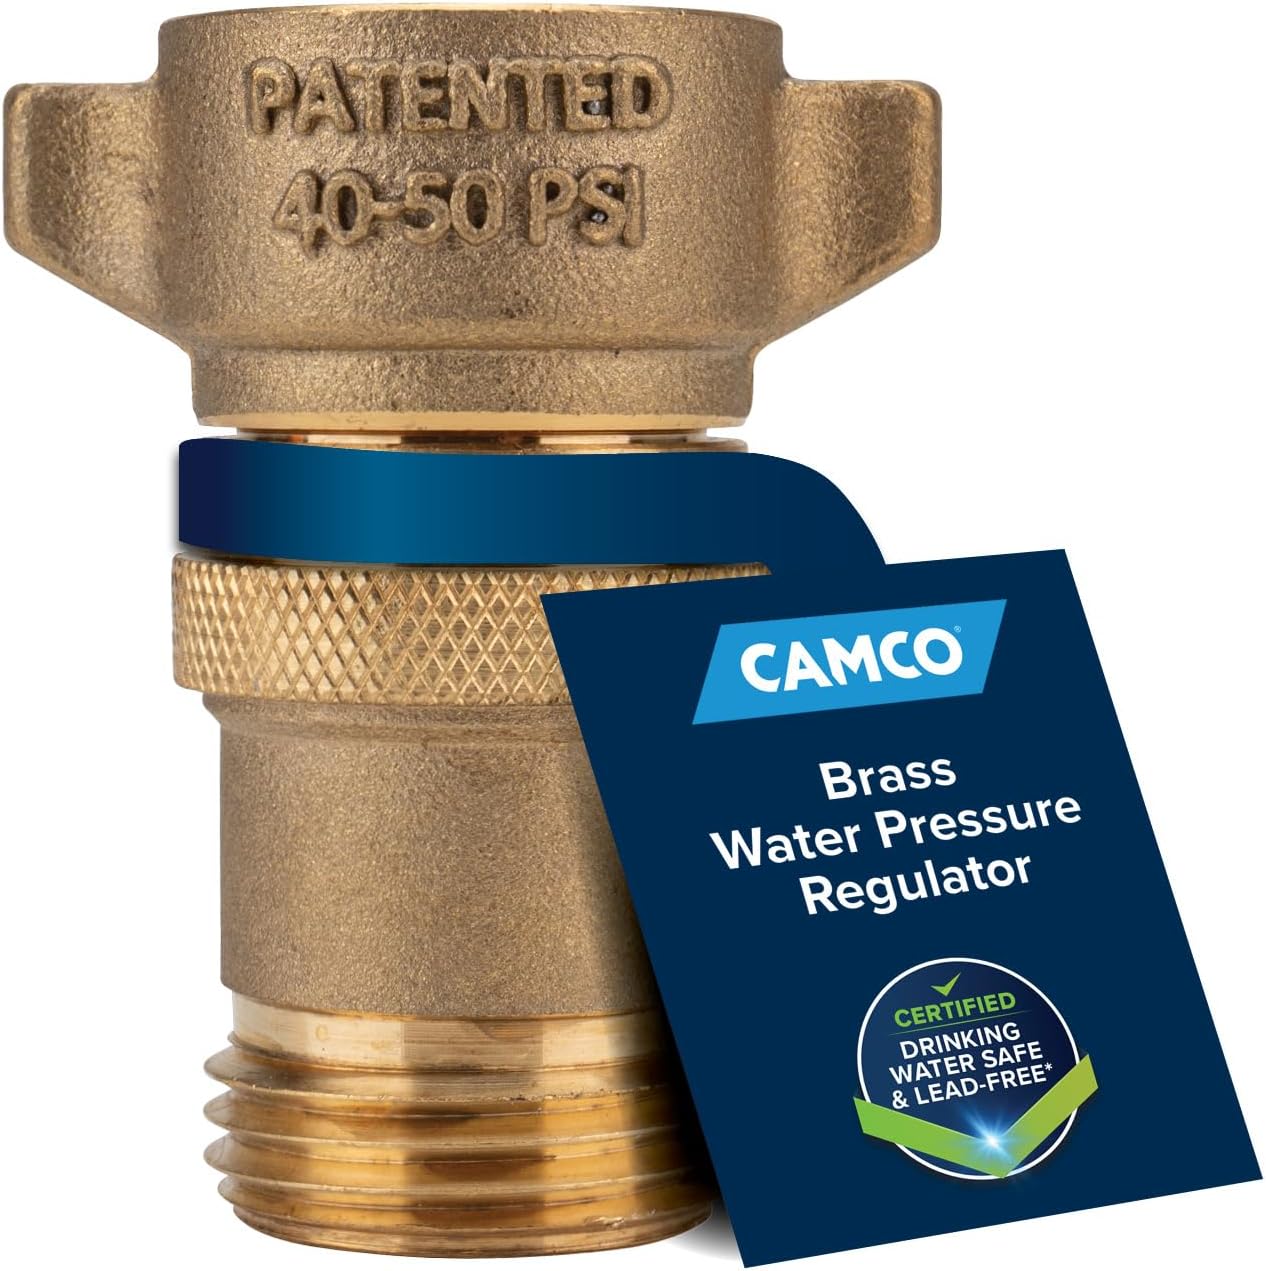
A fixed-pressure regulator has a preset outlet range. It suits owners who want a simple setup and do not need to change pressure. Confirm that its stated range fits your RV and accessories.
An adjustable regulator lets you change the outlet setting. A downstream gauge helps you see the result, but the ability to turn the pressure higher does not make a higher setting safe.
| Feature | Fixed-pressure regulator | Adjustable regulator |
|---|---|---|
| Setup | Usually requires no pressure adjustment | Requires setting and checking |
| Best fit | A simple setup within the RV’s limits | Different supply conditions or a specific pressure target |
| Main limitation | Preset pressure may not suit every system | Incorrect adjustment can expose plumbing to excess pressure |
| Gauge | May be absent or optional | Often included, but verify its location |
Neither design is automatically better. A fixed unit with adequate flow can suit an RV well. An adjustable unit with small internal passages can still restrict a shower.
Verify drinking-water suitability
Select a regulator intended for potable water. Where a product claims certification, check the exact model and what that certification covers.
Two standards can appear on drinking-water plumbing products:
- NSF/ANSI/CAN 61 addresses health effects from substances that drinking-water system components may add to water.
- NSF/ANSI/CAN 372 addresses lead-content requirements. It does not, by itself, establish the broader material-health evaluation covered by Standard 61.
The EPA explains that the federal “lead-free” definition generally uses a weighted average of no more than 0.25% lead across wetted surfaces for covered pipes, fittings, and fixtures. That definition does not mean zero lead or contaminant removal. See the EPA’s guidance on lead-free drinking-water plumbing.
You can also check model listings in the NSF drinking-water component directory.
Check threads, flow data, and gauge placement
Most U.S. RV drinking-water hoses use nominal 3/4-inch garden hose thread, often labeled GHT. This is not interchangeable with 3/4-inch tapered pipe thread, or NPT. Matching nominal size does not mean matching threads.
Look for manufacturer flow data at stated inlet and outlet pressures when available. An unsupported “high-flow” label is less useful than a documented flow specification.
Confirm where the gauge measures pressure. A gauge upstream of the regulating valve shows supply pressure, not the regulated pressure sent toward the RV.
How to Install an RV Water Hose Regulator
Install the regulator before pressurizing the system, then check for leaks and stable outlet pressure.
You will need:
- A potable-water hose.
- A compatible potable-water pressure regulator.
- Sound hose washers.
- A downstream pressure gauge, if the regulator lacks one.
- Your RV, regulator, and filter instructions.
A common arrangement is:
Campground faucet → pressure regulator → drinking-water hose → filter, if used → RV city-water inlet
This arrangement protects the hose from full supply pressure. Follow the filter’s instructions if its location differs. Leave campground backflow devices in place.
Step-by-step setup
- Confirm that the faucet supplies potable water. Do not connect a drinking-water hose to a dump-station rinse outlet or a supply marked nonpotable.
- Turn off the faucet and inspect the parts. Check the regulator, washers, hose, and fittings for cracks, dirt, damaged threads, or missing seals.
- Briefly flush the faucet. Keep the hose ends and drinking-water fittings away from soil and wastewater equipment.
- Attach the regulator in the marked flow direction. Support heavy assemblies so they do not strain the faucet or inlet.
- Connect the hose, filter, and RV inlet. Avoid kinks and tight bends.
- Open an RV cold-water faucet. Then turn on the campground supply slowly to purge air.
- Close the RV faucet and check static pressure. Adjust only as the regulator manufacturer directs.
- Run water and check flowing pressure. Test a faucet or shower, then close it and watch whether pressure stabilizes.
- Inspect every connection for leaks. Recheck after the system has remained pressurized for several minutes.
Many garden-hose connections seal against a flat washer rather than the threads. Thread tape does not repair a missing washer and is usually unnecessary on washer-sealed hose joints.
How to adjust an adjustable regulator
Follow the model’s instructions for the adjustment direction, locking mechanism, and pressure-check procedure. Do not assume every regulator adjusts the same way.
After reducing a setting, you may need to open a downstream faucet briefly to release trapped pressure before the gauge shows the new value. Then close the faucet and confirm the static reading.
Signs of success: No leaks, pressure within all applicable limits, acceptable flow, and a stable reading after fixtures close.
If setup fails: Shut off the supply, release pressure through a faucet, and inspect the system before disconnecting parts.

Troubleshooting Low Flow, Leaks, and Rising Pressure
Start with simple, low-risk checks. Do not raise the pressure setting until you know why flow is weak.
| Symptom | Possible causes | First checks |
|---|---|---|
| Weak flow at every fixture | Low supply flow, kinked hose, clogged filter, restricted regulator | Open the supply fully; inspect the hose; check filter service instructions |
| Weak flow at one fixture | Blocked aerator, showerhead, or local valve | Inspect that fixture before changing the regulator |
| Normal static pressure but a large drop during use | Supply restriction, filter loading, inadequate regulator capacity | Check each restriction in sequence |
| Pressure rises with all fixtures closed | Regulator leakage, thermal expansion, gauge fault | Shut off the supply if limits may be exceeded; investigate before use |
| Water leaks at a hose joint | Damaged washer, cross-threading, loose or cracked fitting | Depressurize, inspect, and reseat or replace the seal |
| Gauge remains at zero | No supply, reversed installation, blockage, faulty gauge | Check the supply and flow-direction arrow |
Separate supply problems from RV problems
If the campground allows it, check the faucet’s unregulated flow into a suitable container with the RV disconnected. Keep potable-water fittings clean.
Strong faucet flow but weak flow through the connected system points toward a restriction in the regulator, hose, filter, or RV. It does not identify which part is at fault, so change or inspect one item at a time.
Do not bypass a regulator and send unknown campground pressure into the RV as a test.
Treat rising static pressure as a warning
A slow rise toward inlet pressure can indicate that the regulator’s valve is not sealing. However, heated water expanding in a closed system can also increase pressure downstream.
A normal pressure-reducing valve may not relieve that trapped pressure. Do not assume that replacing the regulator will solve every pressure-rise problem.
If pressure exceeds a component’s rating, stop using the connection. Have an RV technician investigate persistent pressure rise, repeated leaks, or suspected water-heater expansion issues.

Common Mistakes and Maintenance Needs
The most useful habits are simple: protect the whole hookup, keep drinking-water parts clean, and replace damaged equipment.
Avoid these common mistakes:
- Installing the regulator only at the RV inlet. This may leave the hose and upstream accessories exposed to full supply pressure.
- Using pressure to compensate for a clog. A higher setting can hide a restriction without fixing it.
- Trusting the inlet check valve as a regulator. A check valve controls flow direction; it does not provide the same pressure-control function.
- Removing campground backflow protection. Pressure control and contamination control serve different purposes.
- Leaving the supply on while away. Turning off the faucet when practical limits the water available to feed an unnoticed leak.
- Expecting a regulator to prevent freezing. Ice can damage the regulator, hose, and fittings.
Inspect the unit before each trip. Follow the manufacturer’s cleaning and winter-storage instructions, and use a strainer only where specified.
Replace or service a regulator that has a cracked body, damaged threads, persistent leaks, unreliable adjustment, or a confirmed failure to control pressure. Do not dismantle a pressurized unit. After a freeze event, verify pressure control before returning it to use; damage may not be visible.
FAQs
Do I need a regulator when filling the freshwater tank?
It depends on the fill system. A gravity fill does not normally pressurize the tank, but a threaded or valved tank-fill system may expose parts of the RV plumbing to supply pressure. Follow the RV’s fill instructions, and never seal or obstruct the tank vent.
Will the regulator control my onboard water pump?
No. A regulator at the campground faucet controls that incoming supply. It does not change the onboard pump’s pressure switch or bypass setting.
Can I use the same regulator for a black-tank flush connection?
Follow the RV manufacturer’s instructions for flush pressure and backflow protection. Keep black-tank flush hoses and fittings separate from potable-water equipment; a pressure regulator does not make shared equipment sanitary.
Can I use a regulator with a private well?
Yes, if the supply is potable and the regulator’s operating limits fit the well system. The regulator cannot correct unsafe water or boost low well pressure. Pressure that cycles with a well pump may also affect available flow.
How often should I replace an RV water regulator?
There is no universal replacement interval for all models and conditions. Follow the manufacturer’s service guidance and replace based on damage or failed pressure control—not age alone.
Conclusion
For a typical U.S. campground hookup, place a potable-water pressure regulator at the faucet, ahead of the drinking-water hose, when the equipment instructions permit. Use your RV’s stated pressure limit to choose the setting, then check both static and flowing pressure.
Before your next trip, confirm three things: the permitted pressure, the regulator’s flow direction, and the condition of the hose washers. Those checks help prevent leaks without turning a weak shower into a high-pressure plumbing problem.
Research Scope and Next-Question Gap Map
This guide provides general technical guidance, not model-specific approval. Live browsing, competitor-page inspection, and hands-on testing were not available for this draft. The linked EPA guidance and NSF directory are primary reference resources; current product specifications and certifications should be checked before purchase.
For model-specific limits and procedures, consult the relevant manufacturer’s manual. Owner-document resources include Winnebago operator manuals and Jayco owner manuals. Neither establishes one pressure limit for all RVs.
The following questions are inferred next needs, not verified search-demand findings. Competitor coverage was not checked.
| Question | Reader stage and basis | Competitor coverage | Reader benefit and evidence needed | Priority and placement |
|---|---|---|---|---|
| Why does pressure rise after faucets close? | After setup; inferred from regulator and closed-system behavior | Not checked | Avoid misdiagnosis; exact regulator and water-heater documentation needed | High; troubleshooting |
| Does the gauge show pressure or usable flow? | Selection and diagnosis; inferred from the difference between psi and gpm | Not checked | Avoid unnecessary pressure increases; use pressure readings and model flow data | High; definitions and selection |
| Does an inlet-mounted regulator protect the hose? | Installation; inferred from component placement | Not checked | Protect upstream parts; verify equipment layout and working-pressure ratings | High; installation |